 Loading...
Do you have a question about the Roland VR-3 and is the answer not in the manual?
| USB Output | Yes |
|---|---|
| Built-in Effects | Yes |
| Video Processing | Yes |
| Display | LCD |
| Input Channels | 4 |
| Output Channels | 2 |
| USB Audio Interface | Yes |
| Phantom Power | Yes |
| Video Outputs | Composite (RCA), S-Video, Component (RCA) |
| Microphone Inputs | 2 |
| EQ | 3-band |
| Power Supply | AC |
| Audio Inputs | 4 x XLR/TRS combo inputs |
Details fire, electric shock, and injury prevention, including warning notices and symbols.
Provides essential operating precautions such as placement, handling, and environmental considerations for safe use.
Explains how to connect the AC adapter and the function of the power indicator light.
Describes the procedure for turning the VR-3 power on and off, including the startup sequence.
Explains the controls for audio input sensitivity, EQ, stereo positioning, and fader levels.
Explains how to switch video inputs using the touch panel and select transition effects (CUT, MIX, WIPE).
Guides on adjusting input sensitivity with GAIN dials and stereo position with PAN dials.
Guides on adjusting the final output volume level using the MASTER fader and monitoring with the level meter.
Details how to enable Picture-in-Picture compositing by selecting the PinP mode and input sources.
Details enabling Luminance Key mode and selecting foreground and background video sources.
Details enabling Chroma Key mode and selecting foreground and background video sources.
Guides on adjusting the extraction level for chroma keying using the KEY-LEVEL dial.
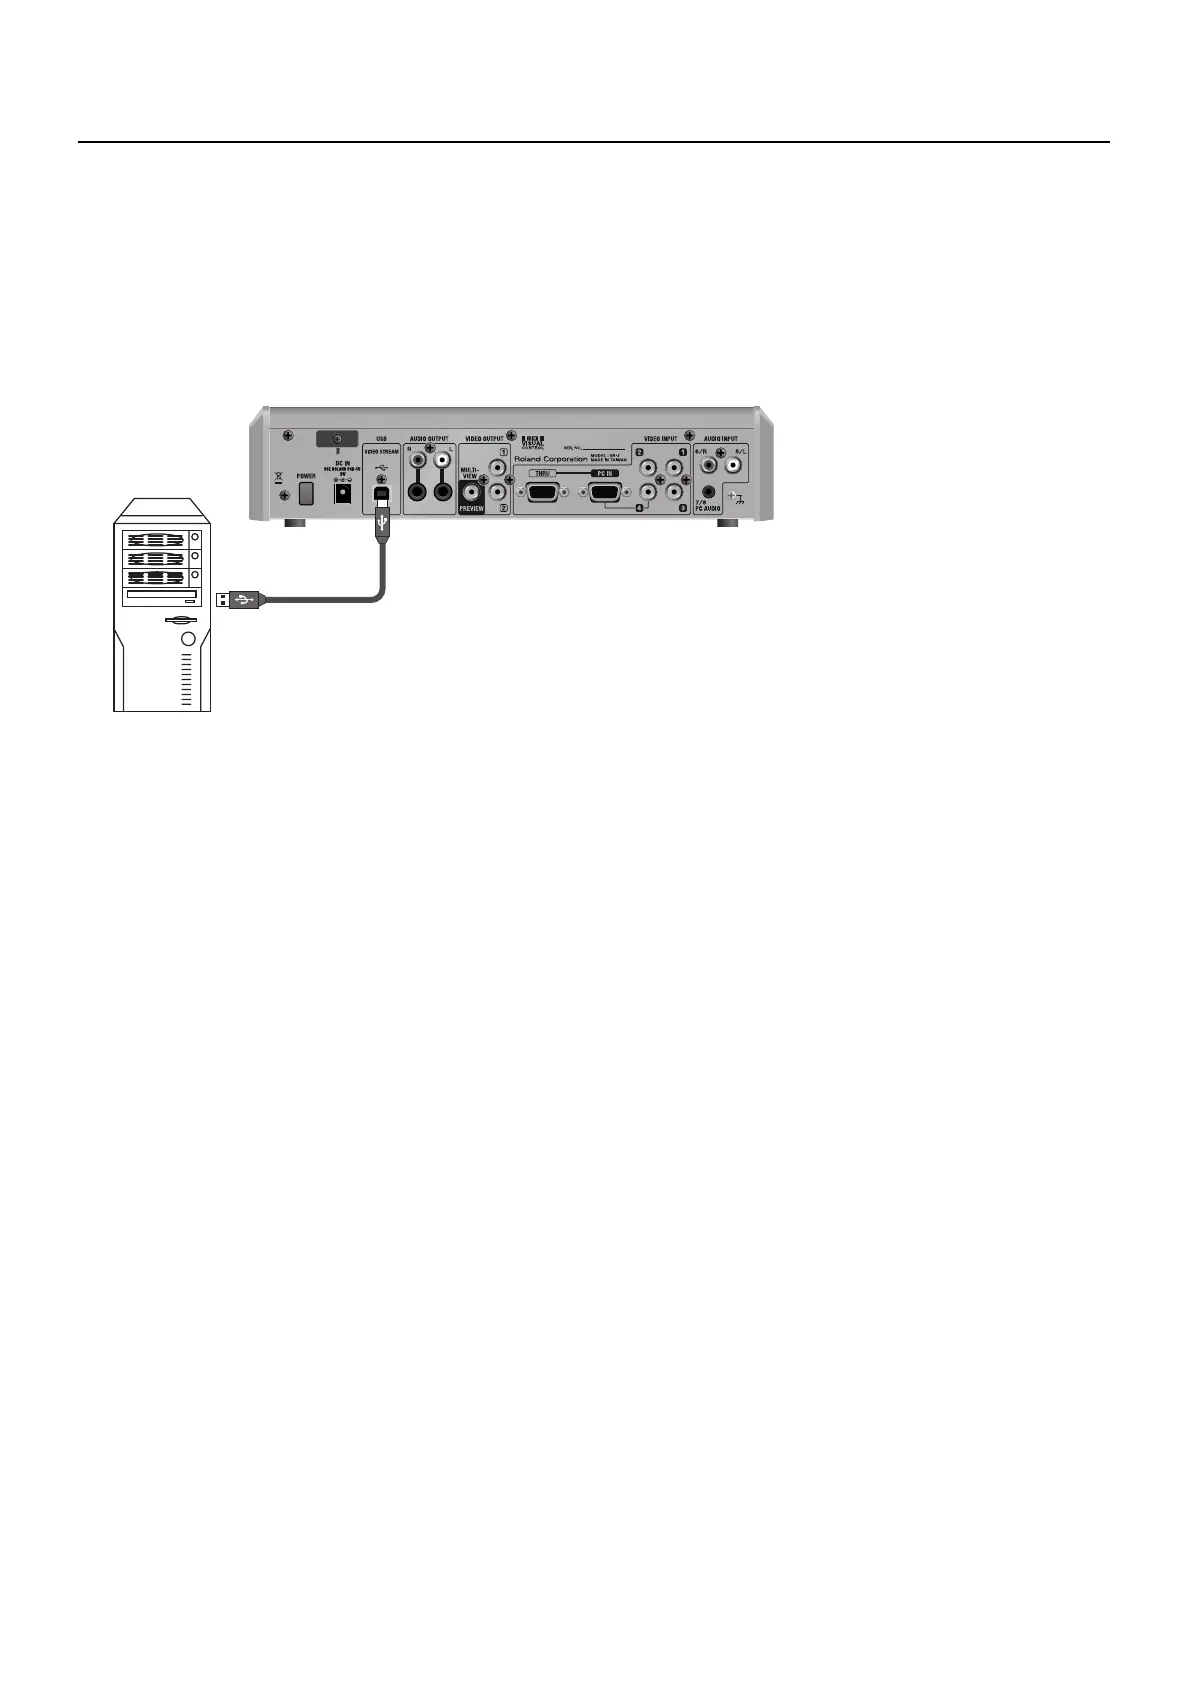
Explains connecting the VR-3 to a computer via USB and lists supported operating systems.
Details the process of returning all unit settings to their factory default state, including saved settings.
Explains how to access and navigate the VR-3's menu system using the MENU button, VALUE dial, or touch screen.
Lists and describes settings within the VIDEO menu related to transitions, compositing modes, and keying.
Details settings within the AUDIO menu for various audio effects, including EQ, Noise Gate, Reverb, and Mastering.
Addresses common issues like no picture from projector, no microphone audio, and incorrect phantom power settings.