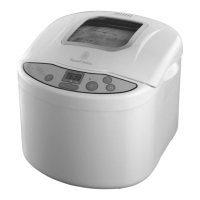
13 Grip the loaf tin handle and pull the loaf tin up and out of the breadmaker.
14 Fit the paddle to the shaft in the bottom of the loaf tin.
15 The top of the shaft and the hole in the paddle are flattened (D-shaped), so you’ll have to
rotate the paddle to fit it on the shaft.
16 Measure the ingredients, and have them all to hand, ready to add to the loaf tin.
17 Set out a wire tray (for the bread), a heatproof placemat (for the loaf tin), and oven gloves (for
your hands – protect both hands).
measure the ingredients
18 It’s important that ingredients are measured accurately
19 For example – if you have 6 ingredients and get each one only 1% out, the difference will be
the same as adding an extra heaped teaspoon of sugar to a cup of tea – not nice! – so:
a) use the same measuring spoons for all the ingredients
b) use the back of a knife to level all spoons for measurements given in spoons
c) don’t use a measuring jug – electronic scales are much more accurate than looking at lines
on a jug, so weigh the water
d) 1 millilitre of water weights 1 gram, so we’ve shown the water in the recipes as grams (g),
rather than millilitres (ml)
e) if you still want to measure the water with a measuring jug, simply replace the “g” with “ml”
(millilitres), but the results may not be consistent
f) if you’re using a recipe from elsewhere, replacing millilitres (ml) of water with grams (g)
will help with accuracy and consistency
add the ingredients in order
20 It’s important that you add the ingredients in the correct order:
a) if the yeast gets wet, it may activate too early
b) if it comes in contact with salt, it may not work properly
c) we’ve numbered them, to make it easier to follow the recipes
21 First, add the liquid:
a) it’s usually water, but it might include milk and/or eggs
b) the water should be warm (20°C-25°C/68°F-77°F), but only warm, not hot or cold
c) both hot and cold water will inhibit the yeast
, Don’t use milk if you’re using the timer, it’ll curdle before the program starts.
22 Add any sugar and salt required by the recipe.
23 Add any “wet” ingredients – honey, syrup, molasses ...
24 Add the dry ingredients – flour, dried milk, herbs, spices ...
25 Finally – add the dried yeast (or baking powder/baking soda).
a) lay it on top of the other ingredients
b) don’t get it wet, or it’ll start working too soon
take extra care with the timer
26 If you’re using the timer, it’s even more important to make sure that the yeast/(baking
powder/baking soda and water/liquid are well separated.
a) they’ll have all day to get together, while you’re not looking
b) the yeast will activate, grow, and die before the program starts
c) your bread will be hard, dense, coarse, and about as edible as a house brick
nuts and raisins
27 You shouldn’t normally add nuts and raisins at the start, as they might upset the recipe.
28 They’re normally added later, during the second kneading.
29 The breadmaker will give a long beep when it wants them.
, The beep comes about 22 minutes after the start of programs 1 (basic) and 5 (sweet), but 47
minutes after the start of program 3 (wholewheat), to allow for 30 minutes preheating.

 Loading...