11
Deutsch(Übersetzung der originalen Anleitungen)
DE
FR EN ES IT PT NL SV DA NO FI HU CS RU RO PL SL HR ET LT LV SK BG
11
English(original instructions)
EN
FR DE ES IT PT NL SV DA NO FI HU CS RU RO PL SL HR ET LT LV SK BG
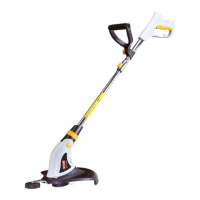
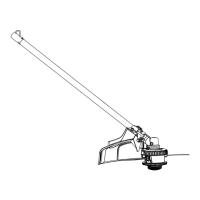
16. Auxiliary handle
Figure 3
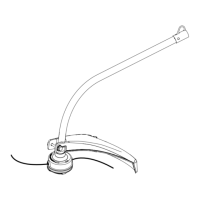
8. Safety guard
10. Cut-off blade
Figure 5
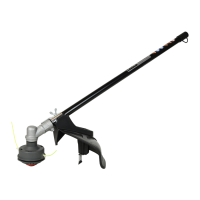
15. Handle adjusting knob
Figure 6
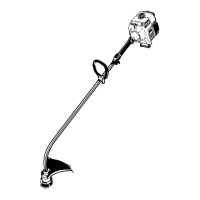
3. Cord retainer
4. Power cord
Figure 7
5. EasyEdge™ pedal
Figure 11
5. EasyEdge™ pedal
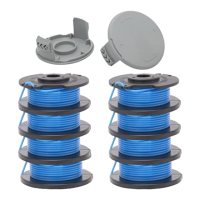
Figure 13
7. Nylon cutting line
9. Spool cover
17. Line release button
Figure 14
18. Spool cover lock buttons
19. Spool
20. Eyelet
ASSEMBLY
UNPACKING
■ Carefully remove the product and any accessories
from the box.
■ Inspect the product carefully to make sure no
breakage or damage occurred during shipping.
■ Do not discard the packing material until you have
carefully inspected and satisfactorily operated the
product.
■ If any parts are damaged or missing, please call your
Ryobi service centre for assistance.
The line trimmer is supplied with some components not
assembled. To assemble these, proceed as follows:
SHAFT ASSEMBLY (Fig.2)
■ Check the cable between the upper shaft and lower
shaft is in good condition.
WARNING
If the cable is damaged, cut or scarred in any
way, contact your local Ryobi service centre and
do not use the product.
■ Unlock and loosen the collar at the end of the upper
half of the telescopic shaft by turning it clockwise.
■ Slide the lower shaft through the collar into the upper
shaft until you hear a click sound. The lower shaft has
a groove along the lower side so that the alignment
with the upper shaft is only possible in one direction.
NOTE: The shaft was designed to save packaging
space and has a one-time assembly. You cannot
disconnect the two shaft parts after it was assembled
the first time.
■ Tighten the collar and lock the line trimmer. Before
using the line trimmer always make sure the shaft
collar is tightened and locked in.
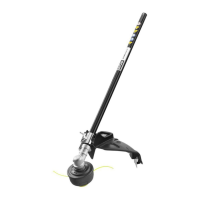
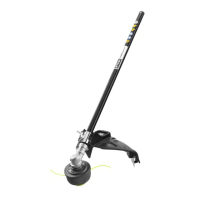
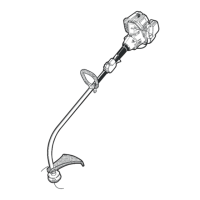
Safety Guard and Plant Protector Assembly (Fig. 3)
■ Put the plant protector into place as shown in figure 3
■ Slide the safety guard over the spool onto the motor
housing as shown in figure 3.
■ Secure the safety guard with the 4 screws provided
and tighten carefully.
■ Click in the plant protector between the safety guard
and the motor housing.
■ Peel off the protective tape over the cut-off blade on
the guard. Be careful as the cut-off blade is sharp.
OPERATION
INTENDED USE
■ This line trimmer is intended for cutting/trimming
grass and edging in domestic use.
PREPARATIONS BEFORE EVERY USE
■ Always ensure before use that the length of the shaft
is adjusted to a comfortable length to operate the line
trimmer. To change the length of the shaft, unlock
the shaft collar (see figure 2), adjust the height and
tighten/lock the shaft collar again.
■ Ensure that the auxiliary front handle is in a
comfortable position and angle before using your
line trimmer. To adjust the front handle (see figure
5), untighten the handle adjusting knob, move the
handle along the shaft and change its angle. Tighten
the handle adjusting knob before operating the line
trimmer.
■ Secure your extension cord using the cord retainer
(figure 6) by looping the extension cord through
the hole in the rear handle and around the cord
retainer. If you bought your line trimmer in the United
Kingdom, please secure the long cord coming out of
the line trimmer in the cord retainer.
■ Before operating the unit, check that the nylon cutting
lines (7) are long enough to touch and pass over the
cut-off blade (10). If they are not long enough you
should press the line release button (17) and pull the
line until it is long enough. Every time you are starting
the EasyEdge™ line trimmer, the automatic feed line
spool also releases approximately one centimetre of
line.
STARTING YOUR LINE TRIMMER
RLT5030S 23lgs manual.indd 11RLT5030S 23lgs manual.indd 11 2009/11/16 3:442009/11/16 3:44
 Loading...