OPERATION
LAWN MOWER BLADES
See Figure 8.
Lawn mower blades are usually sharpened on only one
edge and dressed up slightly on the other. Perform this
sharpening process on both cutting ends of the blade.
After sharpening, be sure to balance the blade by
removing additional material.
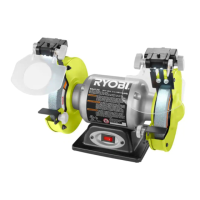
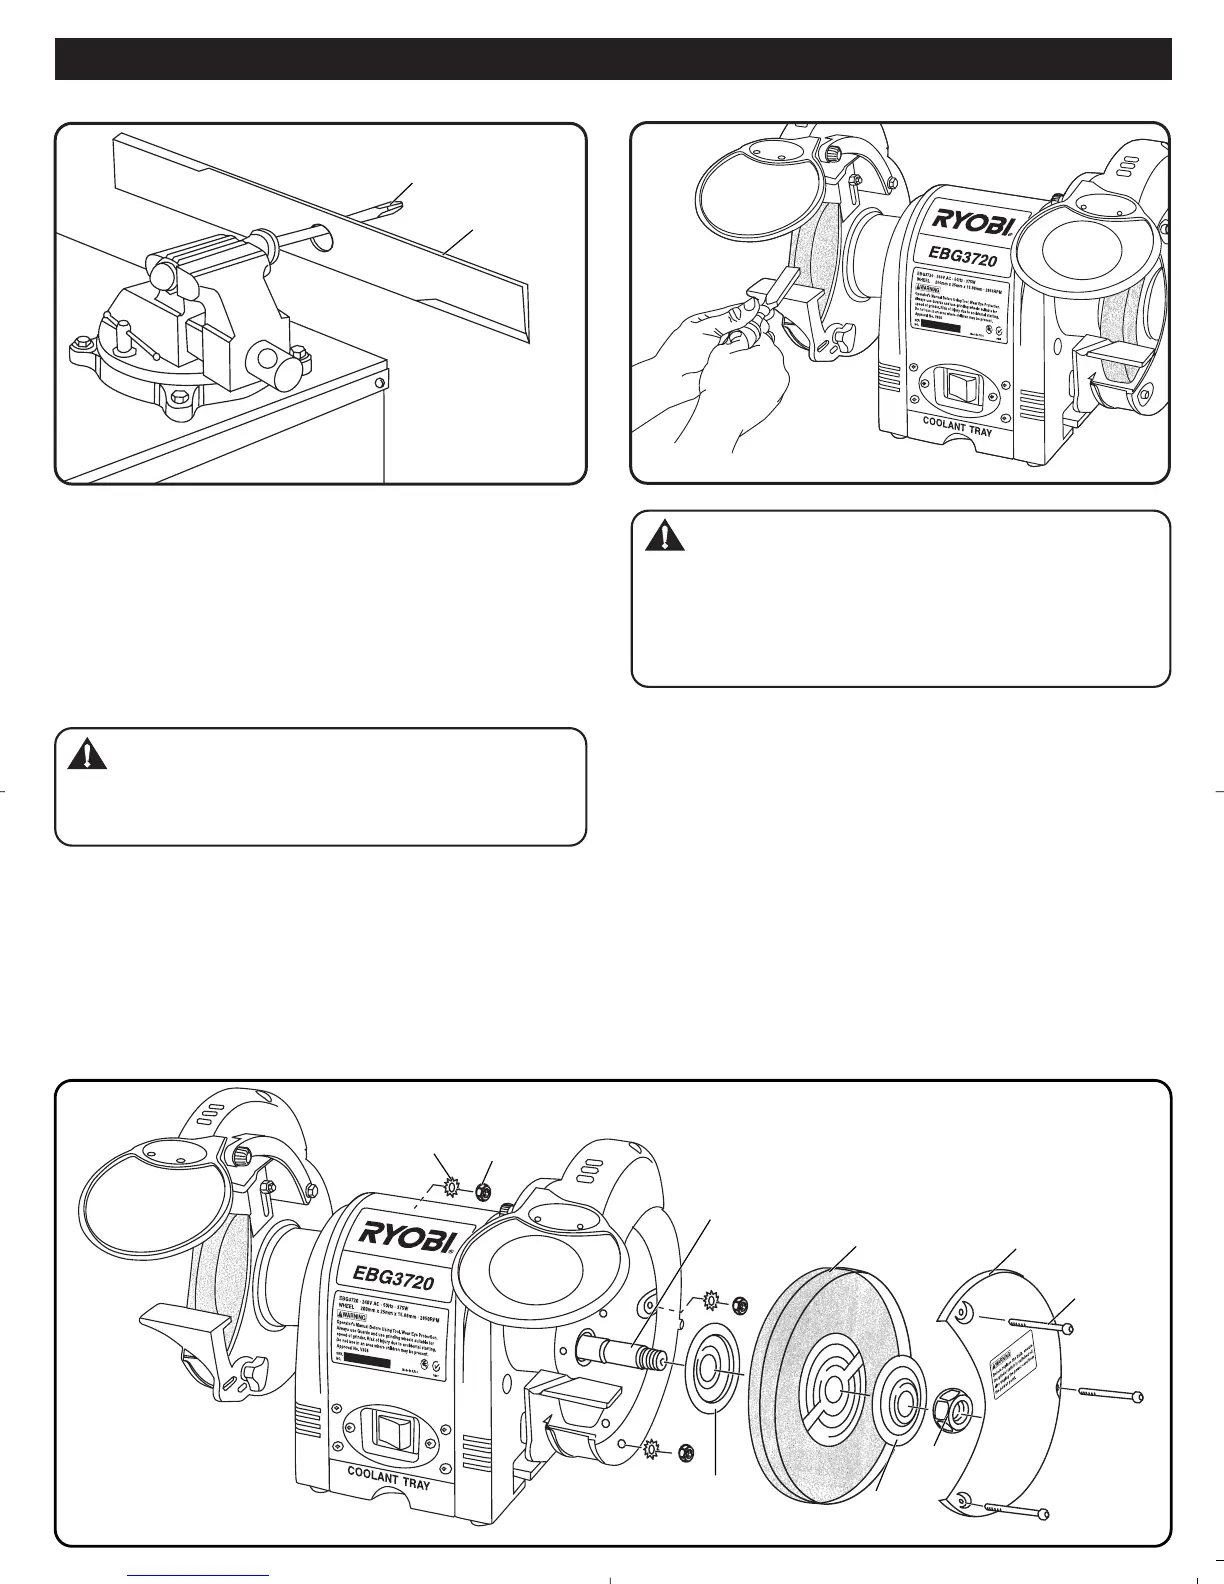
WHEEL REPLACEMENT
See Figure 10.
If you must replace a grinding wheel, be sure to obtain
one with a safe rated speed at least as high as the "no
load speed" RPM marked on the data plate of the grinder
and which is marked to comply with SAA.
To replace the grinding wheel, remove the wheel cover
by loosening the screws, Loosen the wheel nut in a
clockwise direction for the left side and a counterclockwise
direction for the right side. Remove the outer flange and
grinding wheel. To install a new grinding wheel. reverse
the above procedure. Be sure the grinding wheel and outer
flange are properly seated on the spindle shaft.
CHISELS AND SCREWDRIVER BLADES
See Figure 9.
When sharpening chisels and screwdrivers, work rest should
support the chisel at the correct angle against the wheel.
WARNING:
Always disconnect the bench grinder from the power
source before performing any assembly or adjustment.
Failure to do so could result in accidental starting resulting
in possible serious personal injury.
CAUTION
An unbalanced lawn mower blade may cause excessive
vibration which will damage the lawn mower
CHISEL SHARPENING
Fig. 9
Fig. 8
0
1
GRINDING
WHEEL
SPINDLE
SHAFT
STAR
WASHER(S)
HEX NUT(S)
SCREW(S)
WHEEL
NUT
OUTER
FLANGE
Fig. 10
page 9
INNER
FLANGE
WHEEL
GUARD COVER
LAWN MOWER
BLADE
SCREW DRIVER

 Loading...