10
MAINTENANCE
WARNING
The product should never be connected to a power supply
when you are assembling parts, making adjustments,
cleaning, performing maintenance, or when the product
is not in use. Disconnecting the product will prevent
accidental starting that could cause serious injury.
■ When servicing, use only identical Ryobi replacement
parts. Use of any other parts may create a hazard or
cause product damage.
■ Be sure to disconnect the tool from the power supply
before attaching or removing the blade. Clean the tool
and guarding system with clean cloths, or blow it clean
with compressed air.
■ Avoid using solvents when cleaning plastic parts. Most
plastics are susceptible to various types of commercial
solvents and may be damaged by their use. Use clean
cloths to remove dirt, carbon dust, etc.
■ Do not at any time let brake fluids, gasoline, petroleum-
based products, penetrating oils, etc., come in contact
with plastic parts. They contain chemicals that can
damage, weaken or destroy plastic.
■ Always wear safety goggles or safety glasses with side
shields during power tool operation or when blowing
dust. If operation is dusty, also wear a dust mask.
■ If the power supply cord is damaged, it must be
replaced only by the manufacturer or by an authorized
service center to avoid risk. Contact authorized service
center.
■ For greater safety and reliability, all repairs should be
performed by an Authorised Ryobi Service Centre.
LUBRICATION
All of the bearings in the product are lubricated with a
suffi cient amount of high grade lubricant for the life span of
the product under normal operating conditions. Therefore,
no further lubrication is required.
POWER SUPPLY CORD REPLACEMENT
If replacement of the power supply cord is necessary, this
must be done by an authorized service center in order to
avoid a safety hazard.
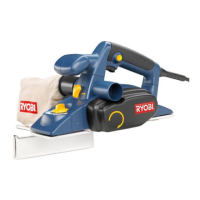
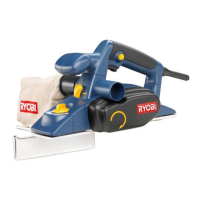
CLEANING THE EXHAUST PORT AND EMPTYING THE
DUST BAG
See Figure 11.
After using the planer for an extended period of time or
when planing wet or green lumber, chips may build-up
in the exhaust port and require cleaning. Chip build-up
restricts air fl ow and causes the motor to overheat. Clean
the exhaust port and empty the dust bag regularly.
■ Unplug the planer.
■ Remove the dust bag from the exhaust port.
■ Clean the chip or dust build-up from the exhaust port of
the planer with a small piece of wood. Do not use your
hands or fingers.
■ Empty all debris from the dust bag and ensure that the
collar is free of debris.
■ Replace the dust bag.
REPLACING BLADES
See Figures 12 - 14.
The planer blades are reversible. When one edge becomes
dull, the blade can be reversed so that the other side can
be used.
Always replace or reverse blades in pairs. Do not attempt
to sharpen blades. If the blades in the planer show signs
of becoming dull, chipped, or damaged in any way, replace
them.
When replacing the blades, use recommended replacement
blade only.
WARNING
Always wear heavy leather gloves and use caution when
loosening blade screws and handling and/or changing
blades. Blades are sharp and can cause serous personal
injury.
■ Unplug the planer.
■ Secure the planer in an upside-down position.
■ Loosen the three screws securing the blade on the
blade holder by turning counterclockwise with the
provided blade wrench.
NOTE: Do not over-loosen the screws. If screws are too
loose, alignment of the new blade will not be accurate.
NOTE: Before removing the old blades, take notice of the
direction of cut as well as how the tapered edge of the old
blades are oriented. The tapered edge of the new blades
must be in the same orientation as the original blades, with
the tapered edge on the same side as the screw heads and
the fl at edge facing the cutter block.
■ Depress the spring-loaded blade guard.
■ Push the blade holder out of the cutter block assembly
using the tip of a screwdriver.
■ Remove the old blade from the blade holder by sliding
the blade out.
NOTE: If blade cannot be easily pushed out of blade holder
after loosening blade securing screws, use a block of wood
to break the blade loose from the blade holder with a short
sharp blow. Then push the blade with a screwdriver to
remove. If necessary, tap the block of wood sharply with a
small hammer to break the blade loose.
■ Clean any sawdust or wood chips from around the
blade area.
■ Slide the new blade into the slot of the blade holder.
CAUTION
Do not attempt to adjust the depth of blade with the two
screws on blade holder.