- 17 -
Mechanical disassemblies
1
Cabinet top ass'y removal.
Disassemble should be made following procedures in numerical order.
Following steps show the basic procedures, therefore unnecessary step may be
ignored.
Caution:
The parts and screws should be placed exactly the same position as the original other-
wise it may cause lose of performance and product safety.
The wiring method of the leads and ferrite cores should be returned exactly the same
state as the original, otherwise it may cause lose of performance and product safety.
Screws Expression
(Type Diameter x Length ) mm
T type M Type
Tapping screw Machine screw
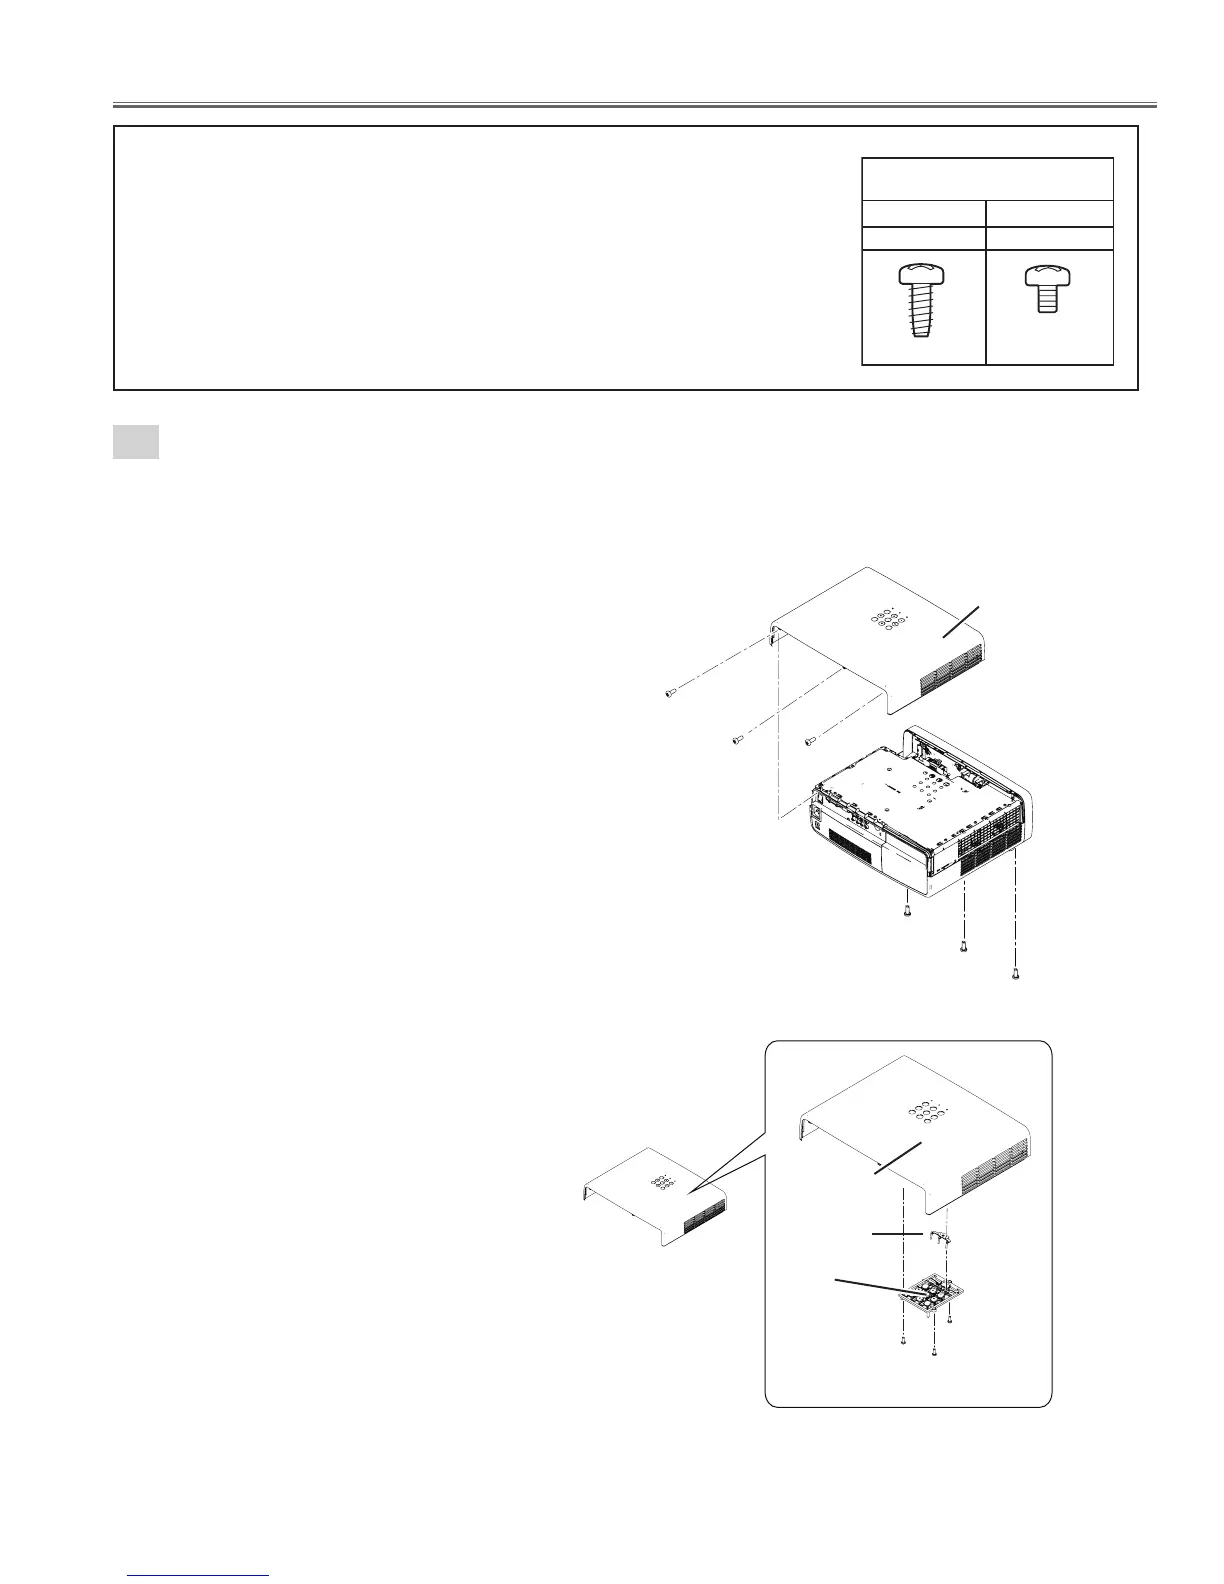
1. Remove the 3 screws-A(M3x10) from the bottom side.
2. Remove the 3 screws-B(M3x8) and remove the Cabinet top ass'y.
3. Remove the 3 screws-C(T2.6x6), remove the Button and DEC. LED.
Cabinet top assy
Cabinet top assy
Cabinet top
DEC. LED
Button
C
C
C
 Loading...