14
Note: Older ST-15C Controllers employed incandescent style lights. These require replacement of bulb if it
blows. Refer to Replacement Parts Sheet in Appendix 4.0. Switch off AC power supply to the controller
before replacing a bulb.
3.6 Control (Bypass) Switch
On those models having a lockable control (Bypass) switch the switch box may be replaced, by removing
two screws inside the switch box. The switch box is replaced as a unit.
A faulty switch may also be replaced if necessary, see replacement parts sheet in Appendix 4.0 for
replacement part numbers.
3.7 Junction Box and Plug & Cable Unit
The Sculcon Junction Box and Cable unit requires simple routine maintenance. More attention is needed in
highly corrosive environments.
Although it is not required, we recommend that the exposed electrical contact of the plug be coated with a
corrosion inhibiting film routinely (once per month is suggested). Corrosion inhibiting spray, ACF-50
Corrosion Block® (manufactured by Lear Chemical Research Corporation, Mississauga ON Canada
www.learchem.com). Other external metal parts of these accessories may also be treated as necessary to
prevent atmospheric corrosion problems.
The exterior surface of the plug should be kept clean using a mild detergent based cleaning solution and
water. The cabling should be routinely wiped of foreign material and cleaned to preserve the outer jacket.
To protect it from loading arm damage etc., it is important to store the plug and cable out of harms way
when it is not in use. A hook is provided on Sculcon Junction Box or a Scully Storage Socket may be
used.
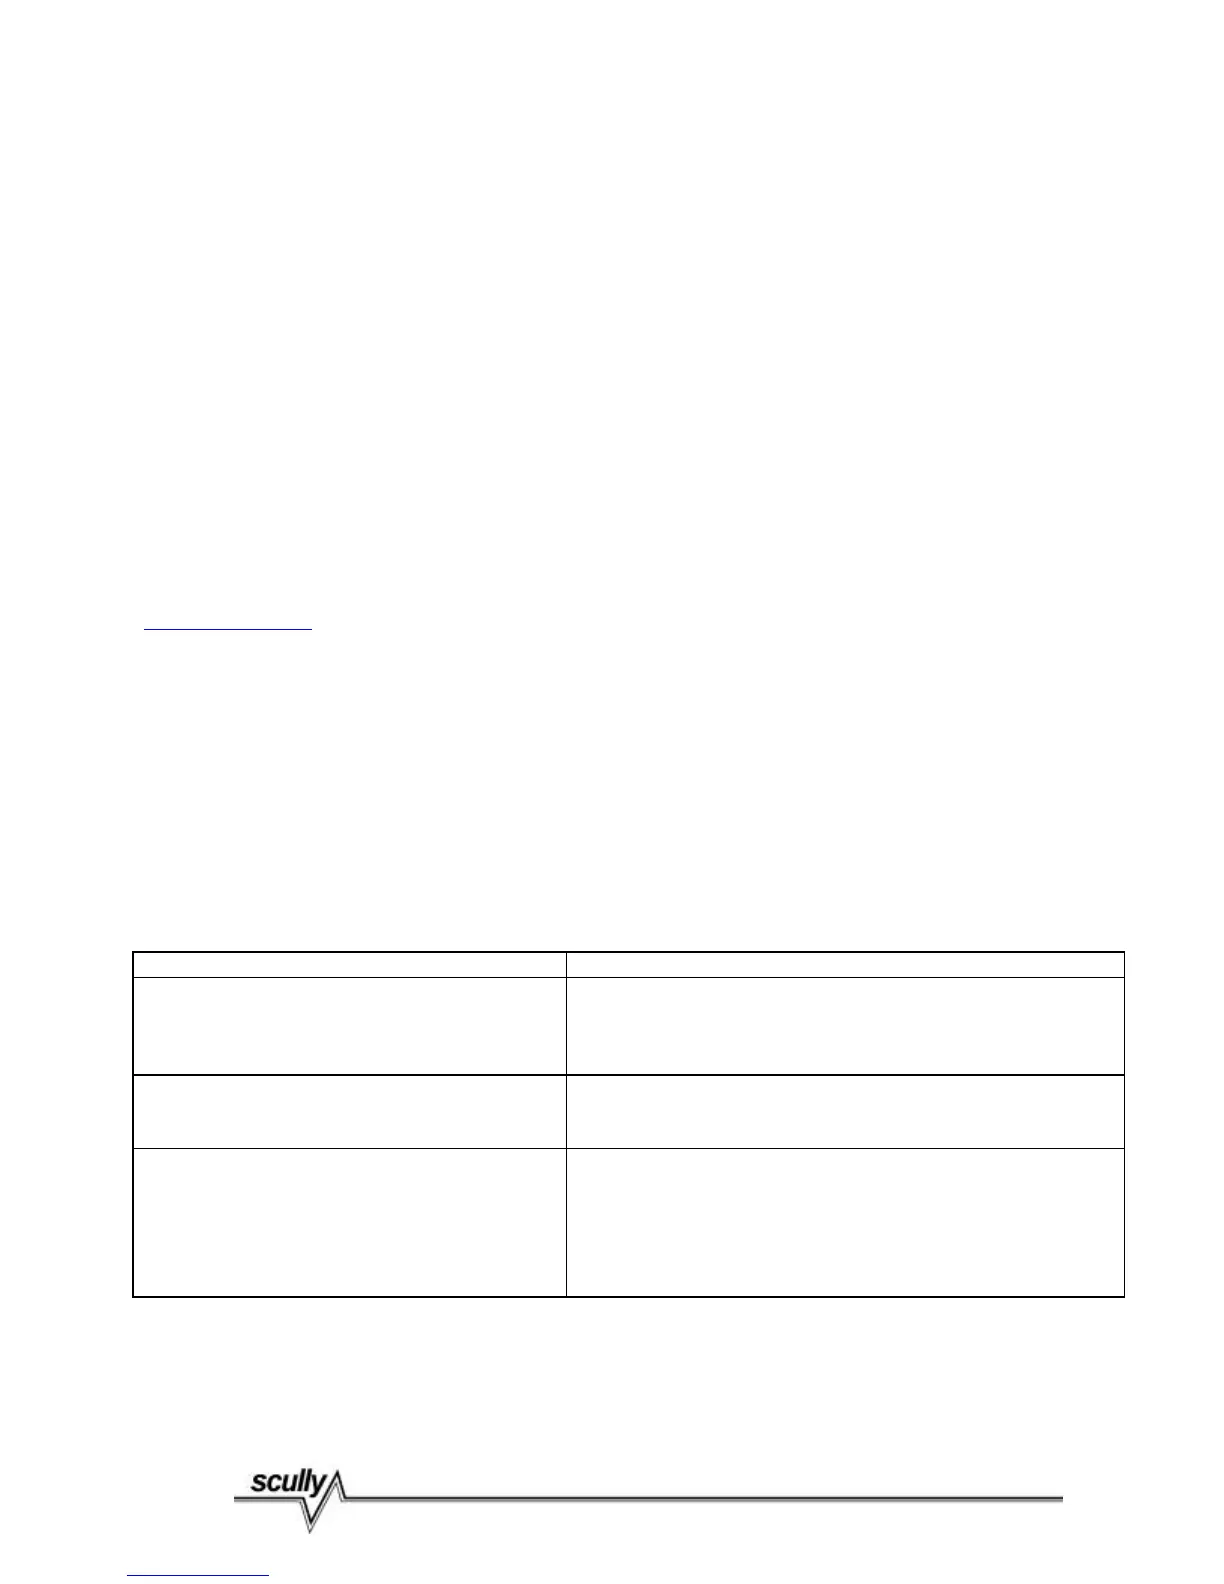
3.8 Troubleshooting
The following troubleshooting guide should aid in an initial diagnosis of most problems encountered with
installation and operation of ST-15C
CONDITION POSSIBLE CAUSE
No lights ON, on front cover • No power to control unit
• Bulb blown (on older units with incandescent lamps)
• Input power fuse (F1) is blown
• Control Module is defective
Green (Permissive) light ON, but control
contact output does not activate valve/pump
• Control Output fuse (F2) is blown
• Wiring defect (control output contact wiring)
• Control Module is defective
Red (Non-permissive) light stays ON when
connected to vehicle with Scully thermistor
sensor or 2-wire optic sensor (or Scully tester)
AND/OR
LED on Control Module (circuit board) not
flashing ON-OFF
• Fault in wiring to junction box and/or plug
• Wet or faulty sensor
• Fault in wiring on vehicle
• Bad plug to socket connection
• Control Module is defective
Check voltage (DC) between pins 5 and 10 (ground) of the plug. It should be 13.5VDC minimum.
 Loading...