23
R-203CW
CONTROL PANEL ASSEMBLY REMOVAL
POSITIVE LOCK
®
CONNECTOR (NO-CASE TYPE) REMOVAL
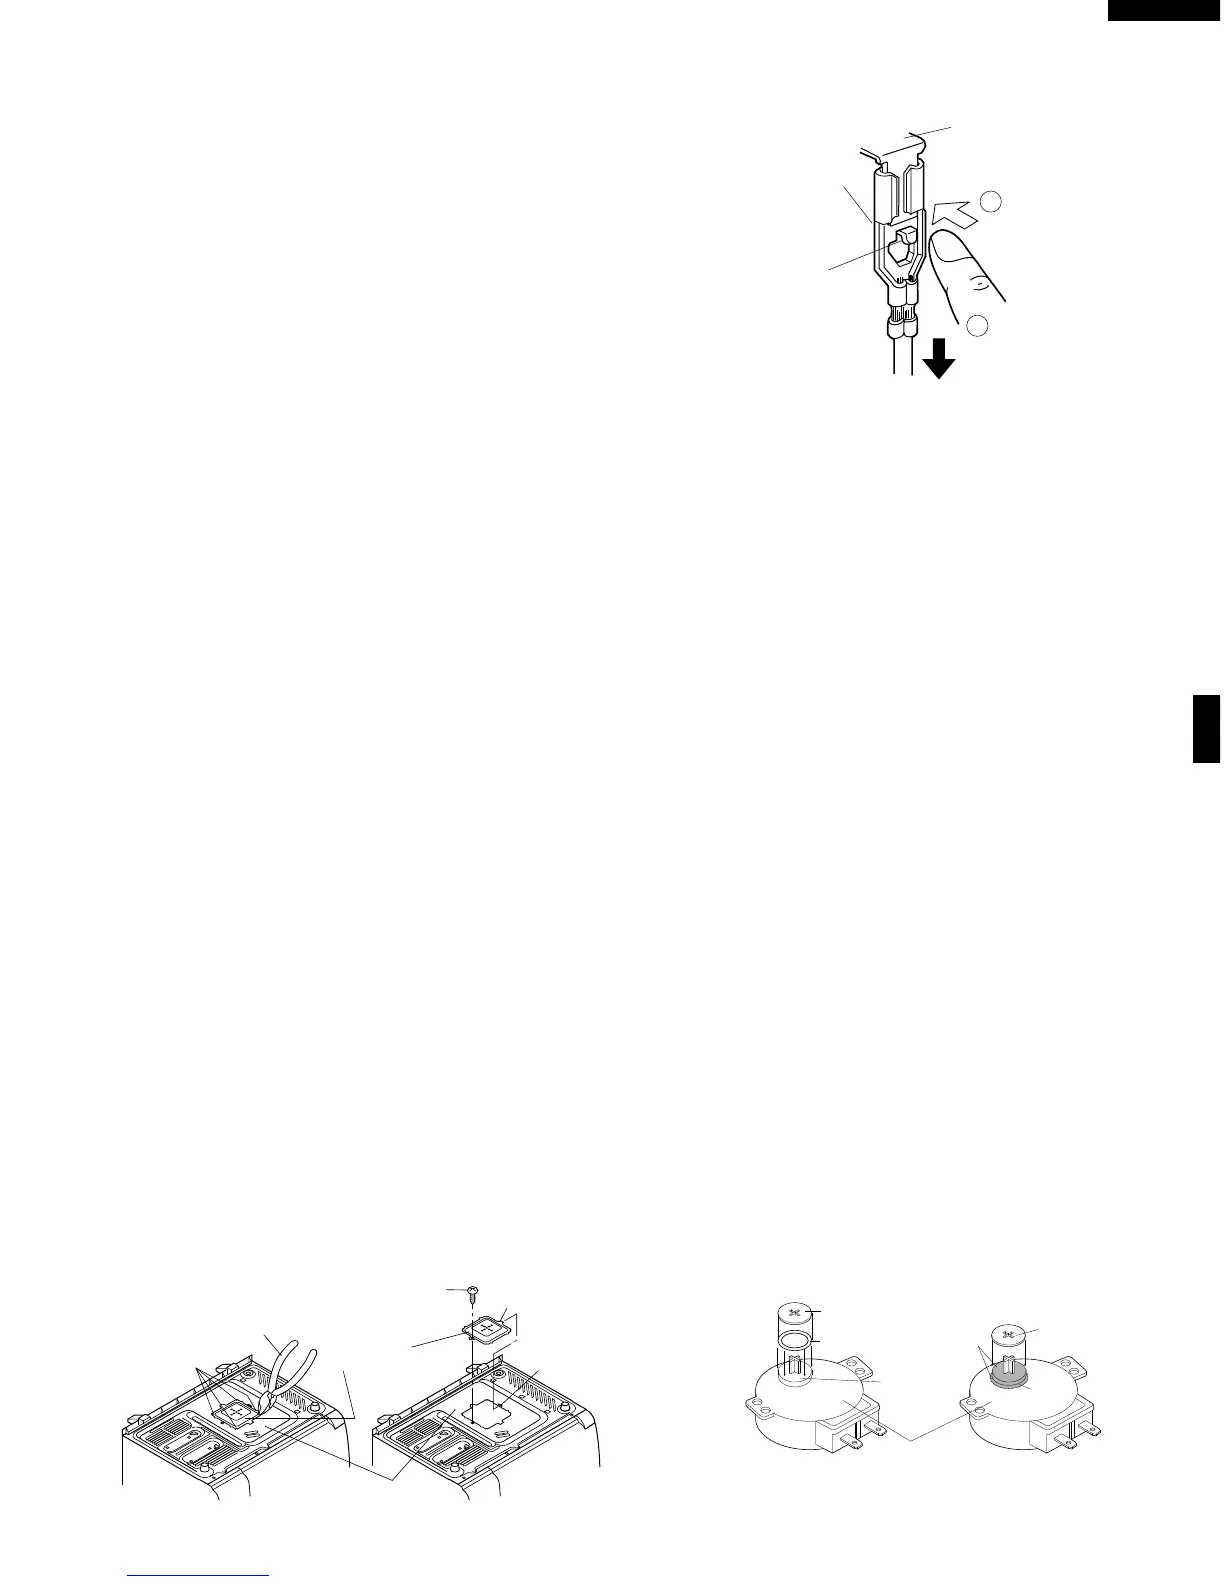
Figure C-2. Positive lock
®
connector
1.
Disconnect the power supply cord, and remove outer case.
2. Open the door and block it open.
3. Discharge high voltage capacitor.
4. Push the lever of positive lock
®
connector.
5. Pull down on the positive lock
®
connector.
CAUTION: WHEN CONNECTING THE POSITIVE LOCK
®
CONNECTORS TO THE TERMINALS, CON-
NECT THE POSITIVE LOCK
®
SO THAT THE
LEVER FACES YOU
1.
Disconnect the power supply cord and remove outer case.
2. Open the door and block it open.
3. Discharge high voltage capacitor.
4. Disconnect the leads from the control unit.
5. Remove the one (1) screw holding the chassis support
to the front plate of the oven cavity.
6. Remove the chassis support from the oven.
7. Lift up the control panel and release it from the oven
cavity.
8. Now, the control panel assembly is free.
NOTE: 1. Before attaching a new key unit, remove remaining
adhesive on the control panel frame surfaces
completely with alcohol.
2. When attaching the key unit to the control panel
frame, adjust the upper edge and right edge of
the key unit to the correct position of control panel
frame.
3. Stick the key unit firmly to the control panel frame
by rubbing with soft cloth not to scratch.
Removal
1. Disconnect the power supply cord.
2. Remove the turntable and turntable support from the
oven cavity.
3. Turn the oven over.
4. Cut the four (4) bridges holding the turntable motor cover
to the bottom plate with the cutting pliers as shown in
Figure C-3.
CAUTION: DO NOT DROP THE TURNTABLE MOTOR
COVER INTO THE OVEN AFTER CUTTING
THE BRIDGES. BECAUSE IT WILL DAMAGE
THE WIRE LEADS OF THE MOTOR AND IT IS
DIFFICULT TO REMOVE IT OUT OF THE
OVEN.
5. Remove the turntable motor cover from the bottom plate.
6. Disconnect the wire leads from the turntable motor.
7. Remove the single (1) screw holding the turntable motor
to the oven cavity.
TURNTABLE MOTOR REMOVAL
8. Remove the turntable motor from the oven cavity.
9. Remove the O-ring and washer from the turntable motor.
10.Now, the turntable motor is free.
Re-install
1. Remove any sharp edges on the turntable motor cover
and the bottom plate with the cutting pliers.
2. Re-install the O-ring.
3. Apply the grease (Shinetsu silicone grease G-420 of
Sinetsu Chemical Co. Ltd. or Toray Silicone grease SH-
14 of Toray Silicone Co., Ltd.) to the O-ring and the base
of the turntable motor shaft as shown in Figure C-4.
4. Re-install the turntable motor with the O-ring and washer
to the oven cavity with the single (1) screw.
5. Re-connect the wire leads to the turntable motor.
6. Insert the tab of the turntable motor cover into the hole of
the bottom plate as shown in Figure C-3.
7. Re-install the turntable motor cover to the bottom plate
with one (1) screw XHTSD40P08RV0 or
XFPSD40P08K00 as shown in Figure C-3.
Figure C-3. Turntable Motor Cover
Figure C-4. Washer and O-ring Installation and
Grease Applying.
 Loading...