FL4A52
R-4E52
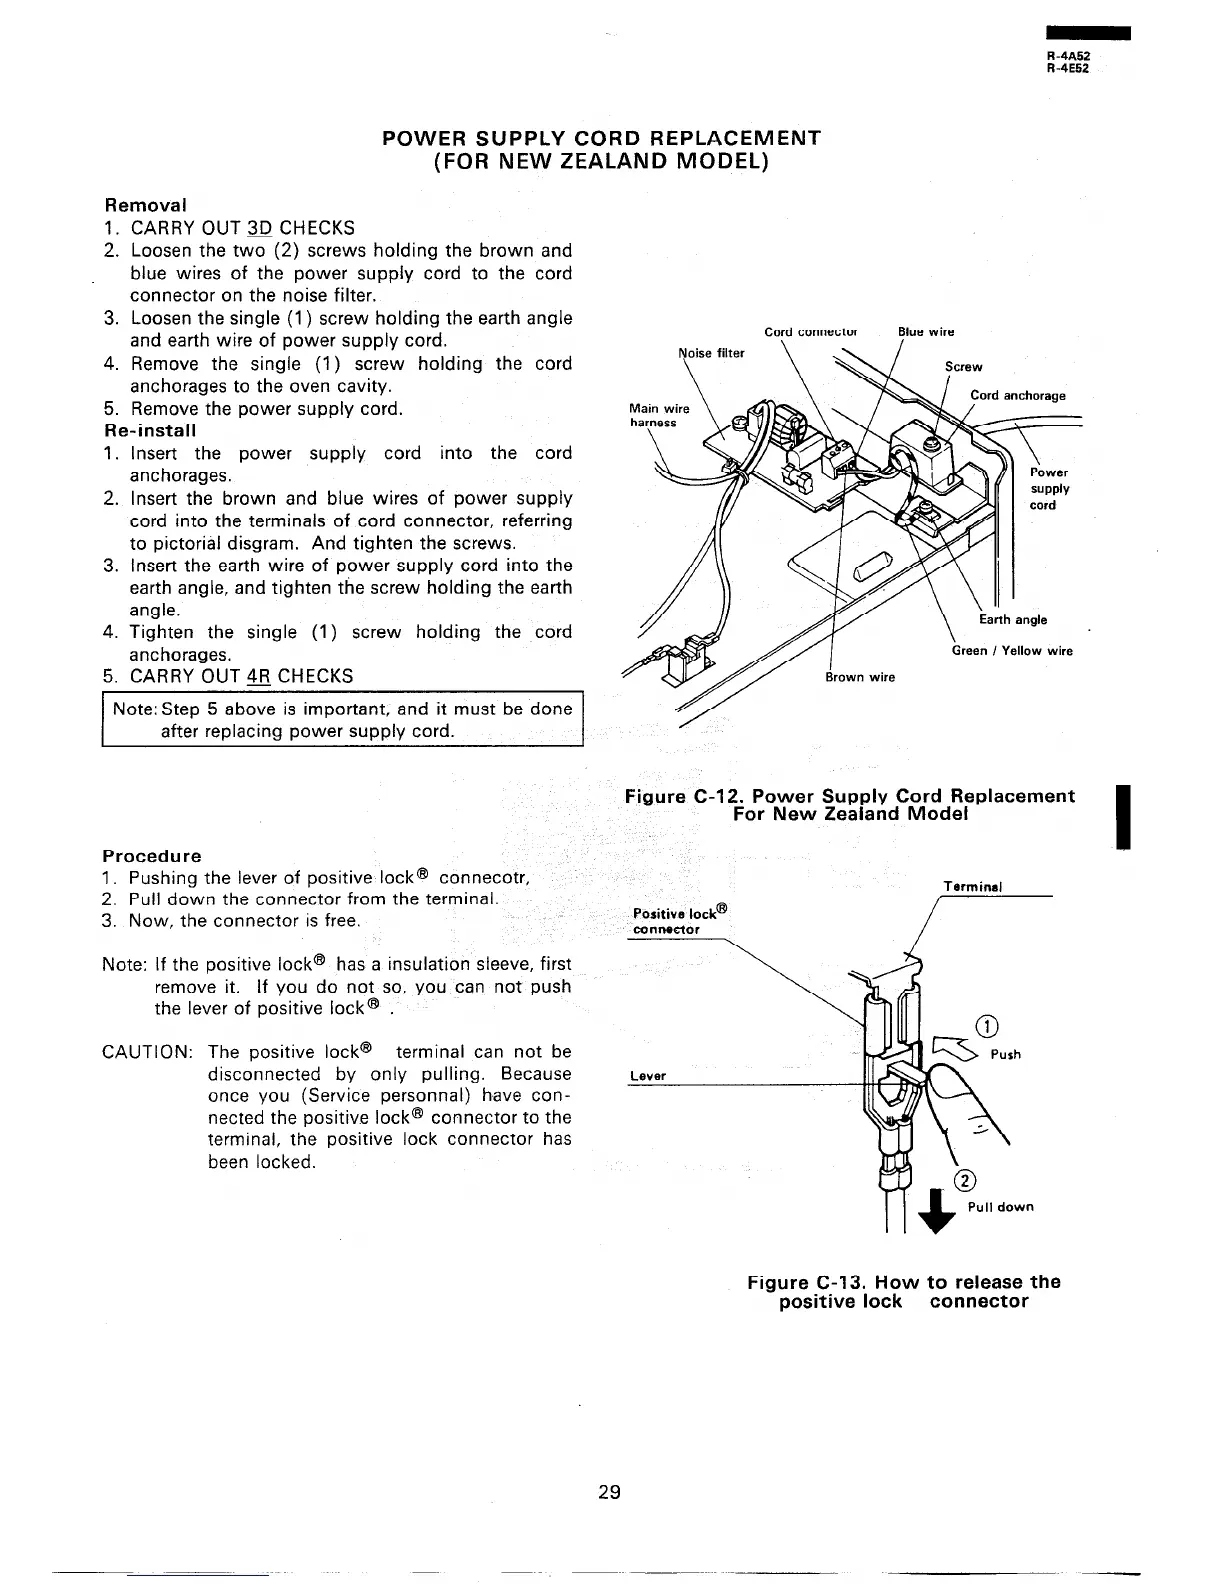
POWER SUPPLY CORD REPLACEMENT
(FOR NEW ZEALAND MODEL)
Removal
1.
2.
3.
4.
5.
CARRY OUT 3D CHECKS
Loosen the two (2) screws holding the brown and
blue wires of the power supply cord to the cord
connector on the noise filter.
Loosen the single (1) screw holding the earth angle
and earth wire of power supply cord.
Remove the single (1) screw holding the cord
anchorages to the oven cavity.
Remove the power supply cord.
Re-install
1.
2.
3.
4.
5.
Insert the power supply cord into the cord
anchorages.
Insert the brown and blue wires of power supply
cord into the terminals of cord connector, referring
to pictorial disgram. And tighten the screws.
Insert the earth wire of power supply cord into the
earth angle, and tighten the screw holding the earth
angle.
Tighten the single (1) screw holding the cord
anchorages.
CARRY OUT Q CHECKS
Note:Step 5 above is important, and it must be done
after replacing power supply cord.
Procedure
1. Pushing the lever of positive lock@ connecotr,
2. Pull down the connector from the terminal.
3. Now, the connector is free.
Note: If the positive lock@’ has a insulation sleeve, first
remove it. If you do not so, you can not push
the lever of positive lock@’ .
CAUTION: The positive lock@ terminal can not be
disconnected by only pulling. Because
once you (Service personnal) have con-
nected the positive lock@ connector to the
terminal, the positive lock connector has
been locked.
Cord connector
Blue wire
rem I Yellow wire
Figure C-12. Power Supply Cord Replacement
For New Zealand Model
Positive lock@
cunnector
\
Terminal
Figure C-13. How to release the
positive lock
connector
29
 Loading...