N
GB
Utskjæring av luke
Cutting out the hatch
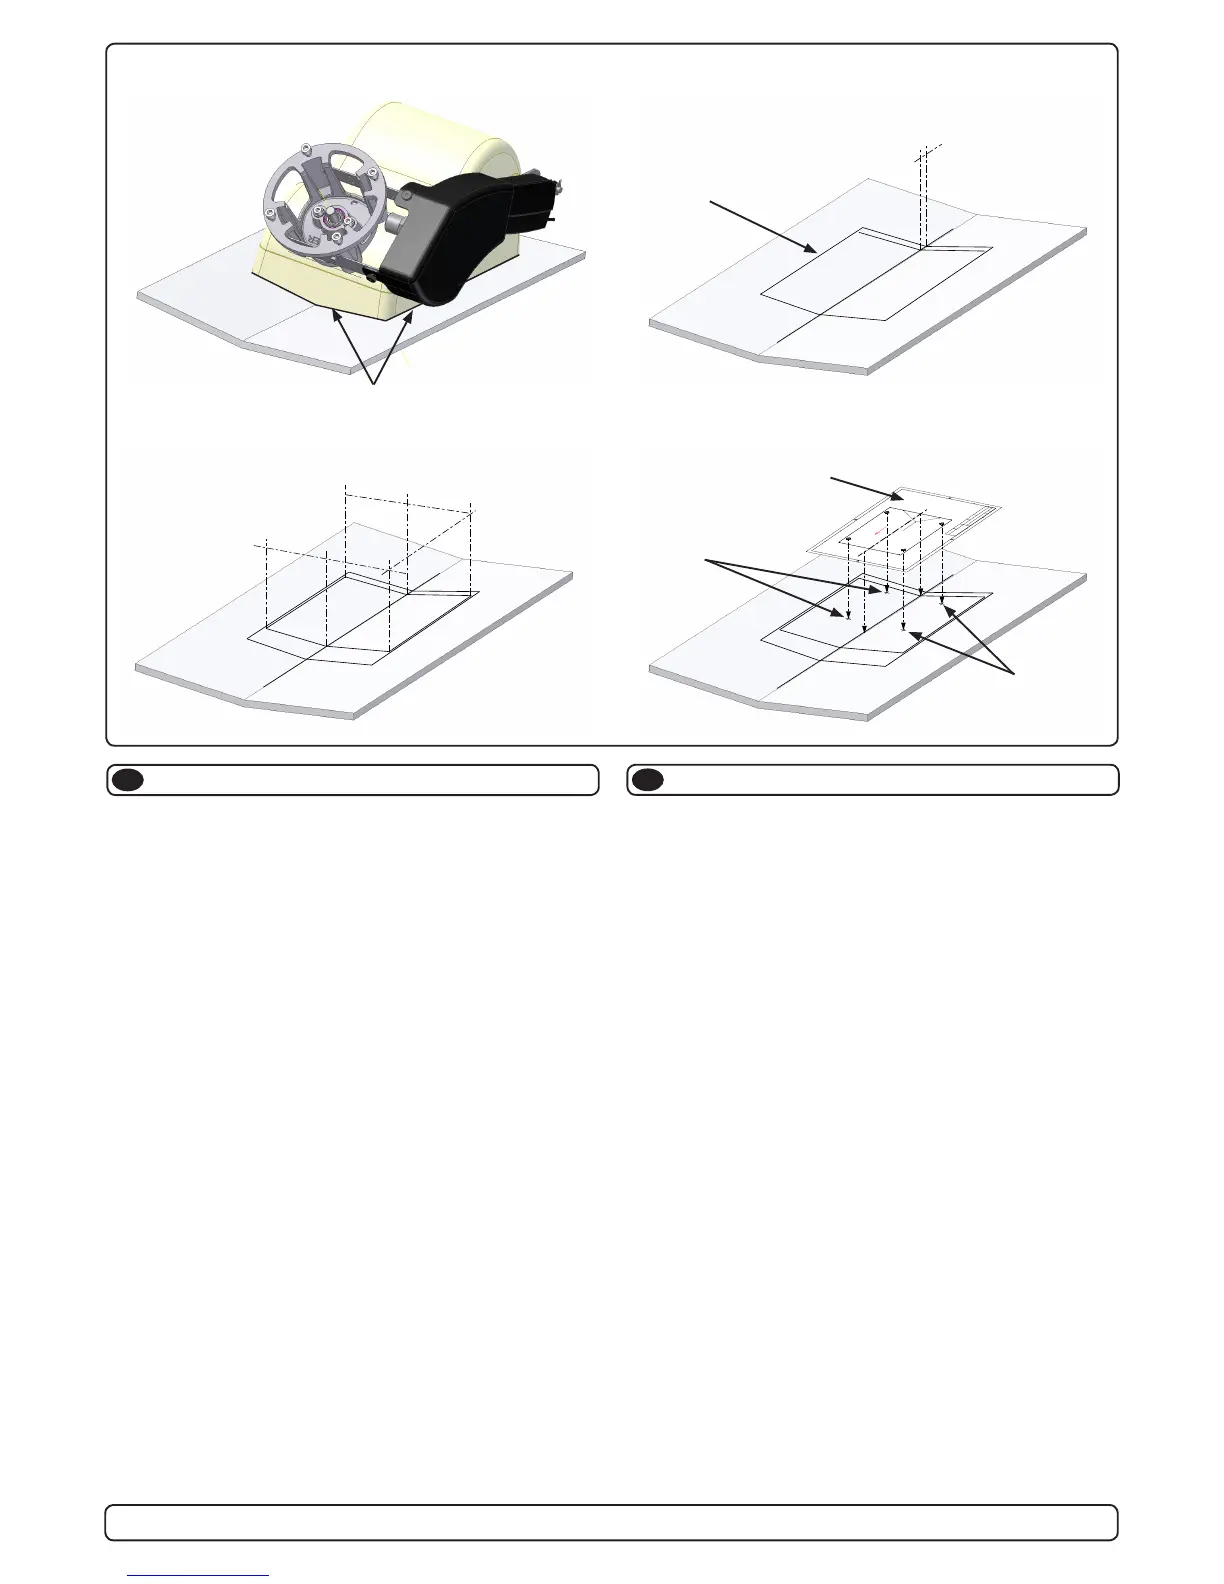
0DUNHURPULVVHWDYHQKHWHQI¡UGXWDUGHQXWLJMHQ
7UHNNHQOLQMHPPIRUDQGHQEDNUHNDQWHQDYRPULVVHWRJGXKDU
GHQEDNUHNXWWOLQMHQIRUOXNHQ
Tegn opp omrisset av luken i henhold til måltegning, luke på side
VLGHNDQWHUPPWLOKYHUVLGHDYVHQWHUOLQMHQIUHPUHNXWWOLQMH
PPIUHPRYHUIUDEDNUHNXWWOLQMH
%UXNEDNUHNXWWOLQMHRJVHQWHUOLQMHLEnWHQVRPXWJDQJVSXQNWIRUOXNH-
PDOHQVLGHRJSURMLVHURJERUGH¿UHKXOOHQHIRUnIHVWHVNURJGH-
len til thrusteren
6. Luken kuttes ut med 45 graders vinkel utover, slik at åpningen blir
størst på utsiden av skroget. Luken må kuttes ut nøye, med dertil
egnet verktøy
OBS. Før alle kutt er utført anbefales det å tape fast luken slik at
den ikke faller ut når kuttene er utført.
Når du har kuttet ferdig skal du ha en pen luke med et tilhørende pent
KXOO)RUVHJONDQWHQHSnOXNHRJVNURJPHGHSR[\RJJODVV¿EHUFXWWLQJ
IRUnI\OOHLJMHQW\NNHOVHQHWWHUNXWWHW
Draw outline of complete unit circumference with marker before
removing unit
5. Draw a line 12 mm in front of the rear end of unit outline, this marks
the aft cut line for the hull.
Draw outline of hatch according to measurement drawing on page 12
( hatch sides 115mm each side of centerline, front cut line 325mm
from aft cut line).
Align hatch drilling template (page 13) with centerline and aft cutline
and mark and drill the four holes used to secure hatch to mechanism.
6. Use appropriate tool and cut out the hatch with a 45 degree chamfer
outwards from centre of hatch.
NOTE: Secure hatch with duct tape or similar before completing
all cuts, to prevent that the hatch drops and get damaged
:KHQGRQHFXWWLQJ\RXKDYHWKHKDWFKWREH¿WWHGWRWKHUHWUDFWPHFK-
anism. Fill edges of hatch and hull with epoxy/cutting to compensate
for thickness of cut.
 Loading...