24
Application How to set the application
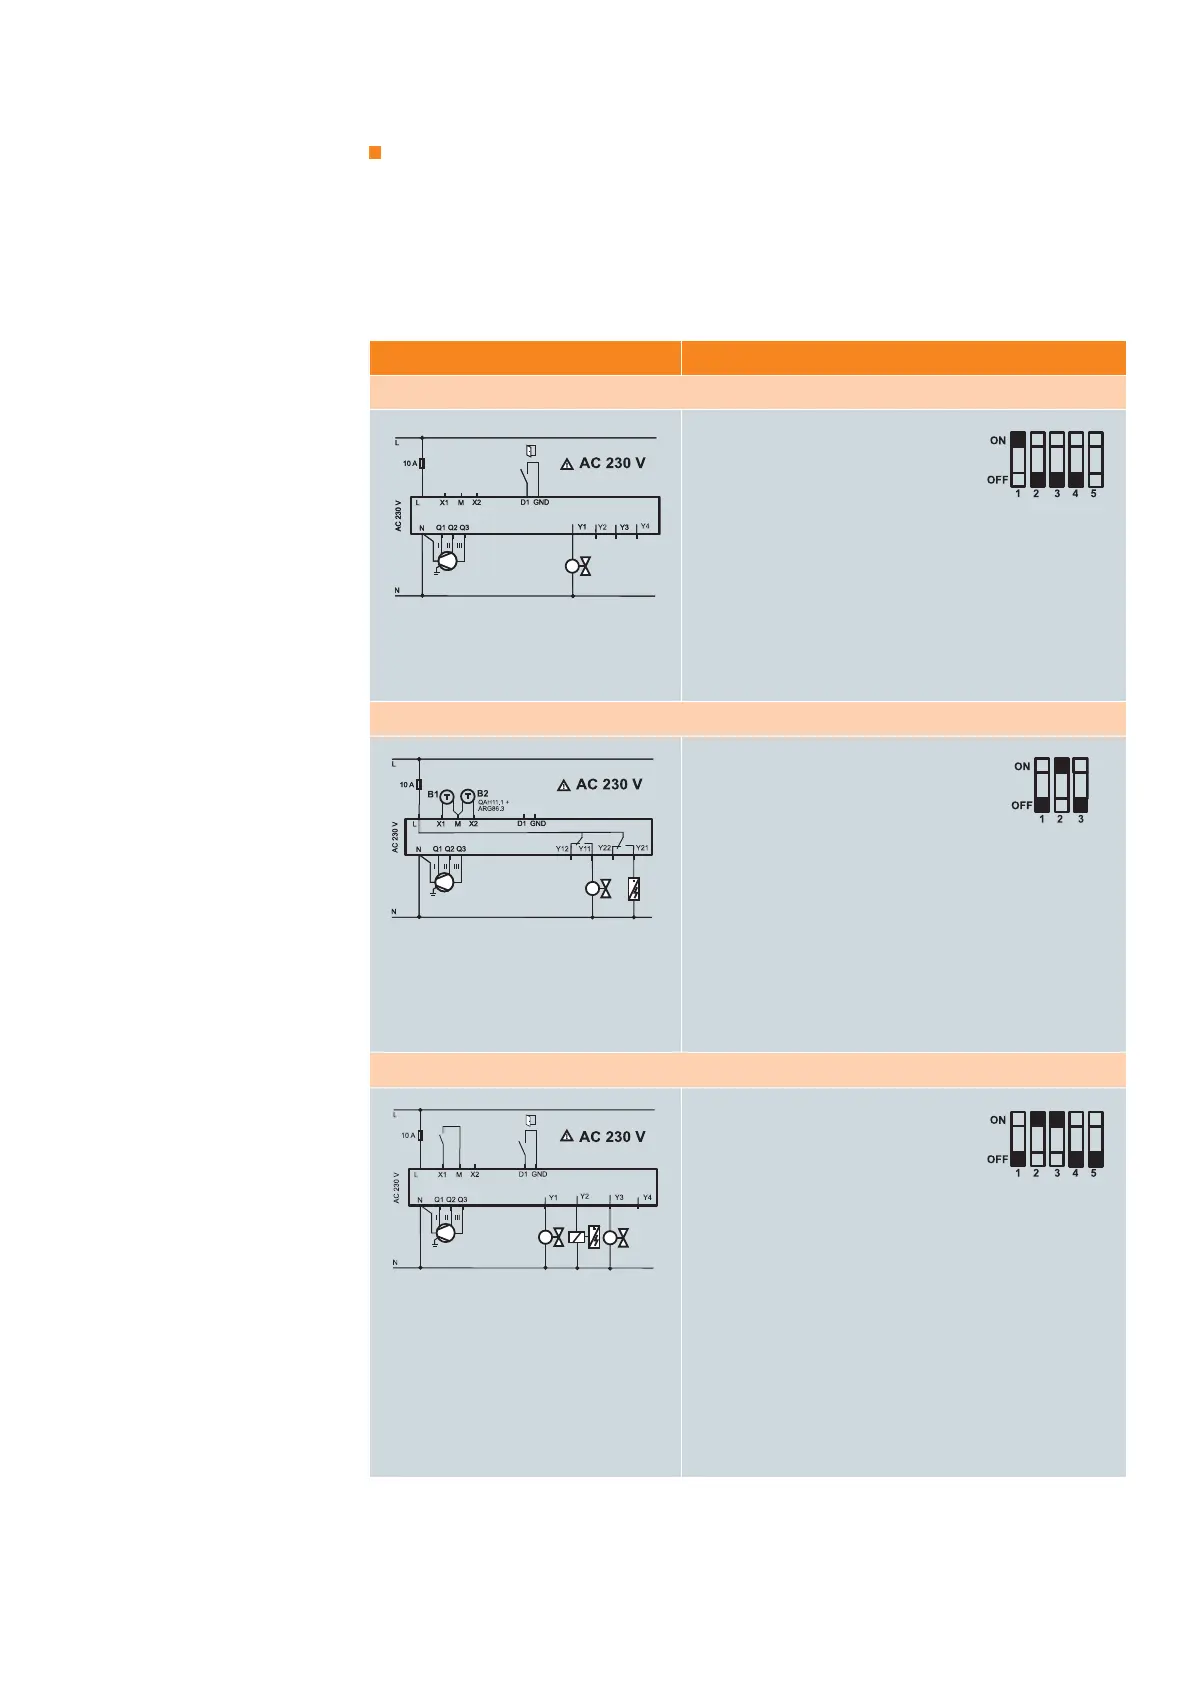
Fan coil unit, 2-pipe cooling only
– Valve actuator: ON/OFF
– Keycard contact
1. Thermostat: RDG100
2. DIP switch: 2-pipe application
Y1 = ON/OFF
3. Wiring: Actuator → Y1-N
Fan → Q1...Q3-N
Key card → D1-GND
4. Parameters: no change necessary (factory-setting)
TIPS
– Keycard contact in hotel guest rooms helps saving energy costs
– RDG100T with 7-day program
– RDG100KN communicating KNX
Fan coil unit, 2-pipe with el. heater
– Valve actuator: ON/OFF
– Heating with electric heater ON/OFF
– Automatic changeover
– Return air temperature sensor
1. Thermostat: RDG110
2. DIP switch: 2-pipe application, el. heater
3. Wiring: Actuator → Y11-N
El. heater → Y21-N
Fan → Q1...Q3-N
Temp. sensor → X1-M
H/C changeover sensor → X2-M
4. Parameters: P01 = 3 (automatic H/C changeover)
TIPS
– RDG110 with relay outputs can drive direct an el. heater
up to 1 kW
Fan coil, 4-pipe with el. heater
– Valve actuators H&C: PWM
– Electric heater: ON/OFF
– Electric heater enable input
– Window contact
1. Thermostat: RDG100
2. DIP switch: 4-pipe application, el. heater
Y1 = PWM
Y3 = PWM
3. Wiring: Actuator heating → Y1-N
Actuator cooling → Y3-N
Contactor
1
for el. heater → Y2-N
Fan → Q1...Q3-N
El. heater enable → X1-M
Window cont. → D1-GND
4. Parameters: P38 = 5 (El. heater Input)
P46 = 2 (PWM heating)
P47 = 2 (PWM cooling)
TIPS
– Electric heater enable signal for saving energy costs
– Note
1
: Add relay if load exceeds 1A!
Fan coil application
examples
Application examples
Installation and set up
1. Select a suitable thermostat.
2. Set application via DIP switch according to the mounting Instructions.
3. Wire and install the thermostat. Apply power.
4. If necessary, set parameter P01 (control sequence) and other application-specifi c parameters.

 Loading...