STEP 7 Getting Started
A5E00171228-01
6-1
6 Configuring the Central Rack
6.1 Configuring Hardware
You can configure the hardware once you have created a project with a SIMATIC
station. The project structure which was created with the STEP 7 Wizard in
Section 2.1 meets all the requirements for this.
The hardware is configured with STEP 7. These configuration data are transferred
to the programmable controller later on "downloading" (see Chapter 7).
The starting point is the open SIMATIC
Manager together with the "Getting
Started" project.
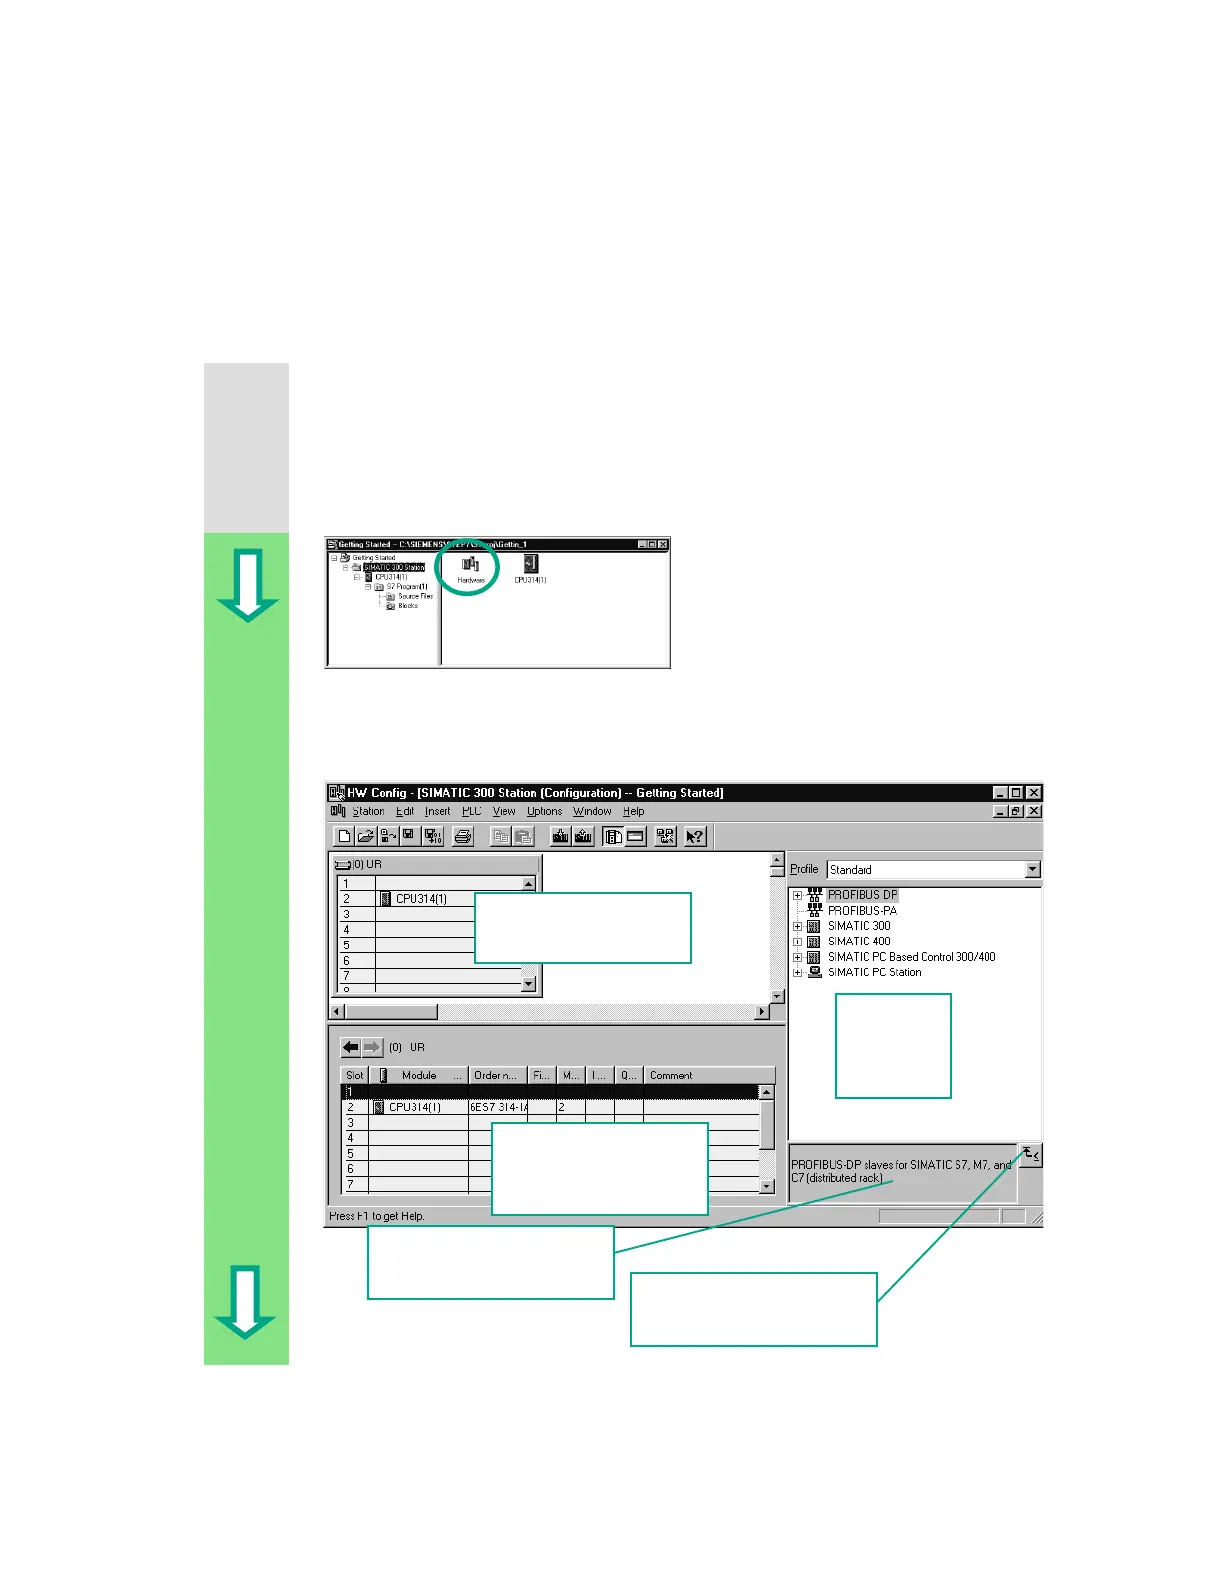
Open the SIMATIC 300 Station folder
and double-click the Hardware
symbol.
The "HW Config“ window opens. The CPU you selected on creating the project is
displayed. For the "Getting Started" project, this is CPU 314.
Rack with individual slots
Configuration table with
the MPI and I/O
addresses
Hardware
Catalog
Help on the selected element
Short information on the
selected element
 Loading...