22
Check Preceding Page to
Locate Assembly Number.
NOTE: Perform the Clutch/Brake Adjustment before
doing the Neutral Adjustment.
Neutral Adjustment
Early Models with Welded Support Bracket
(H, Figure 6-4)
1. Park tractor on level surface. Shut off PTO switch
and engine. Do not apply parking brake. Make
sure transmission control lever is in neutral and
has activated neutral switch light (ignition switch
on)
2. Raise rear of tractor off ground with a suitable
hoist or floor jack. Install jackstands underneath
transaxle and block front wheels.
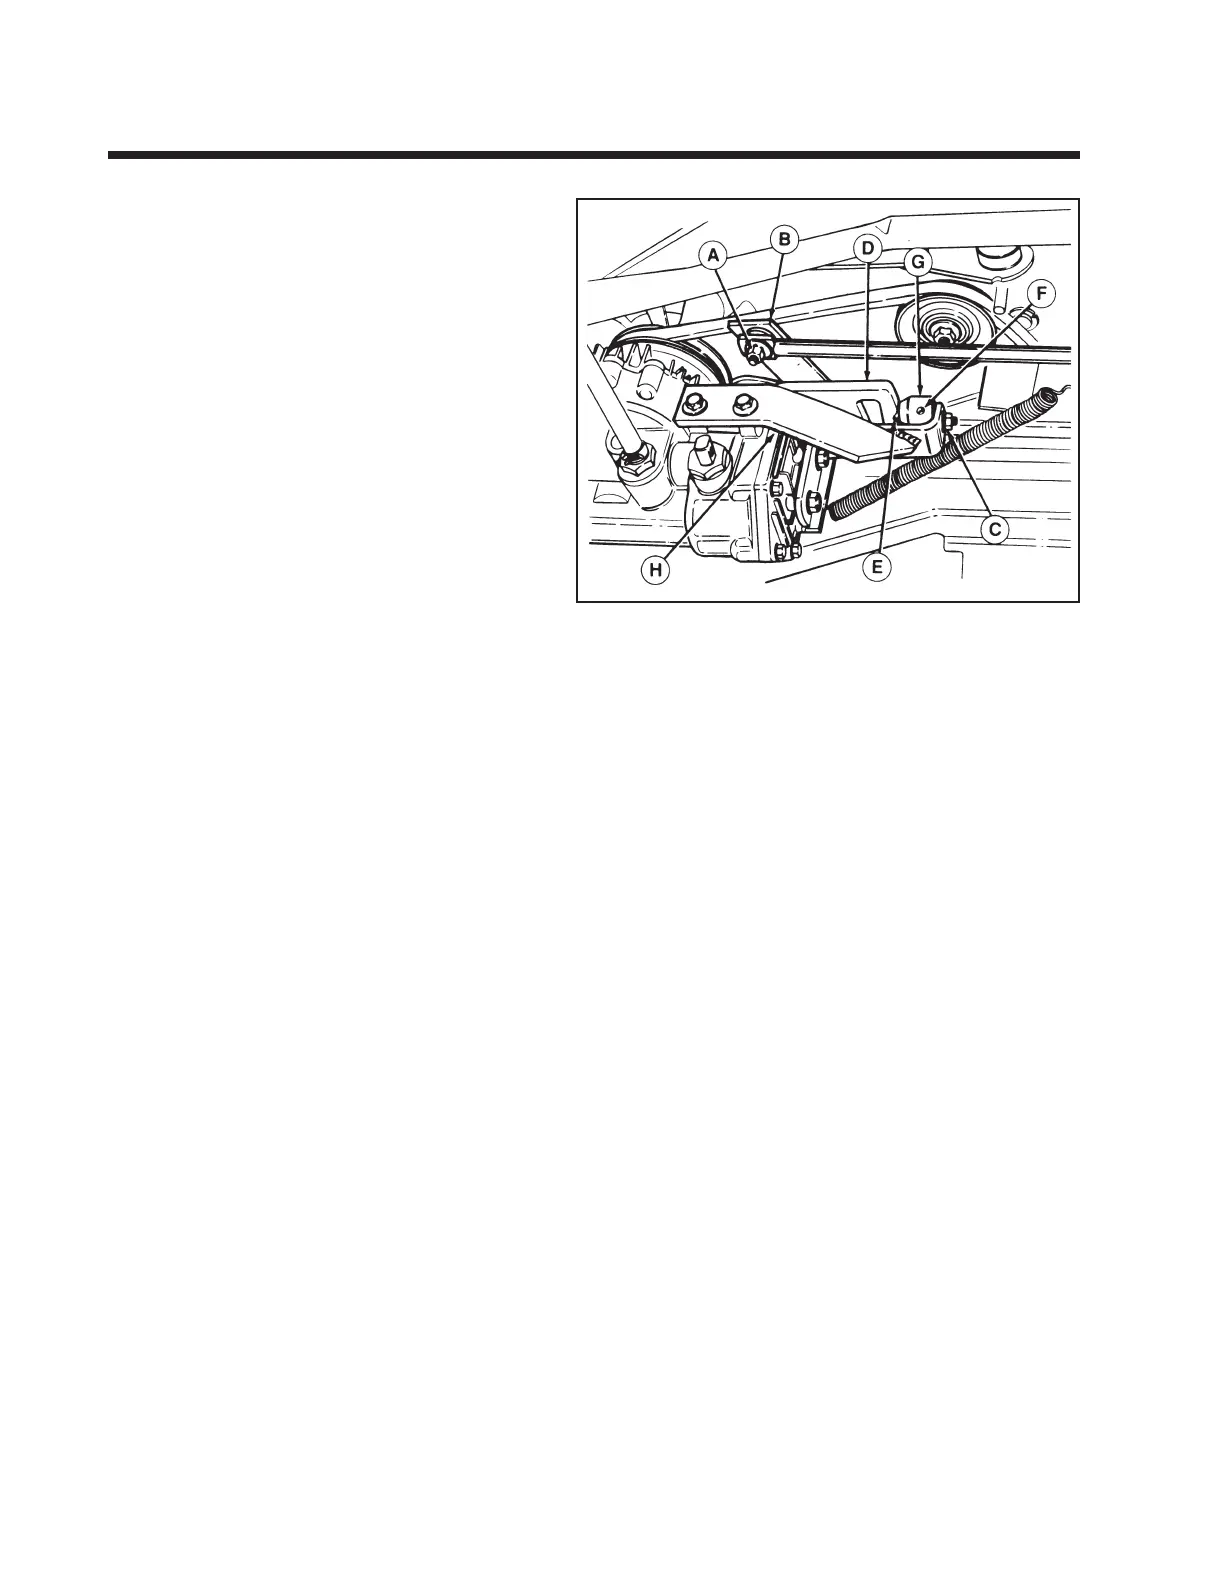
3. Loosen nut (A, figure 6-4) securing transaxle shift
rod to speed control lever (B).
4. Loosen nut (C) securing ball retainer (G) to
welded support bracket (H).
5. Rotate shift cam (D) so that neutral detent is
aligned with roller ball (E).
6. Start engine and increase to full throttle. If wheels
rotate, continue with adjustment. If wheels do not
rotate go to step 8.
7. Place a 1/4" rod or #2 Phillips screwdriver into
hole (F) in eccentric ball retainer (G). Rotate ball
retainer until wheels stop moving.
8. Tighten nut (C) securing ball retainer (G).
9. Make sure dash transmission control lever is in
neutral position and has activated neutral switch
light (ignition switch) before tightening nut (A).
10. Check the "Return-To-Neutral" by following these
steps:
a. Shift transmission lever into forward (drive)
position and fully depress clutch/brake pedal.
b. Lever should return to neutral slot.
c. If lever does not return to neutral, repeat above
steps 1-9.
11. Shut off engine and remove tractor from
jackstands.
Figure 6-4.
A. Nut
B. Speed Control Lever
C. Nut
D. Shift Cam
E. Roller Ball
F. Adjustment Hole
G. Eccentric Ball Retainer
H. Support Bracket (Welded)
For later models with plastic bracket see page 22.
Section 6. (Continued)
Lawn Tractors with Eaton 750 Hydrostatic Transaxle
 Loading...