-11-
STITCH LENGTH REGULATION
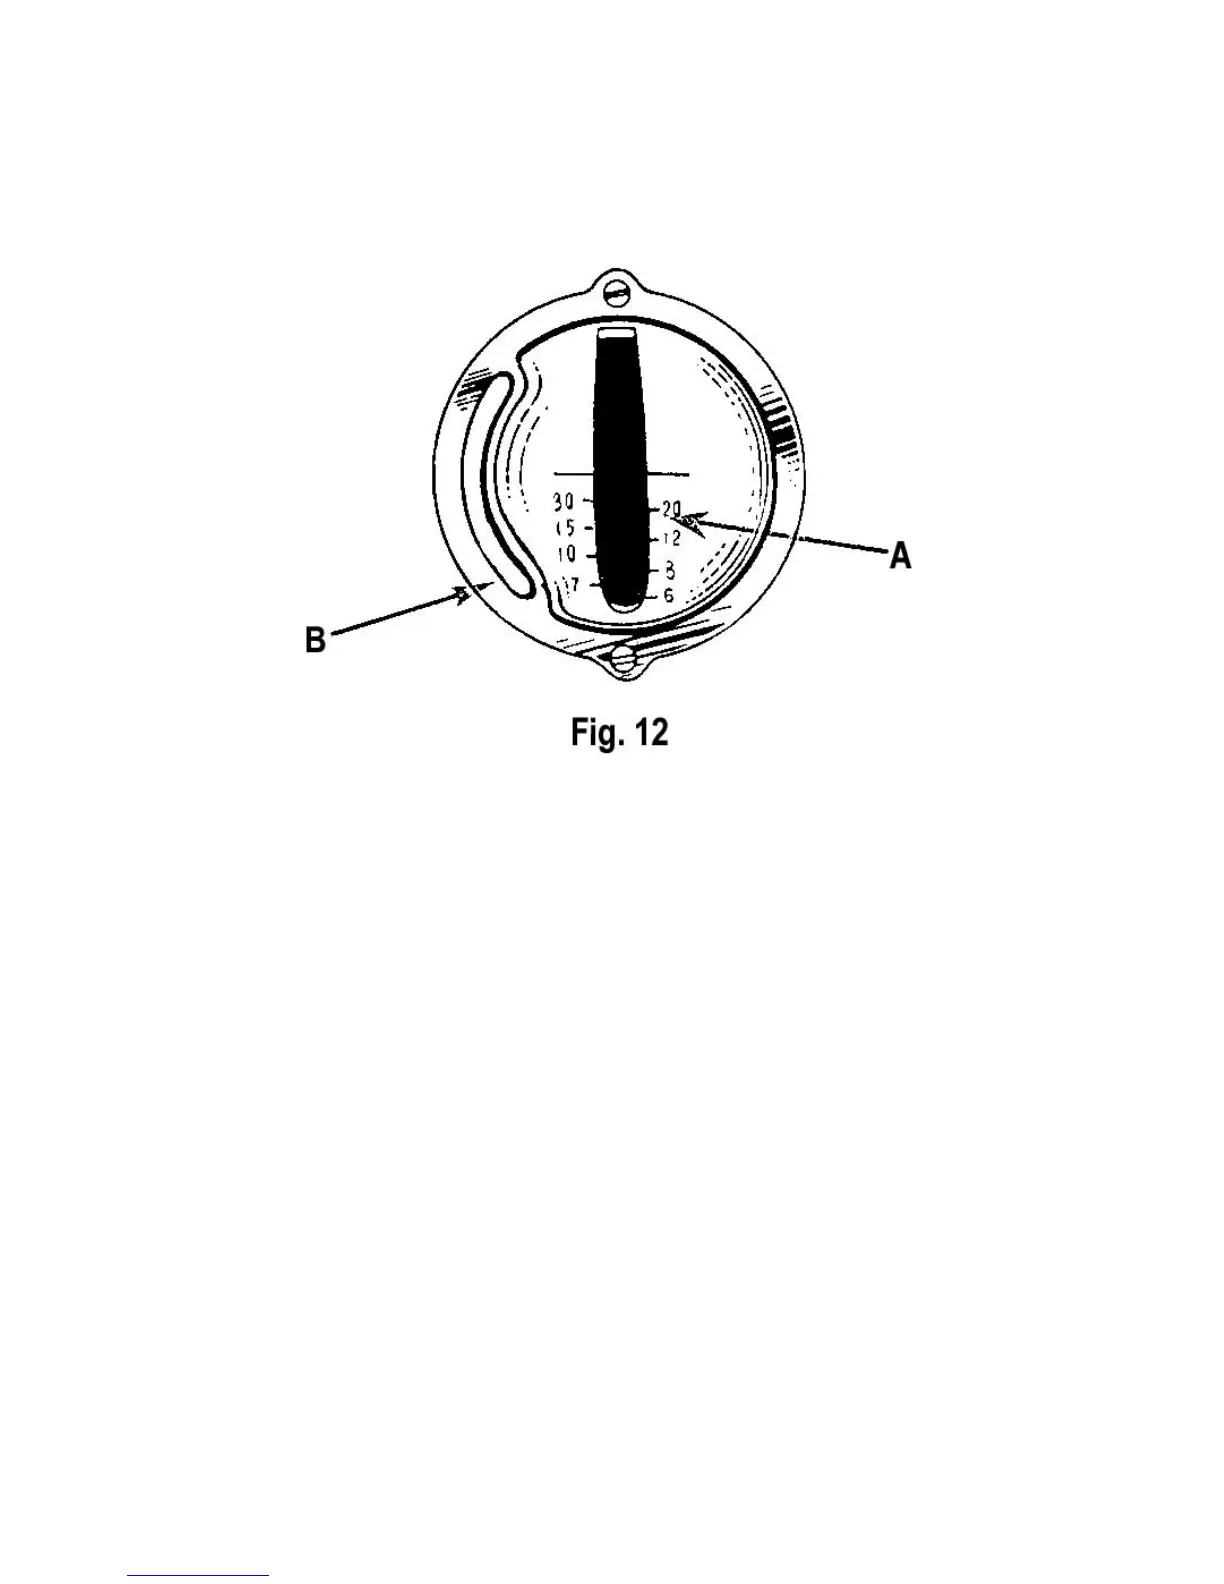
Regulating the length of the stitch: The machine can
be adjusted to from six to thirty stitches per inch, as in-
dicated by the numbers on the stitch indicator plate.
Changing the length of the stitch is accomplished as
follows:
Loosen the stitch length stop control (B, Fig. 12) and
move it to the bottom of the slot. Move the stitch
length lever (A, Fig. 12) to the desired stitch length.
Now, move the stop control up until the control plate
(visible in the stitch length slot) touches the bottom of
the stitch length lever. Tighten the thumb screw (B)
with finger pressure only. At this point, the stitch
length is “marked,” and you can move the lever up to
sew in reverse at approximately the same stitch length,
and then return it to your desired forward length.
 Loading...