Compatibility Test 4746 Mounting the Reserve Parachute
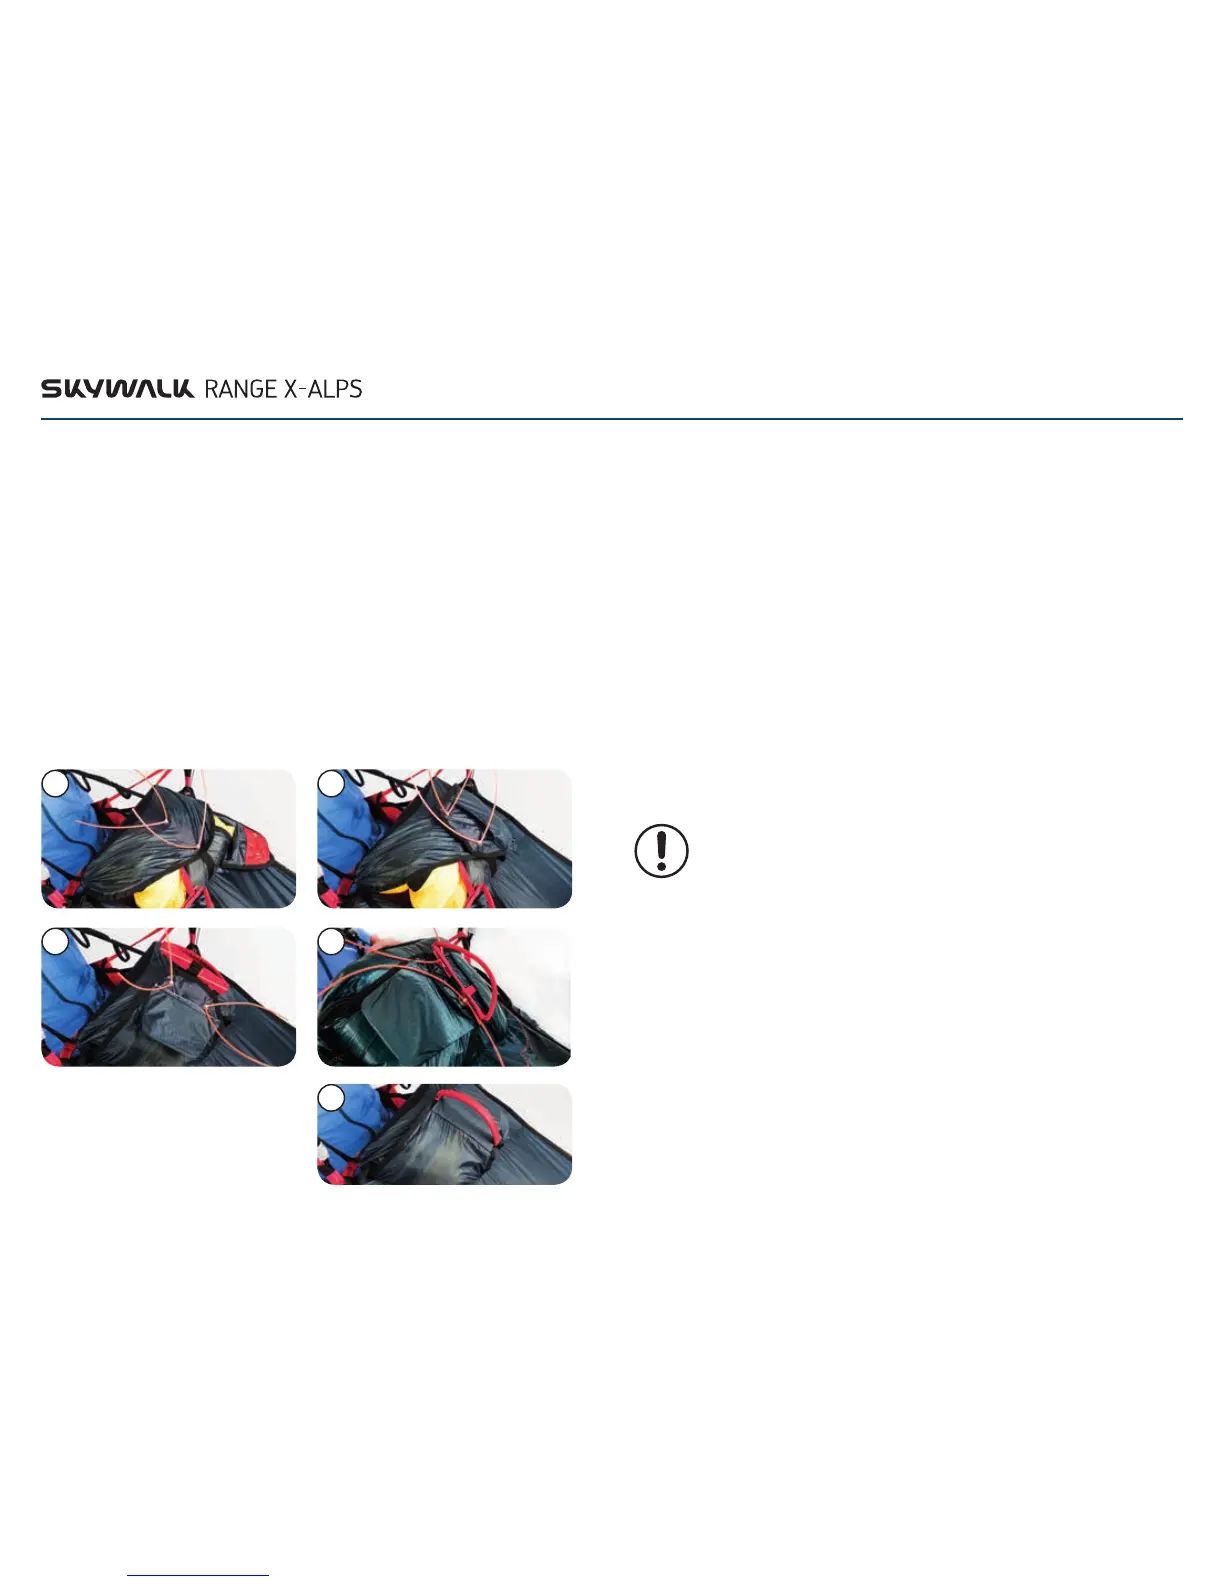
INSTALLATION OF THE RESERVE CHUTE
1. Place the reserve chute deployment bag with the handle pointing upwards into
the reserve chute compartment of the RANGE X-ALPS and lay the V-connection cord
untwisted next to it.
2. Guide the V-line through the side channel and up to the shoulder straps.
3. After the reserve chute has been properly installed in the harness, it must be closed
using the splints on the rescue handle. For this you need two short lengths of para-
chute line (because of the low friction we recommend unsheathed, not too thin
paraglider lines), which you thread through the two loops on the bottom flap
of the outer container.
4. Close the upper flap (pic 1).
5. Close the left flap (in flight direction) (pic 2).
6. Close the right flap (in flight direction) (pic 3).
7. Guide the lower cotter pin of the rescue handle through the lower loop and the upper
cotter pin through the upper loop (pic 4).
8. Remove the parachute lines carefully and slowly.
9. Guide the cover flap through the rescuer handle and insert it into the left compartment
(in flight direction) (pic 5).
EN
1
4
2
5
3
COMPATIBILITY TEST
The correct installation of the reserve chute should now be verified with a test deployment.
To do this, put on the harness, close the leg straps and hang the main carabiners in a har-
ness simulator. Then pull out the reserve chute by the handle. For this test, it is not enough
to deploy the reserve chute without sitting in the harness. It must be possible for you to
reach and pull the handle with no problem from the flying position, in accordance with the
instructions of this manual. If you are not sure, consult a specialist or contact your local
skywalk dealer. The reserve chute must be deployed with the correct throwing technique
by pulling it in a sideways direction. Failure to do so can make deployment more difficult.
A reserve chute deployment can be made more difficult by the following factors:
> The reserve chute is too large or too bulky for the compartment or the deployment bag.
> The reserve chute is not packed in the shape of the deployment bag.
> The reserve chute is not thrown with the appropriate throwing technique (the reserve
chute must be extracted with a pull to the side).
> The reserve chute has too much volume after repacking.
> Because arm length is crucial for a successful reserve chute deployment, smaller
persons with short arms may not be able to deploy the reserve chute. In emergency
situations, high G-loading can occur, which can make deployment even more
CAUTON
BEFORE EACH FLIGHT, CHECK TO SEE IF THE RESCUE HANDLE IS IN THE
RIGHT POSITION AND WHETHER THE SPLINTS OF THE HANDLE ARE SITTING
CORRECTLY. REACHING FOR THE RELEASE HANDLE TO TEST ITS POSITION
EVERY FLIGHT CAN HELP YOU MEMORIZE THE POSITION SUBCONSCIOUSLY.
 Loading...