Section 2 - OPERATING INSTRUCTIONS
WARNING
DO NOT attempt any maintenance, adjustments or
service with engine and blade running. STOP engine
and blade. Disconnect spark plug wire and secure
away from spark plug. Engine and components are
HOT. Avoid serious burns, allow sufficient time for all
components to cool.
2.6 RECYCLING OPERATION
NOTE: For best recycling results, cut up to a maximum of
1/3 of grass blade length and recycle ONLY when grass is
dry.
1. Set all wheels in the highest cutting position
(Notch 6).
2. Move engine speed control to "FAST" (Rabbit)
position.
3. Move ground speed control to slowest speed
setting.
4. Proceed mowing slowly. If grass is very dense,
lower each rear wheel latch one notch lower than
the front wheel latches to improve recycling
perform ance.
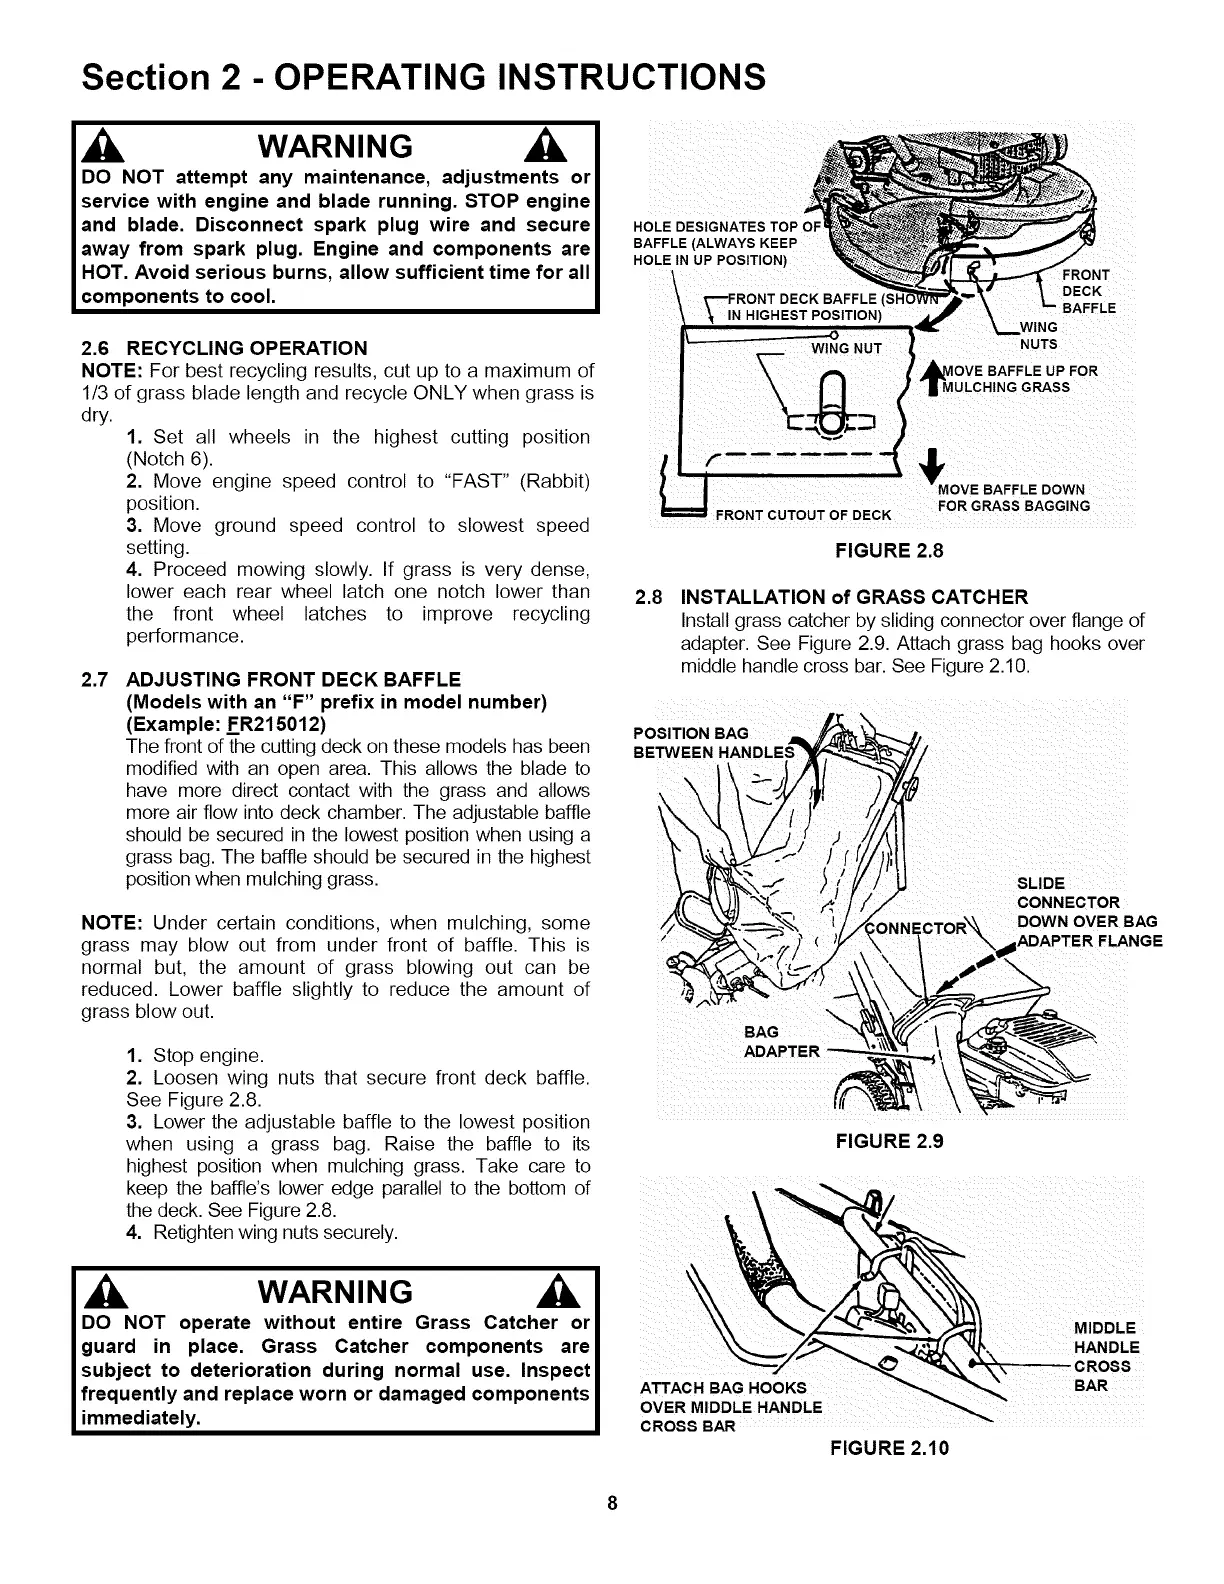
2.7 ADJUSTING FRONT DECK BAFFLE
(Models with an "F" prefix in model number)
(Example: FR215012)
The front of the cutting deck on these models has been
modified with an open area. This allows the blade to
have more direct contact with the grass and allows
more air flow into deck chamber. The adjustable baffle
should be secured in the lowest position when using a
grass bag. The baffle should be secured in the highest
position when mulching grass.
NOTE: Under certain conditions, when mulching, some
grass may blow out from under front of baffle. This is
normal but, the amount of grass blowing out can be
reduced. Lower baffle slightly to reduce the amount of
grass blow out.
1. Stop engine.
2. Loosen wing nuts that secure front deck baffle.
See Figure 2.8.
3. Lower the adjustable baffle to the lowest position
when using a grass bag. Raise the baffle to its
highest position when mulching grass. Take care to
HOLE DESIGNATES TOP OF
BAFFLE (ALWAYS KEEP
HOLE IN UP POSITION)
FRONT
_RONT DECK BAFFLE (SH
IN H GHEST POST ON)
_..WING
W!NG NU T NUTS
BAFFLEUPFO.
MULCHING GRASS
MOVE BAFFLE DOWN
' FRONT CUTOUT OF DECK FOR GRASS BAGG!NG
FIGURE 2,8
2.8 INSTALLATION of GRASS CATCHER
Install grass catcher by sliding connector over flange of
adapter. See Figure 2.9. Attach grass bag hooks over
middle handle cross bar. See Figure 2.10.
POSITION BAG
BE SITvvTIEOENNBHAAGNDLE ,IL ,_ _"_ JIS_jIP_--------,_'_'L%"-t_/
CONNECTOR
__._._ I./i,_ONNECTORX,_ DOWN OVER BAG
• _#ADAPTER FLANGE
APTER \
FIGURE 2.9
keepthebamesowered eparaetothebo omo*
the deck. See Figure 2.8.
4. Retighten wing nuts securely.
OT operate without entire Grass
lace Grass Catcher components AND
g " p •
subject to deterioration during normal use. Inspect "./ _ "_E--------CROSS
frequently and replace worn or damaged components ATTACHBAGHOOKS
immediately.
OVER MIDDLE HANDLE
CROSS BAR
FIGURE 2.10
 Loading...