Page 6 of 12 Last Modified: 06/24/2003
II. Capture Still Images
When taking a photograph you can view the shot through the LCD screen or through the
viewfinder. The concept of the camera is to point and shoot. The camera needs to be in
STILL mode to take a photograph.
To Take a Photograph
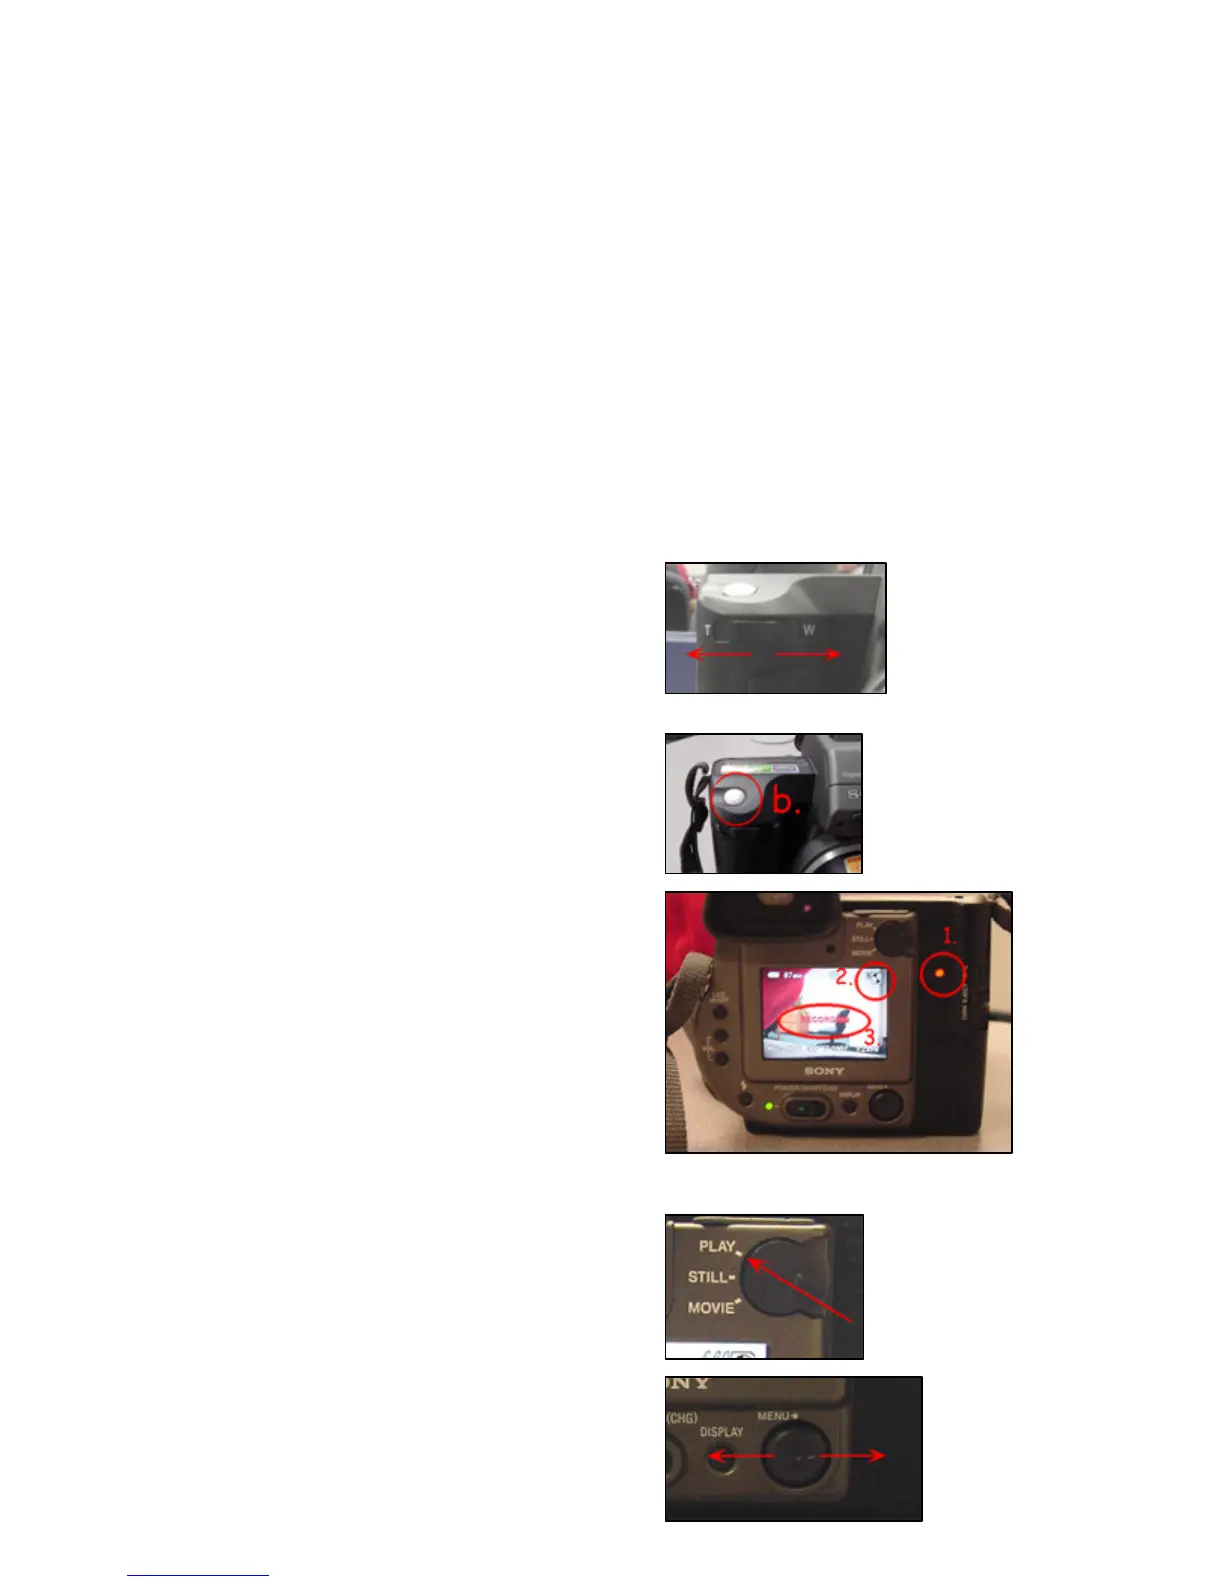
a. The main idea is to aim the camera
and click.
If the image is too far away or too
close the user can use the zoom to
bring the shot in closer (T) or move
out farther (W).
Note: If the zoom option is not practical the
user should physically move in order to
capture the frame of the shot.
b. Firmly press the RECORD button.
c. When the camera records, three
specific (1, 2, 3) areas of the camera
notify the user that the image is
being recorded (See image to the
right).
To Review the Images
Move the PLAY/STILL/MOVIE
selector to the PLAY setting.
Toggle the MENU button ◄►to
navigate through the image files.
 Loading...


