EN - 7
• 15° to the right.
• 0° no tilt.
• 15° to the left.
5.11 HEADLAMP SWITCHES
Bring the switch to position I to turn
on the headlamps (g. 9.E).
• switch in position I.
6. USING THE MACHINE
IMPORTANT The safety regulations to
follow during machine use are described in
chap. 2. Strictly comply with these instructions
to avoid serious risks or hazards.
6.1 PREPARATION
Before using the machine check for fuel and the
oil level. For refuelling and oil top-up methods
and precautionsent (seepar. 7.2 and par. 7.3).
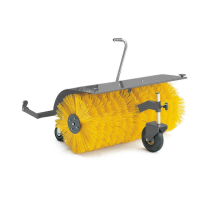
The small wheels are used for
adjusting the distance of the brush
from the ground to safeguard it.
Before using the machine, adjust
the small wheels as follows:
3. Release the lock (g. 11.A).
4. Extract the plug (g. 11.B).
5. Lift/lower the small wheels (g. 11.C)
6. Re-insert the plug.
7. Lock the lock.
8. Loosen the side knob (g. 11.D).
9. Rotate the upper knob (g. 11.E)
in clockwise / anticlockwise to
lift / lower the small wheels.
10. Fix the side knob (g. 11.D)
6.2 SAFETY CHECKS
Ensure you have understood the contents
before proceeding. Run the following safety
checks and check the results correspond
to those outlined in the tables.
Always carry out the
safety checks before use.
6.2.1
Result
Fuel lines and
connections.
No leaks.
Electrical cables. All insulation intact.
No mechanical damage.
Oil lines No leaks.
No damage.
Test driving No abnormal vibrations.
No abnormal sound.
6.2.2 Traction and brush operation testing
Action Result
Start the machine
(par. 6.3)
The wheels and brush
must stay still.
Traction operation test
Press the forward
control (g. 9.D).
The wheels should move
the machine forward.
Release the forward
control (g. 9.D)
The wheels stop.
Brush operation test
Press the brush
control (g. 9.C)
The brush starts to rotate.
Release the brush control. The brush stops.
Brush and wheel operation test
Keeping the brush
control pressed
(g. 9.C), press the
forward control (g. 9.D).
The brush should rotate
and the wheels move
the machine forward.
Release the forward
control (g. 9.D).
The wheels rotate and the
brush continues to rotate.
Release the brush
control (g. 9.C)
The brush stops.
If any of the results fails to match
the indications provided in the following
table, do not use the machine! Take
it to a service centre to be checked
and repaired if necessary.
6.3
1. Turn the ignition switch ON (g. 10.A).
6.3.1 Cold start
1. Turn the throttle to full on (g. 10.B).
2. Engage the choke (g. 10.C).
3. Press the primer bulb (g. 10.D) twice or three
times. Make sure that the hole is covered by
your nger when pressing the bulb.
4. Start, using the electric control (par.
6.3.4) or manual control (par. 6.3.3).
 Loading...