6.5 LED on Charger
The LED indicates the operating status of the
charger.
If the LED glows green, the battery is being
charged.
► If the LED flashes red: Rectify the malfunction.
Malfunction in charger.
7 Assembling the Trimmer
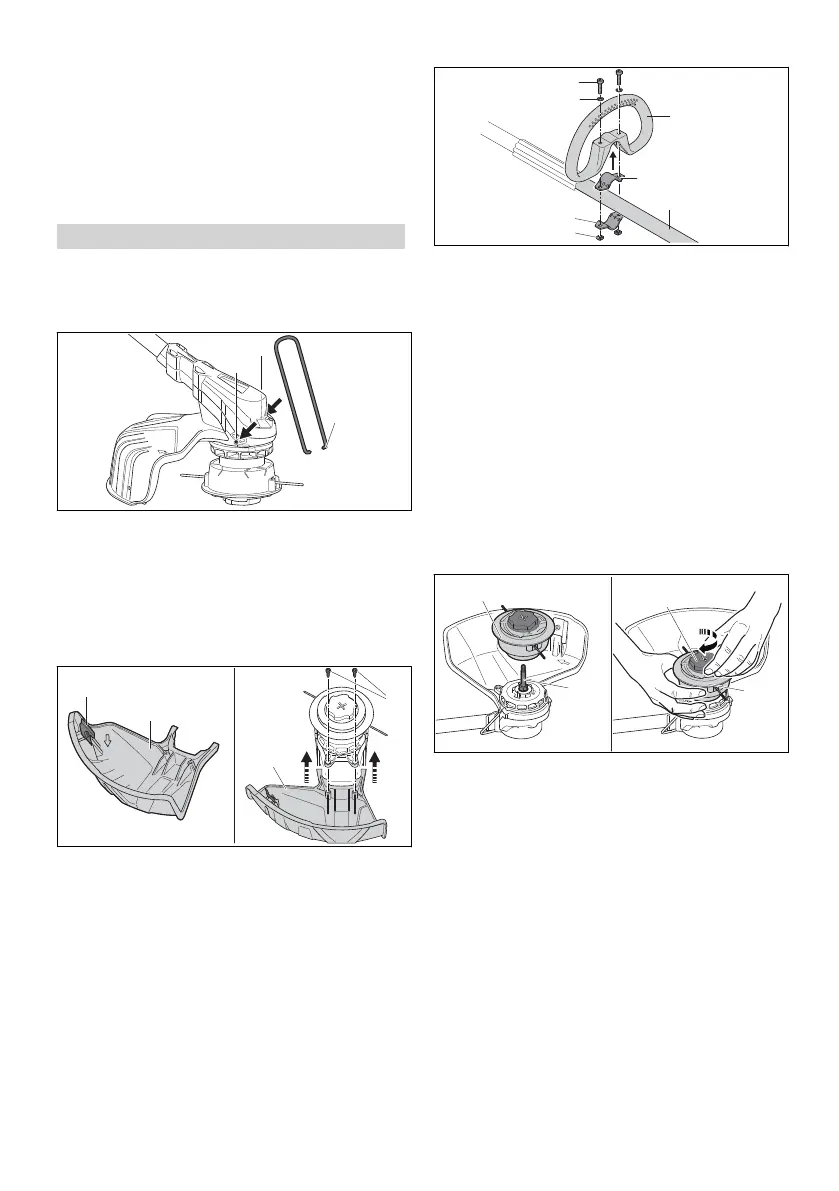
7.1 Mounting the bump guard
► Switch off the brushcutter and remove the bat‐
tery.
► Insert the ends of the bump guard (1) into the
holes (2) in the housing.
The bump guard (1) need not be removed.
7.2 Mounting the guard
► Switch off the brushcutter and remove the bat‐
tery.
The line limiting blade (1) has already been
installed in the guard (2) and must not be
removed.
► Push the guard (2) into the guides on the
housing until it hits the limit stop.
The guard (2) is flush with the housing.
► Insert and tighten down the screws (3).
The guard (2) must not be removed.
7.3 Mounting the Loop Handle
► Switch off the brushcutter and remove the bat‐
tery.
► Fit the clamp (4) in the loop handle (3).
► Place the loop handle (3) with clamp (4) on the
shaft (5).
► Fit the washers (2) on the screws (1).
► Press the clamp (6) against the shaft (5).
► Insert the screws (1) through holes in the loop
handle (3) and clamps (4 and 6).
► Fit and tighten down the nuts (7) firmly.
7.4 Mounting and Removing the
Mowing Head
7.4.1 AutoCut C 6-2 mowing head
Mounting the Mowing Head
► Switch off the brushcutter and remove the bat‐
tery.
► Position the mowing head (1) on the shaft (2).
► Hold the mowing head (1) with your hand.
► Manually rotate the cap (3) clockwise and
tighten it.
Removing the Mowing Head
► Switch off the brushcutter and remove the bat‐
tery.
► Hold the mowing head with your hand.
► Manually rotate the cap counterclockwise until
the mowing head can be removed.
7.4.2 PolyCut 6-2 mowing head
Mounting the Mowing Head
► Switch off the brushcutter and remove the bat‐
tery.
English 7 Assembling the Trimmer
12 0458-832-0121-B. VA0.B21.
 Loading...