NOTICE
■ This notice refers to risks which can result in
damage to property.
► Damage to property can be avoided by tak‐
ing the precautions mentioned.
2.3 Symbols in Text
This symbol refers to a chapter in this
instruction manual.
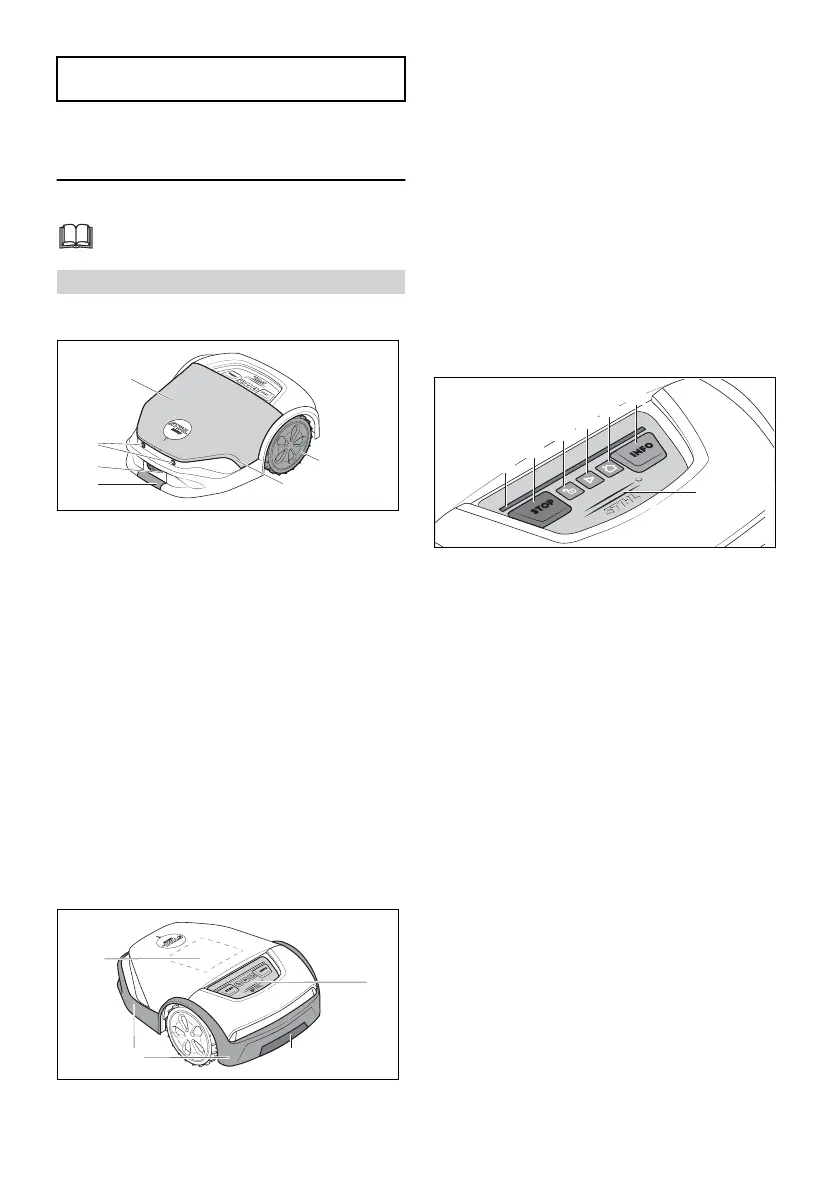
3 Overview
3.1 Robot mower
1 Front grip surface
Lift and transport the robot mower by simulta‐
neously gripping it at the front and rear grip
surface.
2 Charging contacts
The charging contacts connect the robot
mower with the docking station.
3 Ultrasound sensors
The ultrasound sensors detect obstacles.
4 Hood
The hood is spring-mounted and features a
bump sensor to detect obstacles on the mow‐
ing area.
5 Drive wheels
The drive wheels drive the robot mower.
6 Light strip
The light strip shows the robot mower's sta‐
tus.
7 Rear grip surface
Lift and transport the robot mower by simulta‐
neously gripping it at the front and rear grip
surface.
8 Protective strip
The protective strip protects the user against
ejected objects and contact with the blades.
9 Matrix display
The matrix display shows the robot mower's
status.
10 Control panel
The control panel features pushbuttons and a
rain sensor.
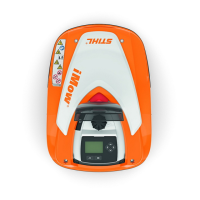
3.2 Control panel
1 Light strip
The light strip shows the robot mower's status
and signals which key combination to press
for a certain action.
2 STOP pushbutton
The pushbutton stops the robot mower and
mowing unit. The pushbutton also activates
the device lock.
3 LOCK pushbutton
This pushbutton unlocks the robot mower in
conjunction with a displayed key combination.
4 START pushbutton
This pushbutton starts mowing operations.
5 HOME pushbutton
This pushbutton makes the robot mower
return to the docking station or cancels the
current mowing job if the robot mower is in
the docking station.
6 INFO pushbutton
This pushbutton starts voice output about the
current status of the robot mower.
7 Rain sensor
The rain sensor reacts to moisture. Depend‐
ing on the setting, the robot mower can take
weather conditions into account for the mow‐
ing plan.
3 Overview English
0458-012-0101-A 3
 Loading...