0458-687-0121-A
11
English
6 Charging the Battery, LEDs
6.1 Charging the Battery
The charging time depends on several factors, e.g.
temperature of the battery or the ambient temperature. The
actual charging time may differ from the specified charging
time. For specified charging times see
www.stihl.com/charging-times.
► Recharge the battery fully as described in the instruction
manual for the STIHL AL 101, 300, 500 chargers.
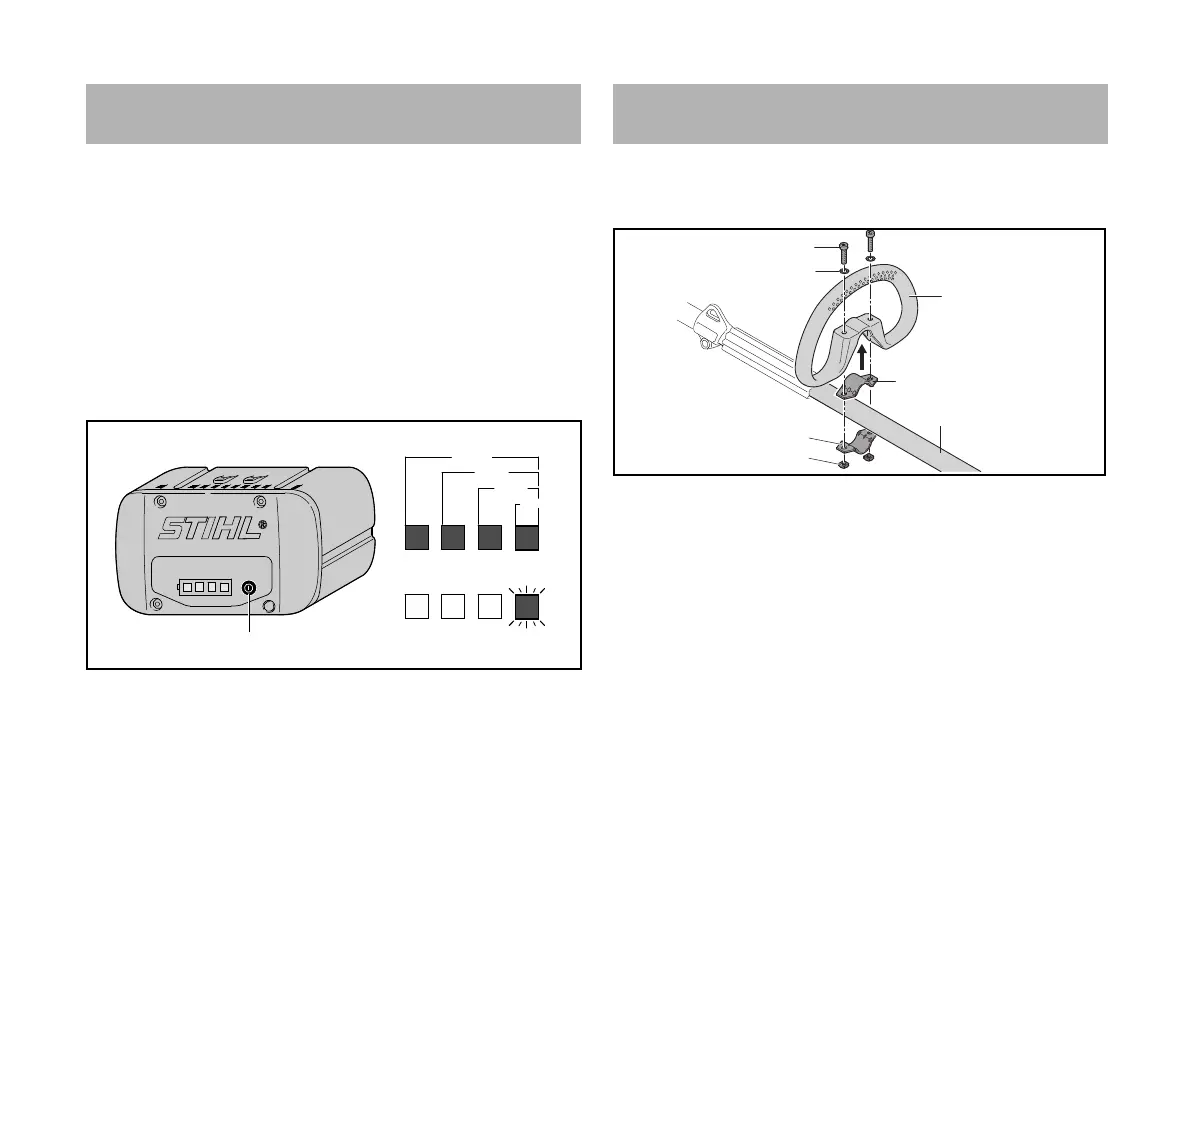
6.2 Displaying State of Charge
► Press the button (1).
The LEDs (5) glow green for about 5 seconds and indicate
the state of charge.
► If the LED on the right flashes green: Charge the battery.
6.3 LEDs on Battery
The LEDs can show the state of charge or malfunctions. The
LEDs can glow or flash green or red.
The state of charge is indicated when the LEDs glow or flash
green.
► If the LEDs glow or flash red: Troubleshooting, @ 18.1.
Malfunction in trimmer or battery.
7.1 Mounting the Loop Handle
► Switch off the KombiEngine and remove the battery.
► Fit the clamp (4) in the loop handle (3).
► Place the loop handle (3) with clamp (4) on the shaft (5).
► Fit the washers (2) on the screws (1).
► Press the clamp (6) against the shaft (5).
► Insert the screws (1) through holes in the loop handle (3)
and clamps (4 and 6).
► Fit and tighten down the nuts (7) firmly.
The loop handle must not be removed again.
7.2 Mounting the Loop Handle with Barrier Bar
► Switch off the KombiEngine and remove the battery.
6 Charging the Battery, LEDs
1
0000-GXX-1248-A0
20-40%
40-60%
60-80%
80-100%
0-20%
7 Assembling the KombiMotor
5
4
6
7
1
2
3
0000-GXX-3083-A2
 Loading...