RMA 510
English
25
The type of blade initially supplied with
the mower depends on the market.
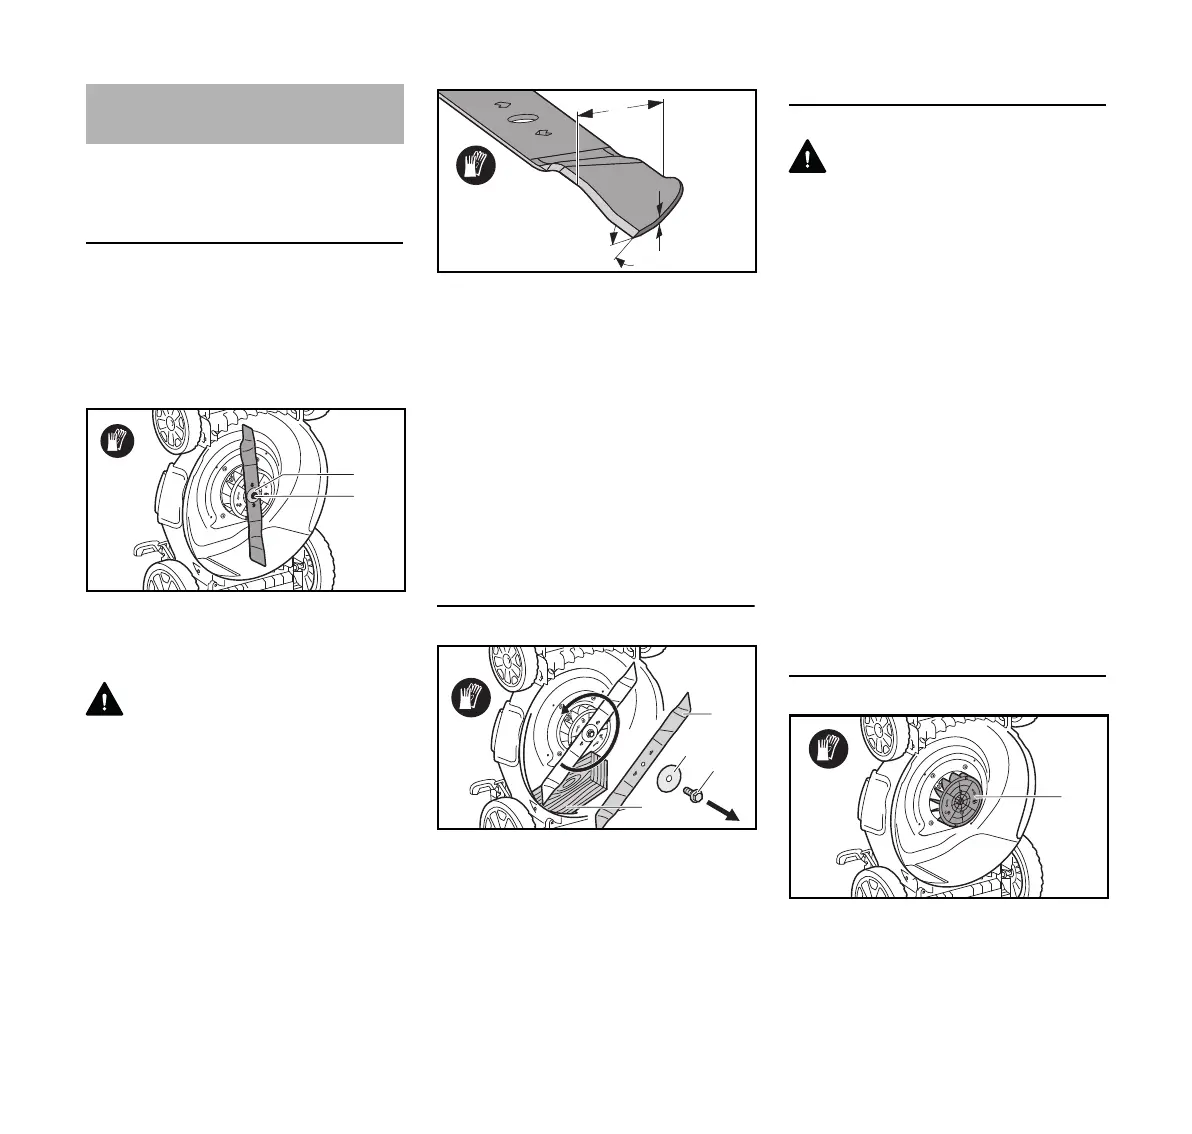
Checking the Blade
N Put the mower in the cleaning
position.
N Clean the cutting blade and inspect
it for damage (nicks or cracks) and
wear, replace if necessary.
Always check the mounting screw (1)
and washer (2) when replacing the
cutting blade.
WARNING
To reduce the risk of blade detachment
and resulting injury, always replace a
damaged mounting screw and washer.
N Use a caliper gauge to check blade
thickness at a minimum of 5
different points.
N Place a ruler on the front edge of the
blade and measure how far it has
been filed back.
Blade thickness must not be less than
a = 0.118 in. at any point.
Angle ‘b’ must be 30°.
Blade width at its narrowest point must
be at least c = 1.772 in..
Removing the Cutting Blade
N Use a suitable piece of wood (2) to
block the cutting blade (1).
N Take out the mounting screw (3)
and remove the washer (4).
N Check the blade mounting screw (3)
and washer (4) for damage.
N Remove the cutting blade (1).
Sharpening Instructions
WARNING
STIHL recommends that you have the
blade resharpened by your STIHL
servicing dealer. An incorrectly ground
cutting blade (wrong sharpening angle,
out-of-balance) can cause operational
problems and could cause the blade to
break or fracture, resulting in severe
personal injury or death to the operator
or bystanders.
N Cool the cutting blade during
resharpening, e.g. with water.
N Sharpen the cutting blade uniformly
to avoid out-of-balance and
vibrations.
N Sharpen the cutting edges to an
angle of 30°.
N Use fine emery paper to remove any
burrs from the cutting edges after
resharpening.
Installing the Cutting Blade
N Clean mounting faces and
thread (1).
Sharpening Instructions
0000-GXX-2659-A0
2
1
0000-GXX-2660-A0
b
a
c
0000-GXX-2661-A0
2
4
3
1
0000-GXX-2662-A0
1

 Loading...