400 Series
400 Series
Installation Information
2-3
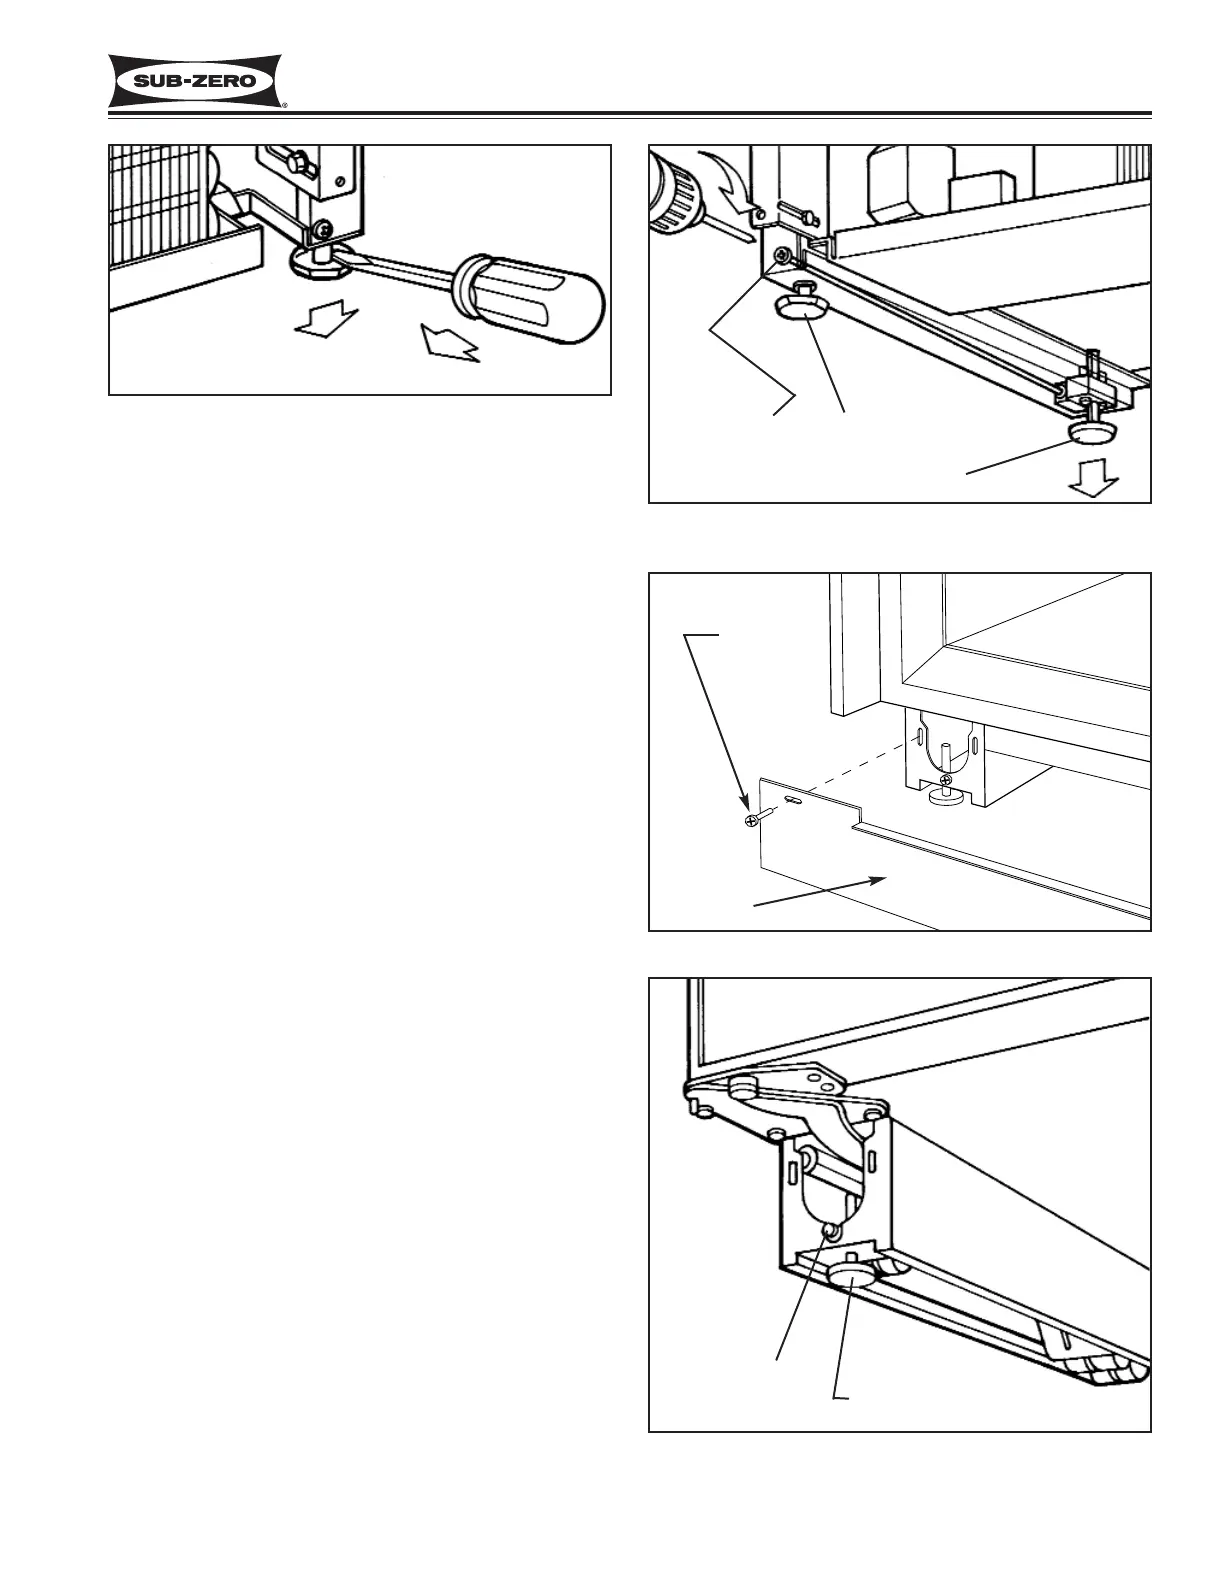
Figure 2-6. Model 427, 427R
Adjusting Rear Leveling Leg
Figure 2-7. Model 430 Kickplate Removal
Figure 2-8. Model 430
Adjusting Rear Levelers
Figure 2-5. Model 427, 427R, 430
Adjusting Front Leveling Legs (427 Shown)
a standard screwdriver blade and place it in the foot of
the front leg. (See Figure 2-5)
The rear levelers are adjusted from the front of the
base by turning the Phillips head adjusting screw. Turn
the screw clockwise to raise the rear or counterclock-
wise to lower it. (See Figure 2-6) The long adjusting
screw reaches all the way to the rear leveler assembly.
NOTE: The rear leveling legs will only move 1/16” for
every 18 revolutions on the Phillips head screw. Do not
over torque. Use the lowest torque setting on any
power screwdriver. Do not turn rear leveling legs by
hand. Damage will occur if you turn these legs by
hand.
Unit Leveling (Model 430)
NOTE: The unit must be in the correct installation posi-
tion before leveling (See WARNING on previous page).
The kickplate must be removed before leveling. (See
Figure 2-7) If the unit has been anchored to the cabi-
nets, the anchor screws must be extracted before level-
ing, then reinstalled after leveling.
To level the unit, turn the front leveling legs counter-
clockwise to raise the front or clockwise to lower it. To
assist in turning the front leveling legs up or down, use
a standard screwdriver blade and place it in the foot of
the front leg. (See Figure 2-5 & 2-8)
The rear levelers are adjusted from the front of the
base, using a 5/16” socket wrench. (The long adjusting
screw just above the front leveler leg reaches all the
way to the rear leveler/roller assembly.) Turn the
adjusting screw clockwise to raise the rear or counter-
clockwise to lower it. (See Figure 2-8)
NOTE: Level is best checked at the top and side main-
frame extrusion(s).
Kickplate
Screw
Rear Leveler
Adjusting Screw
Front Leveling Leg
Rear Leveler
Adjusting Screw
Front Leveling Leg
Rear Leveling Leg
 Loading...