7-15
To adjust the drive chain, follow
the procedure below:
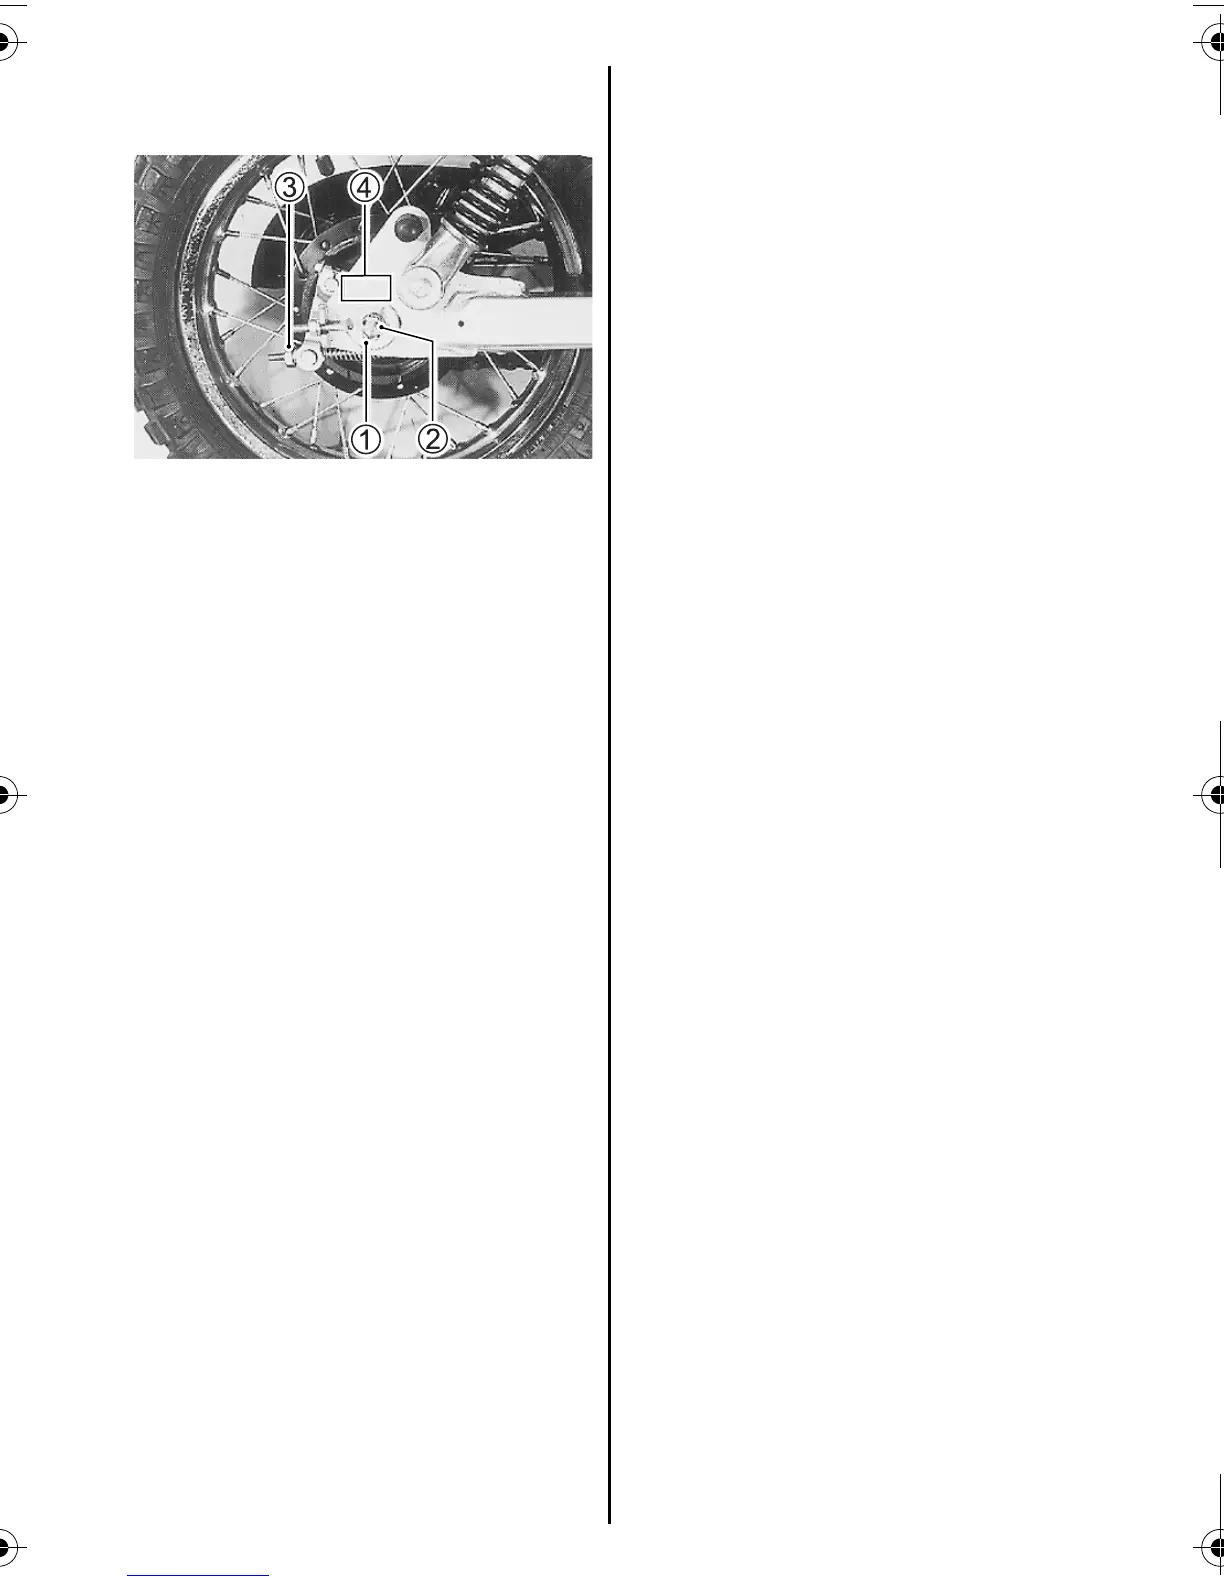
1. Remove the cotter pin 1 and
loosen the axle nut 2.
2. Turn the right and left adjuster
nuts 3 until the chain has 20
–
25 mm (0.8 – 1.0 in) of slack
halfway between the engine
sprocket and rear sprocket.
3. At the same time that the
chain is being adjusted, the
rear sprocket must be kept in
perfect alignment with the front
sprocket. To assist you in per-
forming this procedure, there
are reference marks 4 on the
swing arm and each chain
adjuster which are to be
aligned with each other and to
be used as a reference from
one side to the other.
4. Tighten the axle nut 2
securely. Replace the cotter
pin with a new one.
5. Recheck the chain slack after
tightening and readjust if nec-
essary.
6. Tighten adjusting nuts.
7. Check and, as necessary,
readjust the brake pedal play
as outlined in page 50. This is
because adjusting the drive
chain as above could alter the
pedal play.
Rear axle nut tightening torque:
35 N
·m (3.5 kgf-m, 25.3 lb-ft)
JR50_03A.book Page 15 Tuesday, April 12, 2005 5:06 PM

 Loading...