20
Menu Operation
Note: Not all models have OK button on the set.
Software update:
Note: Do not switch off or unplug the TV until the upgrade
is completed.
Press or on the remote control, select Settings >
System > Software update and press OK/► to enter.
You have the following options to update the software.
- By USB: Enables you to install a new version software
from a USB stick. Insert the USB stick in which a new
version software is stored into a USB socket of the set.
Select By USB and press OK/► to enter. Follow the
on-screen instructions to complete the process.
- By network: Enables you to download and install the
latest version software from the Internet. Make sure to
setupawiredorwirelessnetworkconnectionrstthen
select By network and press OK/► to enter. Follow the
on-screen instructions to complete the process.
Note: Keep successful network connection during
upgrade.
- By channel: Enables you to install the latest version
software if available from the broadcast. Select By
channel and press OK/► to enter. Follow the on-
screen instructions to complete the process.
There is also information about the TV such as Current
version and Product name, etc.
Location: Use ▲/▼ to select Home, Shop or Shop with
demo.
HbbTV mode: Use ▲/▼ to select On to turn on HbbTV
function.
Note: The option may not be available for certain
modes.
Auto source: Use ▲/▼ to select On to turn on Auto
source function.
Cookies: Use ▲/▼ to select On to turn on HbbTV
cookies.
Note: Cookies is available when HbbTV mode is set
to On.
Advanced settins: Press OK/► to enter, please see
the introducton of T-Link on page 13.
Sports mode: Please see the introducton of Sports
mode on page 13.
Reset shop: Allows you to reset the TV to factory
default settings.
1. Press System > Reset shop and press OK/► to
enter.
2. Use the numeric buttons to enter the password.
3. Press ◄/► to select OK and press OKtoconrm.
4. The Initial setup menu appears. Follow the
instructions in the section Initial setup.
LED Indicator: Allows you to select the LED indicator
ontheTVfrontpaneltoashornot.
1. Press Settings > System > LED Indicator and
press OK/► to enter.
2. Press ▲/▼ to select Flashing or Normal and press
OK toconrm.
3. Press EXIT or to close the menu.
Chapter 5 Advanced Functions
Using E-Manual (Help)
YoucanndinstructionsforyourTV'sfeaturesfromthe
e-manual in your TV. To view it, press on the remote
control to open Homepage, use ◄/► to switch to TV
page, select Settings > System > E-Manual and press
OK to view the details.
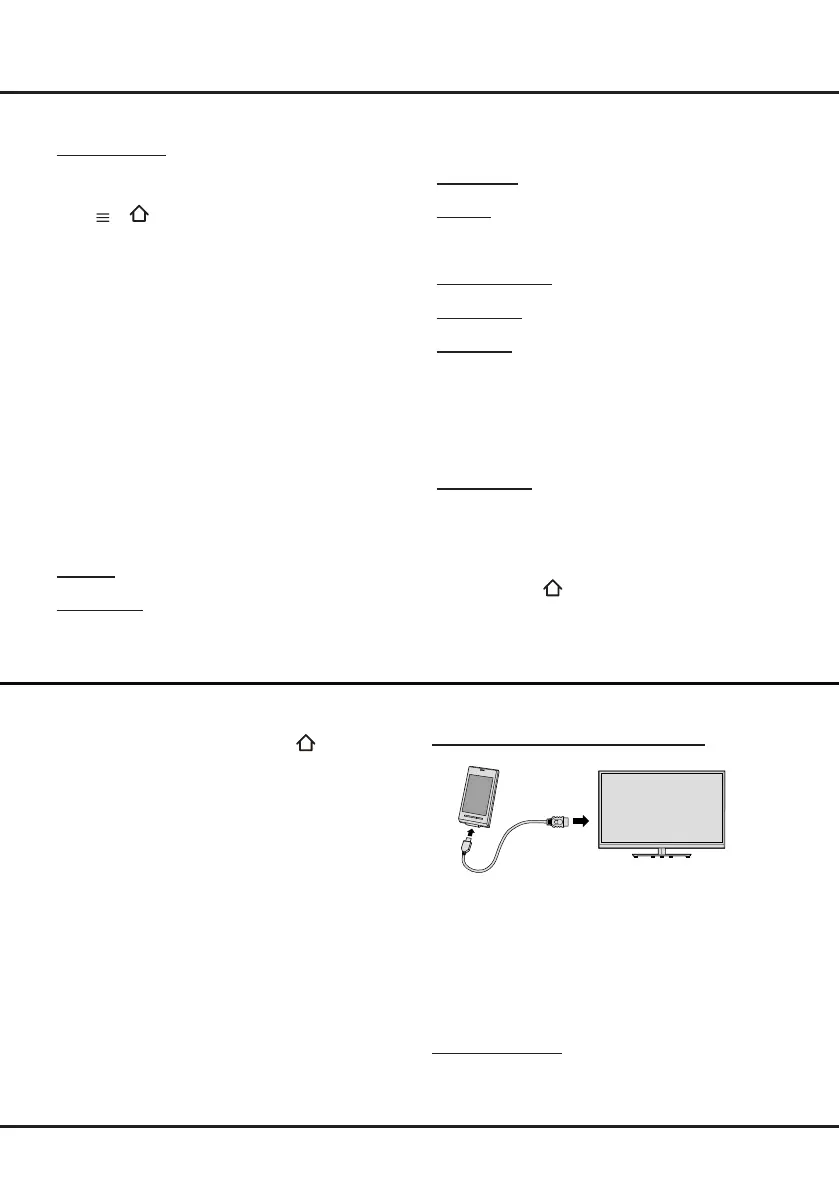
Using MHL Function (Mobile
High-denition Link)
You can use the MHL functions by connecting the TV
HDMI 1 (MHL) port and the USB port of a mobile device
with an MHL cable. Features of the MHL functions
include:
•ChargethemobiledevicefromtheTV.
•Two-wayremoteoperationbetweenTVandmobile
device.
•Video/Audiocontentsplayfromthemobiledevice,and
shown on the TV.
Notes:
• These functions may not be available depending on
the connected equipment.
• If there is no more battery life left in the connected
device, charging will not start.
Connecting MHL-compatible Device
•ConnecttheMHL-compatibledevicetotheHDMI1
(MHL) port on theTV, using an MHL cable (not supplied),
charging starts automatically.
•WhenconnectingMHL-compatibledevicetoHDMI1
(MHL) port on the TV, switch TV source to HDMI 1.
Note: Do not connect the MHL-compatible device to any
ports other than HDMI 1(MHL) port.
When using MHL
•InteroperabilitywithMHLdevicesofother
manufacturers is not guaranteed. Therefore, TCL does
not provide any guarantee against operational failure
 Loading...