Do you have a question about the Technics SL-1210MK7 and is the answer not in the manual?
Describes the coreless direct drive motor's benefits for torque and reliability.
Details the tone arm's precision bearings for improved tracking and reduced skating.
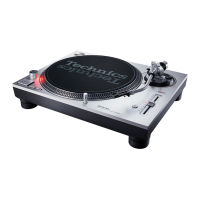
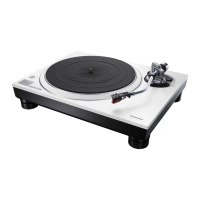
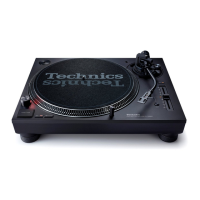
Explains the unit's design for sound quality and vibration resistance.
Lists user-adjustable functions like torque, brake speed, and reverse playback.
Safety warnings for the unit itself, including avoiding rain, liquids, and unauthorized repairs.
Safety precautions for the AC mains lead, covering voltage, plug insertion, and handling.
Cautions regarding naked flames, radio interference, moderate climates, and heat.
Placement advice to ensure stability, ventilation, and avoid environmental hazards.
Instructions on how to safely replace the fuse in the AC mains plug.
Guidance on the proper disposal of electrical and electronic equipment in the EU.
Identifies turntable platter, slipmat, and slip sheet accessories.
Identifies the dust cover accessory.
Identifies head shell, balance weight, and cartridge mounting hardware.
Identifies PHONO audio cables, earth lead, and AC power cord.
Identifies and locates front panel controls and indicators.
Identifies key components of the tone arm.
Identifies the input/output terminals on the rear of the unit.
Step-by-step guide for attaching a cartridge to the head shell.
Instructions for fitting the head shell with the cartridge into the tone arm.
Instructions for placing the turntable, slipmat, and slip sheet.
Guides on removing the magnet cover from the turntable.
Instructions for correctly seating the turntable onto the centre spindle.
Details on placing the slipmat and slip sheet onto the turntable.
Instructions for attaching the balance weight to the tone arm.
Procedure for safely removing the turntable.
Guide for connecting PHONO audio and ground cables to amplifier or mixer.
Instructions for connecting the power cord to the unit and outlet.
Wiring diagram for connecting to a standard amplifier.
Wiring diagram for connecting to a DJ mixer.
Advice on placing the unit on a stable, level surface.
Procedure for leveling the unit using adjustable insulators.
Instructions for attaching and removing the dust cover.
General installation guidelines and environmental considerations.
Explanation of condensation and how to prevent unit damage.
Steps to balance the tone arm horizontally using the balance weight.
How to set the stylus pressure using the control.
Finalizing stylus pressure adjustment with the balance weight.
How to adjust the anti-skating control based on stylus pressure.
Procedure for adjusting the tone arm height relative to the record.
Steps to check and adjust the armlift height.
Configuration for LED colour, reverse playback, 78 RPM, torque, and brake.
Steps to power on the unit and initiate turntable rotation.
Using the START-STOP button to control turntable operation.
How to reset the pitch control to its preset value.
Guiding the tone arm over the record for playback.
Procedures for starting, stopping, and stylus illumination.
Specific steps for playing 45 rpm EP and 78 rpm SP records.
How to turn off the pitch control LED and reset pitch.
Choosing between ±8% and ±16% pitch adjustment ranges.
Using the PITCH ADJ slider for fine pitch adjustments.
Using strobe mirrors to verify pitch accuracy.
Returning the pitch to its factory preset value.
Instructions for cleaning the stylus, records, and head shell terminals.
Instructions for safely packing and moving the turntable.
Information on the disposal of old equipment.
Solutions for when the unit does not power on or has audio issues.
Checks for incorrect stereo connections.
Identifying and resolving humming noises.
Steps to resolve issues indicated by blinking speed select buttons.
Overview of general technical specifications like power, dimensions, and mass.
Technical details related to the turntable platter, motor, and speeds.
Technical details pertaining to the tone arm, tracking, and weight.