23
User’s Guide
English
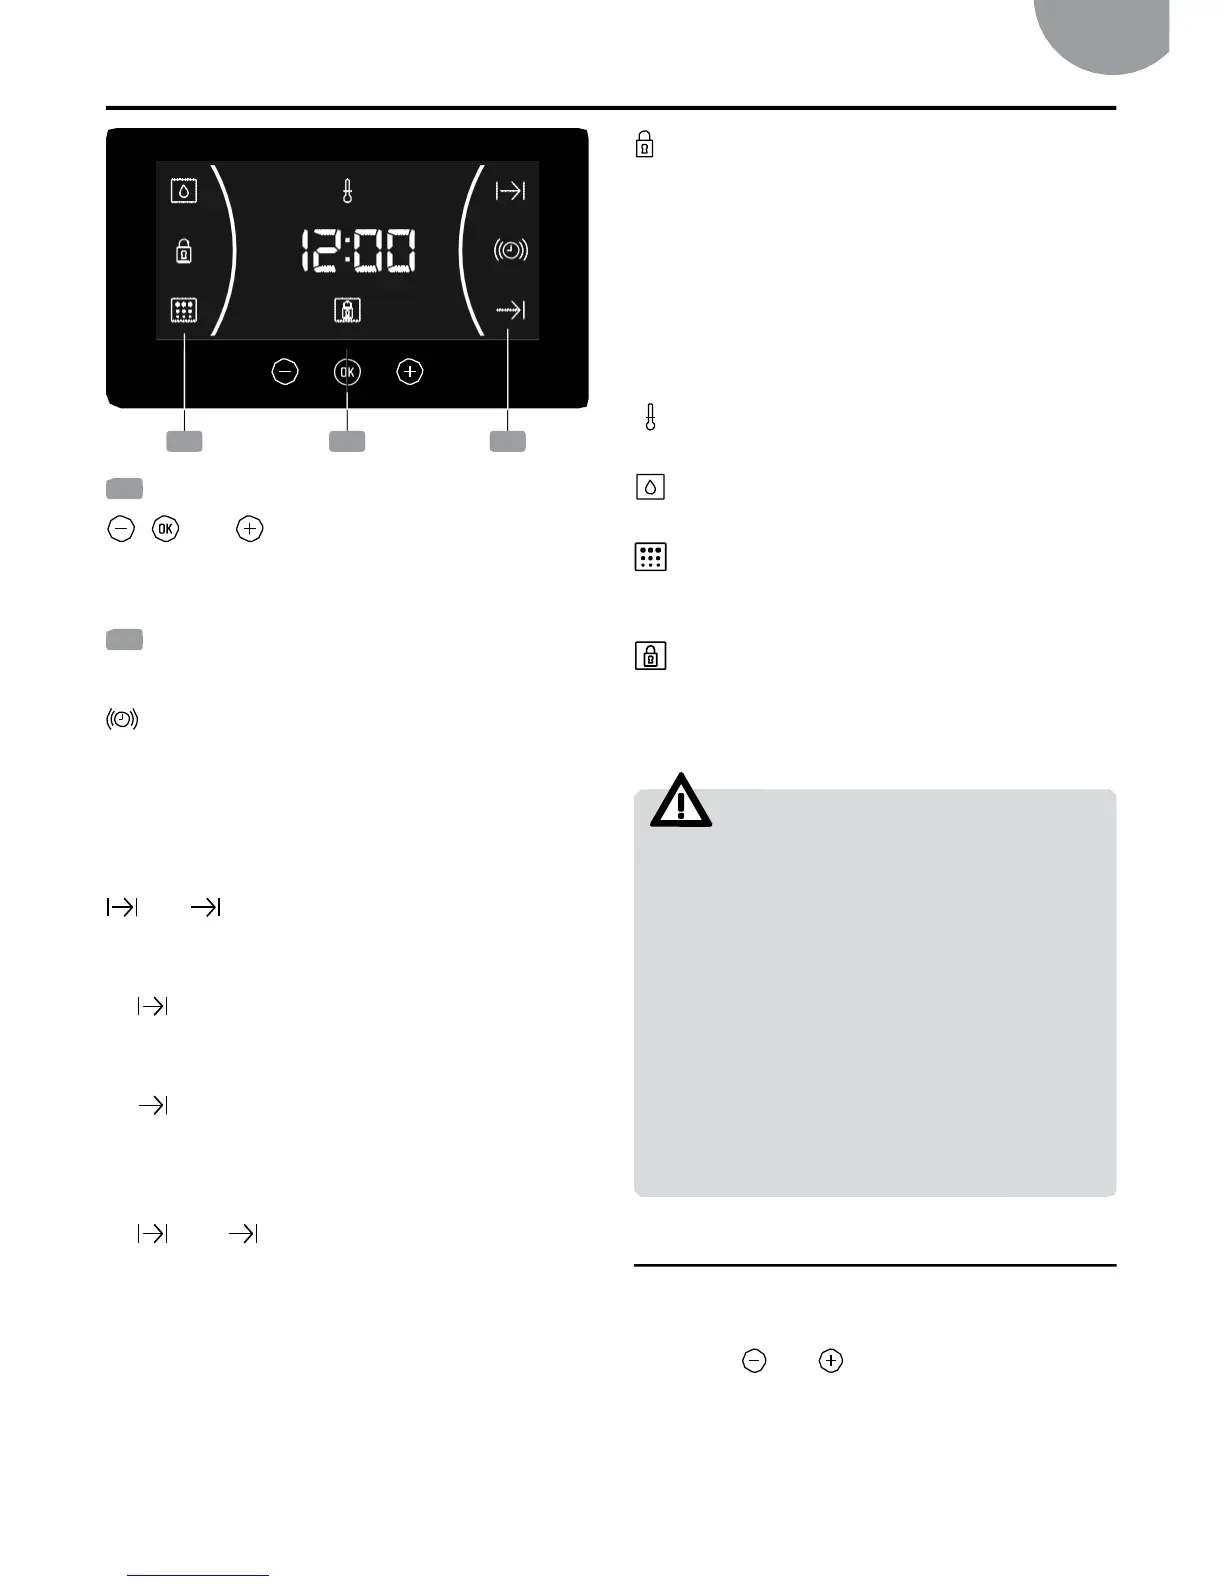
Electronic clock/timer description
CLoCK/TIMER LoCK: Indicates that the
touch keys for the clock/timer are locked,
preventing modifications by small children.
Indicates that the touch keys for the clock/
timer are locked, preventing modifications by
small children.
1
KEYs
and : Enable you to programme the
,
electronic clock/timer functions.
2
sYMBoLs
Clock settings
aVIsaDoR: Lights up when the clock/
timer is selected. Generates an acoustic
signal when the time is up. The oven does
not turn off at the end of the timer period.
This function can also be used while the
oven is cooking.
and PRoGRaMMING: Light up to indi-
cate that the oven is programmed (cooking
time, stop time or total).
Cooking Time: This function allows you
to programme the cooking time, after which
the oven will turn off automatically.
Cooking stop Time: This setting al-
lows you to programme the time for cook-
ing to stop, after which the oven will turn off
automatically.
•
•
•
and Cooking Time and Cooking
stop Time: This setting allows you to pro-
gramme the cooking time and cooking stop
time. The oven switches on automatically
at the set time and operates for the select-
ed cooking time (Cooking Time). It then
switches off automatically at the indicated
time (Cooking Stop Time).
other functions
HEaTING: Indicates that the oven is trans-
mitting heat to the food.
HYDRoCLEaN: Lights up while the Teka
Hydroclean
®
function is in progress.
PYRoLYsIs: For pyrolytic models only.
Lights up while the Pyrolytic function is in
progress.
DooR LoCK: For pyrolytic
models only. Indicates that the door is
locked, either manually or automatically
while the pyrolytic function is in progress.
WaRNING
The sensitivity of the touch keys adapts
continually to environmental conditions.
Make sure the surface of the control panel is
clean and free of obstacles when plugging
in the oven.
If the clock does not respond correctly
when you touch the keys, unplug the oven
for a few seconds and then plug it in again.
Doing this causes the sensors to adjust au-
tomatically so that they will react once more
to fingertip control.
sETTING THE TIME
• When you plug in the oven, you will see the
clock flashing 12:00.
• Touch or to adjust the hours and
then the minutes. You will hear a double
beep confirming the time is set.
2 1 2
 Loading...