Note: Read the cleaning procedure before disassembling the instrument for cleaning.
Required equipment
Most assemblies in this instrument can be removed with a T
-10 or T8 Torx® screwdriver tip.
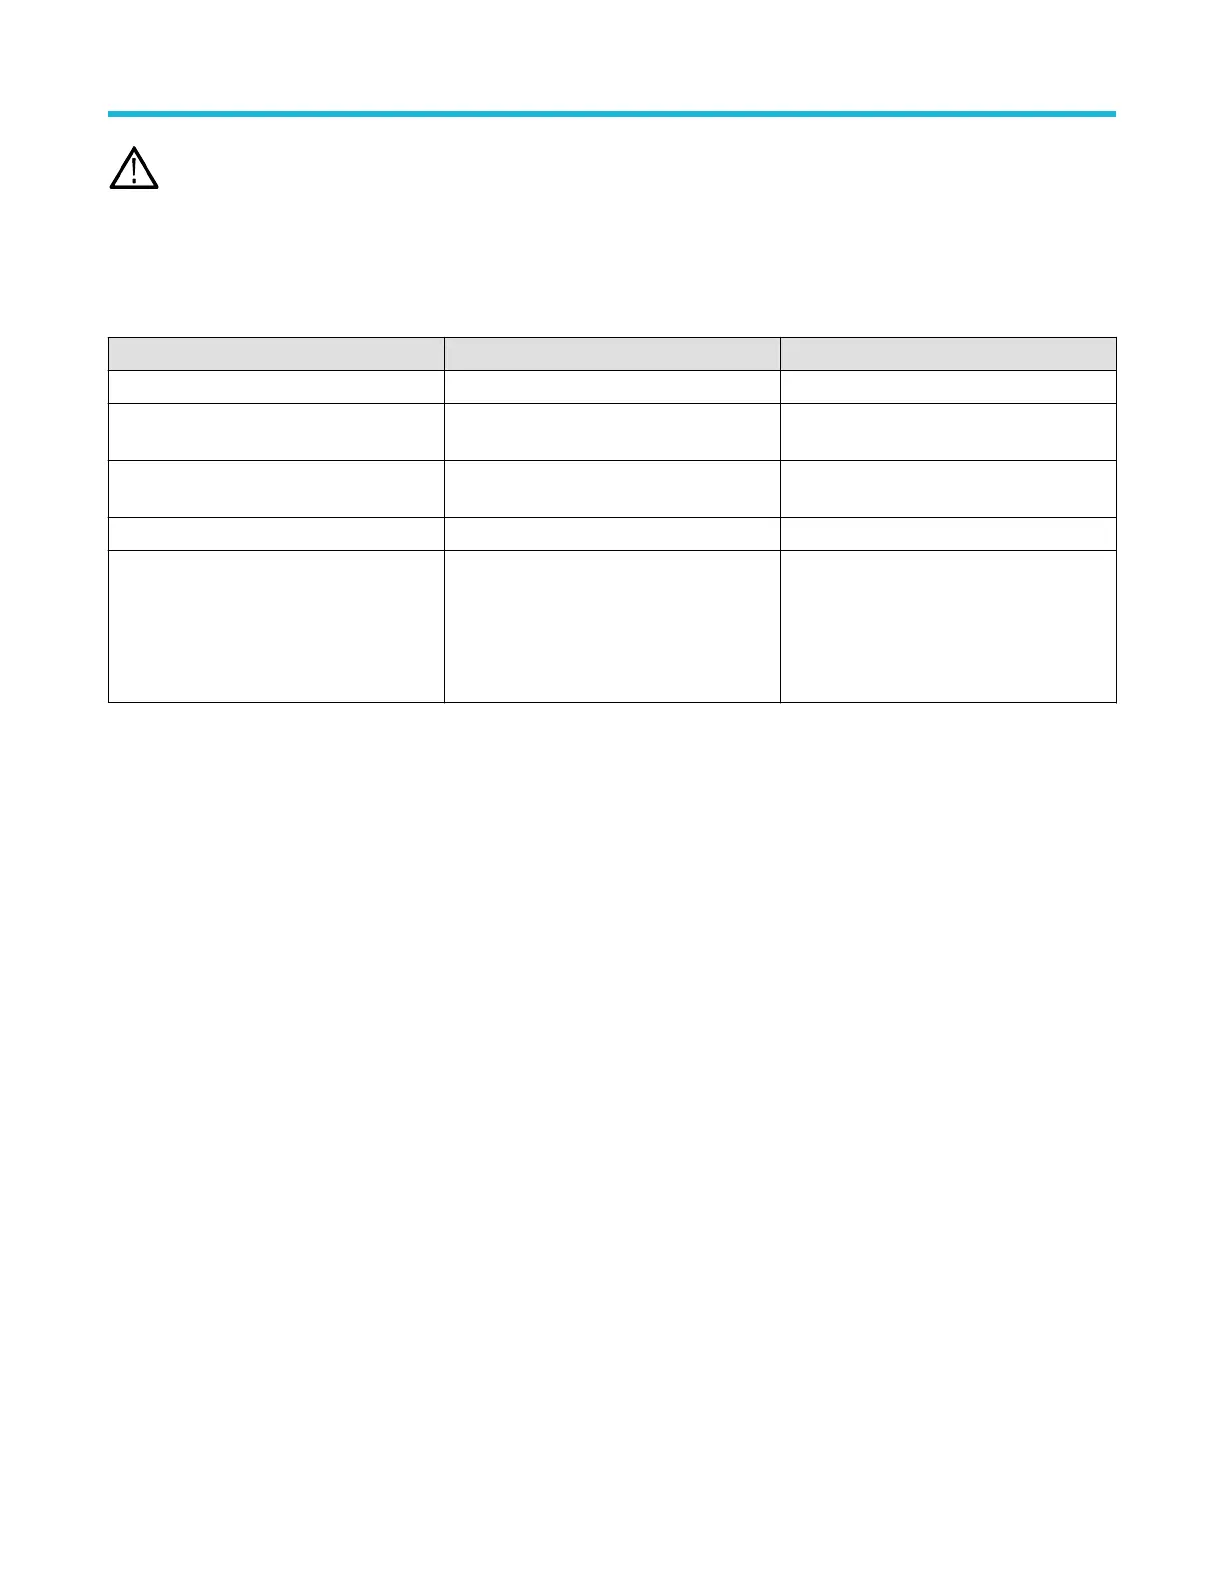
Table 3: Required equipment for removal and replacement
Item No. Name Description
1 Screwdriver handle Accepts Torx-driver bits
2 T-10 Torx tip Used for removing instrument screws. Torx-
driver bit for T
-10 size screw heads
3 T-8 Torx tip Used for removing instrument screws. Torx-
driver bit for T-8 size screw heads
4 9/16 inch open-end wrench Used to remove nut posts
5 Proper antistatic work environment To prevent electrostatic damage to
components whenever you work on
the instrument, wear properly-grounded
electrostatic prevention wrist and foot straps,
and work in a tested antistatic environment
on an antistatic mat.
Removal/Replacement procedures
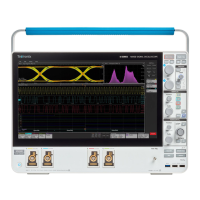
Removal of the front-panel knobs
The following procedure describes the removal and replacement of the front-panel knob assemblies, There are eight knob assemblies that
can be removed from the front case.
Prerequisite:
•
To prevent electrostatic damage to components whenever you work on the instrument, wear properly-grounded electrostatic prevention
wrist and foot straps, and work in a tested antistatic environment on an antistatic mat.
Procedure:
1. To remove a knob assembly, pull the knob straight out of the front panel. Finger strength is adequate to pull knobs. Do not use pliers.
2. To reinstall a knob, align the knob with the shaft indent and push the knob onto the shaft. Turn the knob to make sure there is a smooth
rotation.
Removal of the feets
The following procedure describes the removal and replacement of the feets, There are two feets that can be removed from the bottom of
the instrument.
Prerequisite:
• To prevent electrostatic damage to components whenever you work on the instrument, wear properly-grounded electrostatic prevention
wrist and foot straps, and work in a tested antistatic environment on an antistatic mat.
Procedure:
1. Remove all cables and the power cord from the rear panel.
2. Set the instrument on its back side so the bottom is facing you.
3. Flip open both feet assemblies.
Maintenance
4 Series MSO (MSO44, MSO46) Service 18

 Loading...