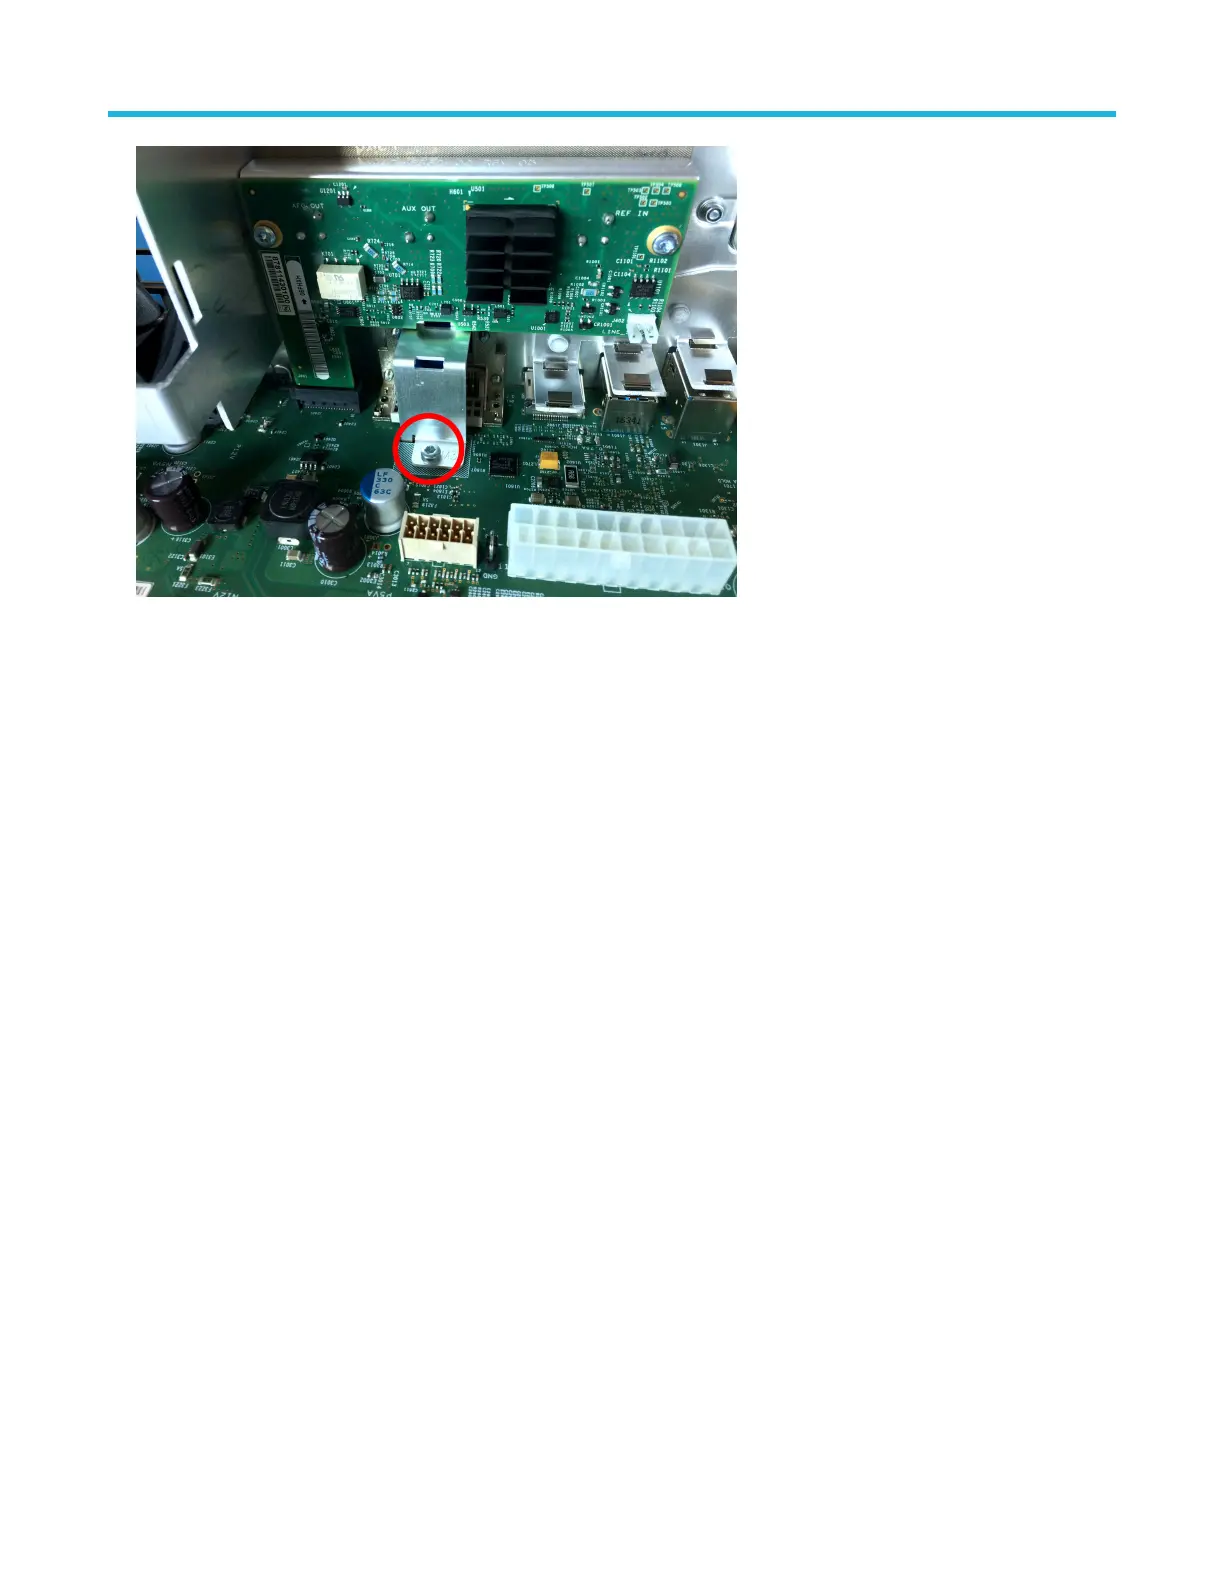
2. Lift the AFG riser assembly straight up from the carrier interface assembly.
3. To reinstall, reverse the steps. Tighten the T-10 Torx screw to 0.65 N·m when reinstalling.
Remove handle hub assembly
Use this procedure to remove and replace the handle hubs from the rear chassis. You will need to remove the left side hub if you want to
remove the main fan.
Before you begin
• To prevent electrostatic damage to components whenever you work on the instrument, wear properly-grounded electrostatic prevention
wrist and foot straps, and work in a tested antistatic environment on an antistatic mat.
• Remove rear chassis assembly on page 20
• Remove the baffle bracket on page 22
Procedure
1. Remove the left and right handle hub assemblies from the inside walls of the chassis using a T-10 Torx bit screwdriver. Two screws will
be removed for each hub assembly.
2. To reinstall, reverse the steps. Use a screwdriver with a T-10 Torx tip to tighten the screws to 0.65 N·m.
Remove the main fan assembly
Use this procedure to remove and replace the main fan from the rear chassis.
Before you begin
• To prevent electrostatic damage to components whenever you work on the instrument, wear properly-grounded electrostatic prevention
wrist and foot straps, and work in a tested antistatic environment on an antistatic mat.
• Remove the baffle bracket on page 22
• Remove handle hub assembly on page 27 next to the main fan
• Remove carrier interface assembly on page 24
Procedure
1. Use a T-10 Torx screwdriver to remove the four screws from the main fan assembly bracket.
Maintenance
5 Series MSO Service Manual MSO54, MSO56, MSO58 27

 Loading...


