TAS 200 Series Performance Verification
Bench Test Instruments and Handheld Oscilloscopes Basic Service
15
Horizontal Check
The following checks verify the horizontal accuracy of your oscilloscope.
To check time base accuracy, perform the following steps.
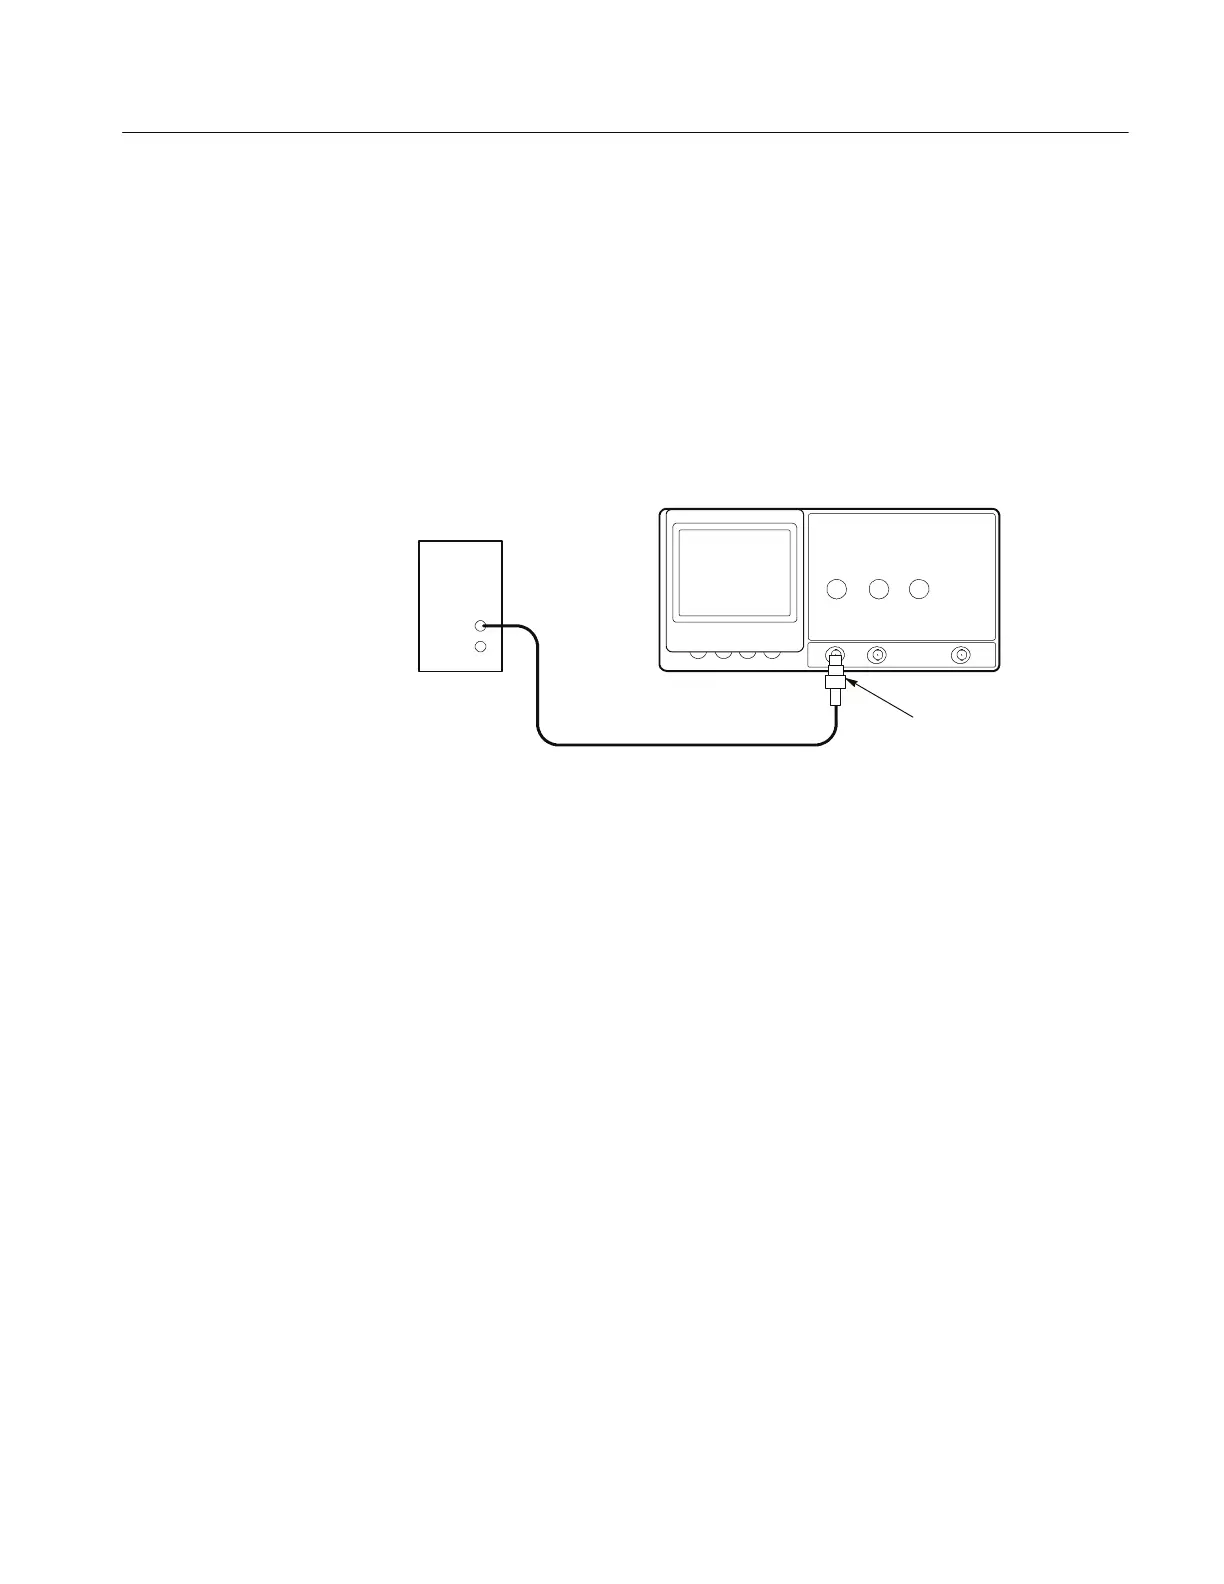
1. Use the 50 Ω precision coaxial cable to connect the output of the time mark
generator to the 50 Ω termination; then connect the 50 Ω termination to the
TAS 200 series instrument CH 1 input. See Figure 4 below.
Time Mark
Generator
50 Ω Termination
Precision cable
Figure 4: Timing check setup
2. Set up the oscilloscope as follows:
VERTICAL MODE CH1
CH 1 AC-DC DC
CH 1 VOLTS/DIV 0.5 V
CH 1 GND Out (release)
HORIZONTAL SEC/DIV .1 s
TRIGGER M ODE AUTO
TRIGGER COUPLING DC
3. Set up the time mark generator to produce 0.1 s markers.
4. Center the time marks vertically on the oscilloscope display.
5. Position the rising edge of the second time mark to the second vertical
graticule line of the oscilloscope display.
6. Verify that the time mark to graticule accuracy over the center eight divisions
is within the limits shown for each HORIZONTAL SEC/DIV setting listed
in Table 15.
Time Base Accuracy
 Loading...


