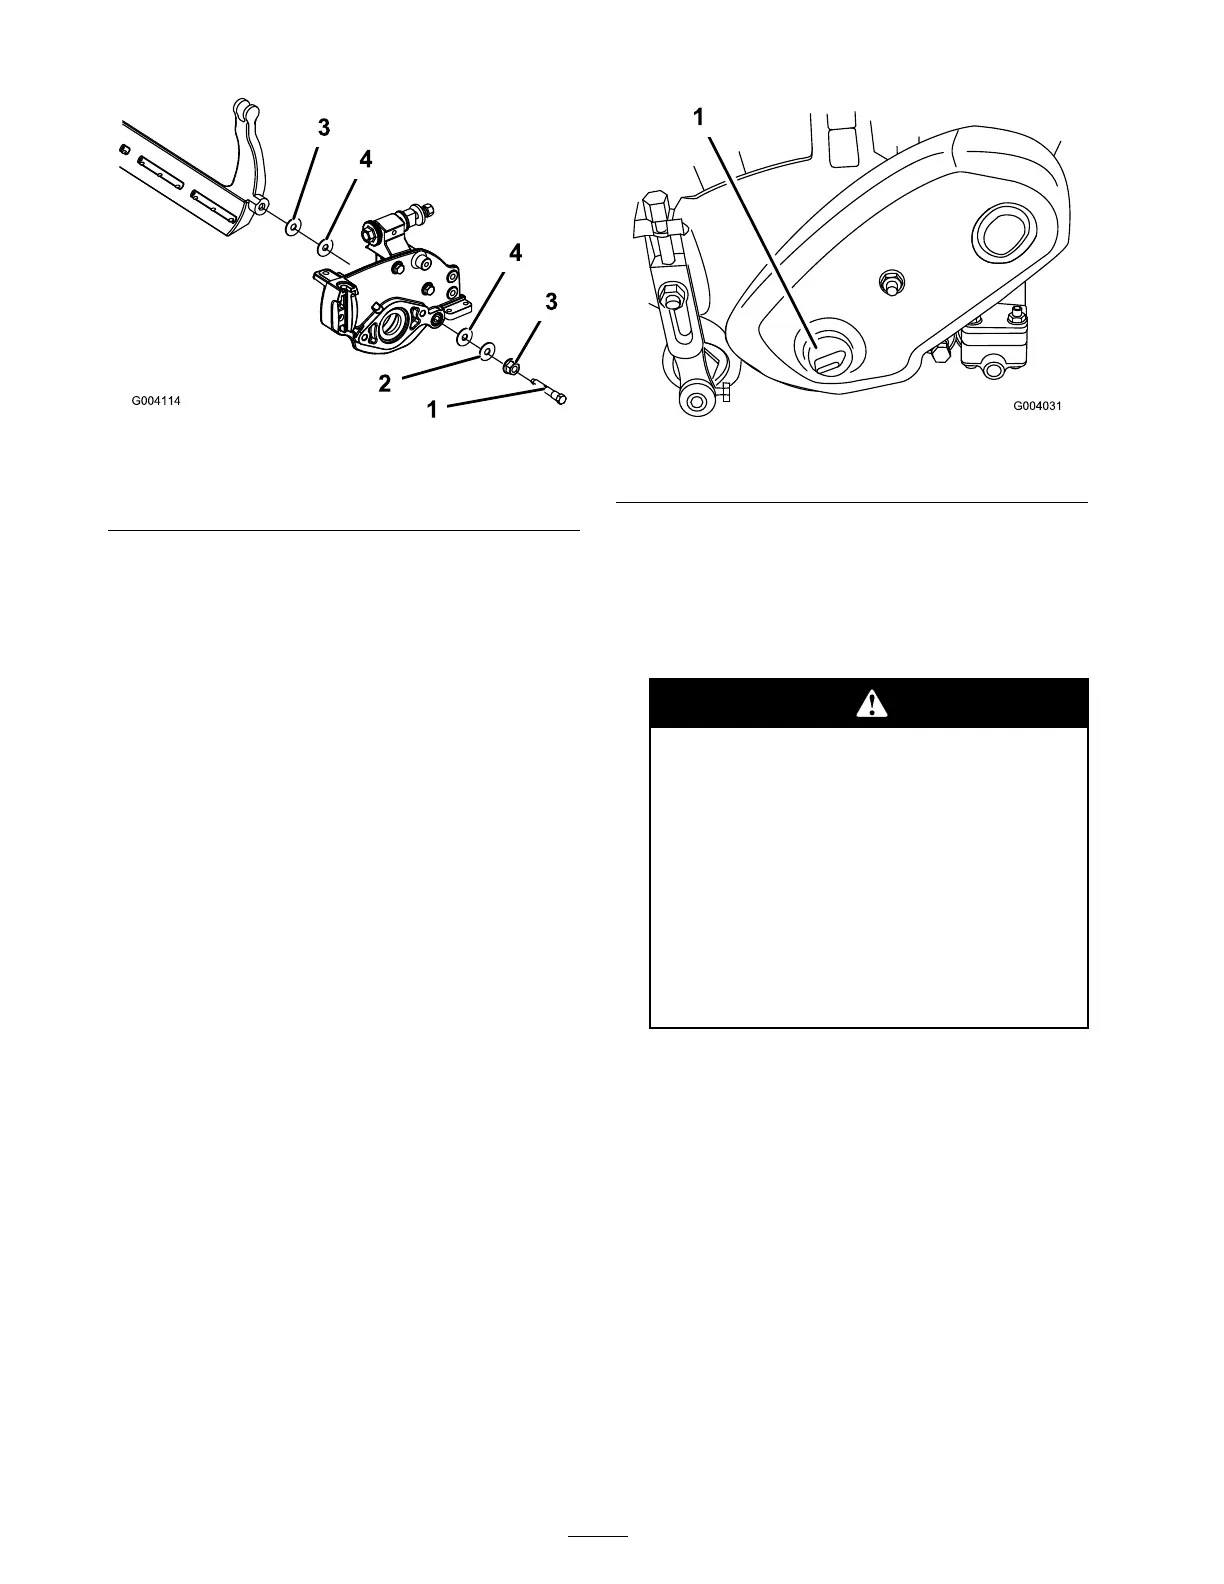
Figure 61
1. Bedbar bolt
3. Nut
2. Steel washer 4. Nylon washer
Assembling the Bedbar
1. Install bedbar , positioning mounting ears
betw een w asher and bedbar adjuster .
2. Secure bedbar to eac h side plate with bedbar
bolts (jam n uts on bolts) and 8 w ashers . A
nylon w asher is to be positioned on eac h side
of side plate boss . Place a steel w asher outside
eac h of the nylon w ashers . T or que bolts to
240-320 in.-lb .
3. Tighten the jam n ut until the end pla y is
remo v ed from the outside thr ust w ashers . Do
not o v er tighten.
Note: It is acce ptable that the inside thr ust
w ashers on the cutting unit ma y remain loose .
4. Tighten spring tension n ut until spring is
collapsed, then bac k off 1/2 tur n.
5. Adjust bedbar; refer to Adjusting the Bedknife
to the R eel.
Backlapping the Reel
1. R emo v e plug from the reel dri v e co v er on the
left side of reel assembly ( Figure 62 )
Figure 62
1. Reel drive cover plug
2. Inser t a 18 mm soc k et onto hex flang e n ut on
left end of reel shaft.
3. Bac klap according to the procedure in the T oro
Shar pening R eel and R otar y Mo w ers Man ual,
F or m No . 80-300 PT .
Contact with the r eel or other mo ving
par ts can r esult in per sonal injur y .
• Stay a w ay fr om the r eel while
backlapping .
• Nev er use a shor t handled paint
br ush f or backlapping . P ar t No.
29-9100 Handle assembl y complete
or indi vidual par ts ar e a v aila ble
fr om y our local Authoriz ed T or o
Distributor .
Note: F or a better cutting edg e , r un a file
across the front face of the bedknife when
the lapping operation is completed. T his will
remo v e any bur rs or rough edg es that ma y
ha v e built up on the cutting edg e .
4. R einstall plug when bac klap operation is
completed.
38
 Loading...


