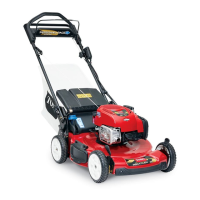
Figure31
1.Bladenuts4.Bladedriver
2.Stiffener
5.Disk
3.Blade6.Bladebrakeclutchshield
4.Removetheblade(Figure31).
5.Removethebladedriveranddisk(Figure31).
6.Removethebladebrakeclutchshield(Figure31).
7.Brushorblowoutdebrisfromtheinsideofthe
shieldandaroundalltheparts.
8.Installthebladebrakeclutchshieldthatyou
previouslyremoved.
9.Installthebladedriveranddiskthatyoupreviously
removed.
10.Installthebladeandthestiffenerthatyoupreviously
removed(Figure31).
11.Installthebladenutsandtorquethemto15to
27ft-lb(20to37N-m).
CleaningtheMower
ServiceInterval:Beforeeachuseordaily
Themowermaydislodgematerialfromunder
themowerhousing.
•Weareyeprotection.
•Stayintheoperatingposition(behindthe
handle)whentheengineisrunning.
•Donotallowbystandersinthearea.
Forbestresults,cleanthemowersoonafteryouhave
completedmowing.
1.Lowerthemowertoitslowestcuttingheightsetting.
RefertoAdjustingtheCuttingHeight.
2.Movethemowerontoaatpavedsurface.
3.Washouttheareaunderthereardeectorwherethe
clippingsgofromthehousingtothegrassbag.
Note:Washouttheareawiththebag-on-demandin
boththefullyforwardandfullyrearwardpositions.
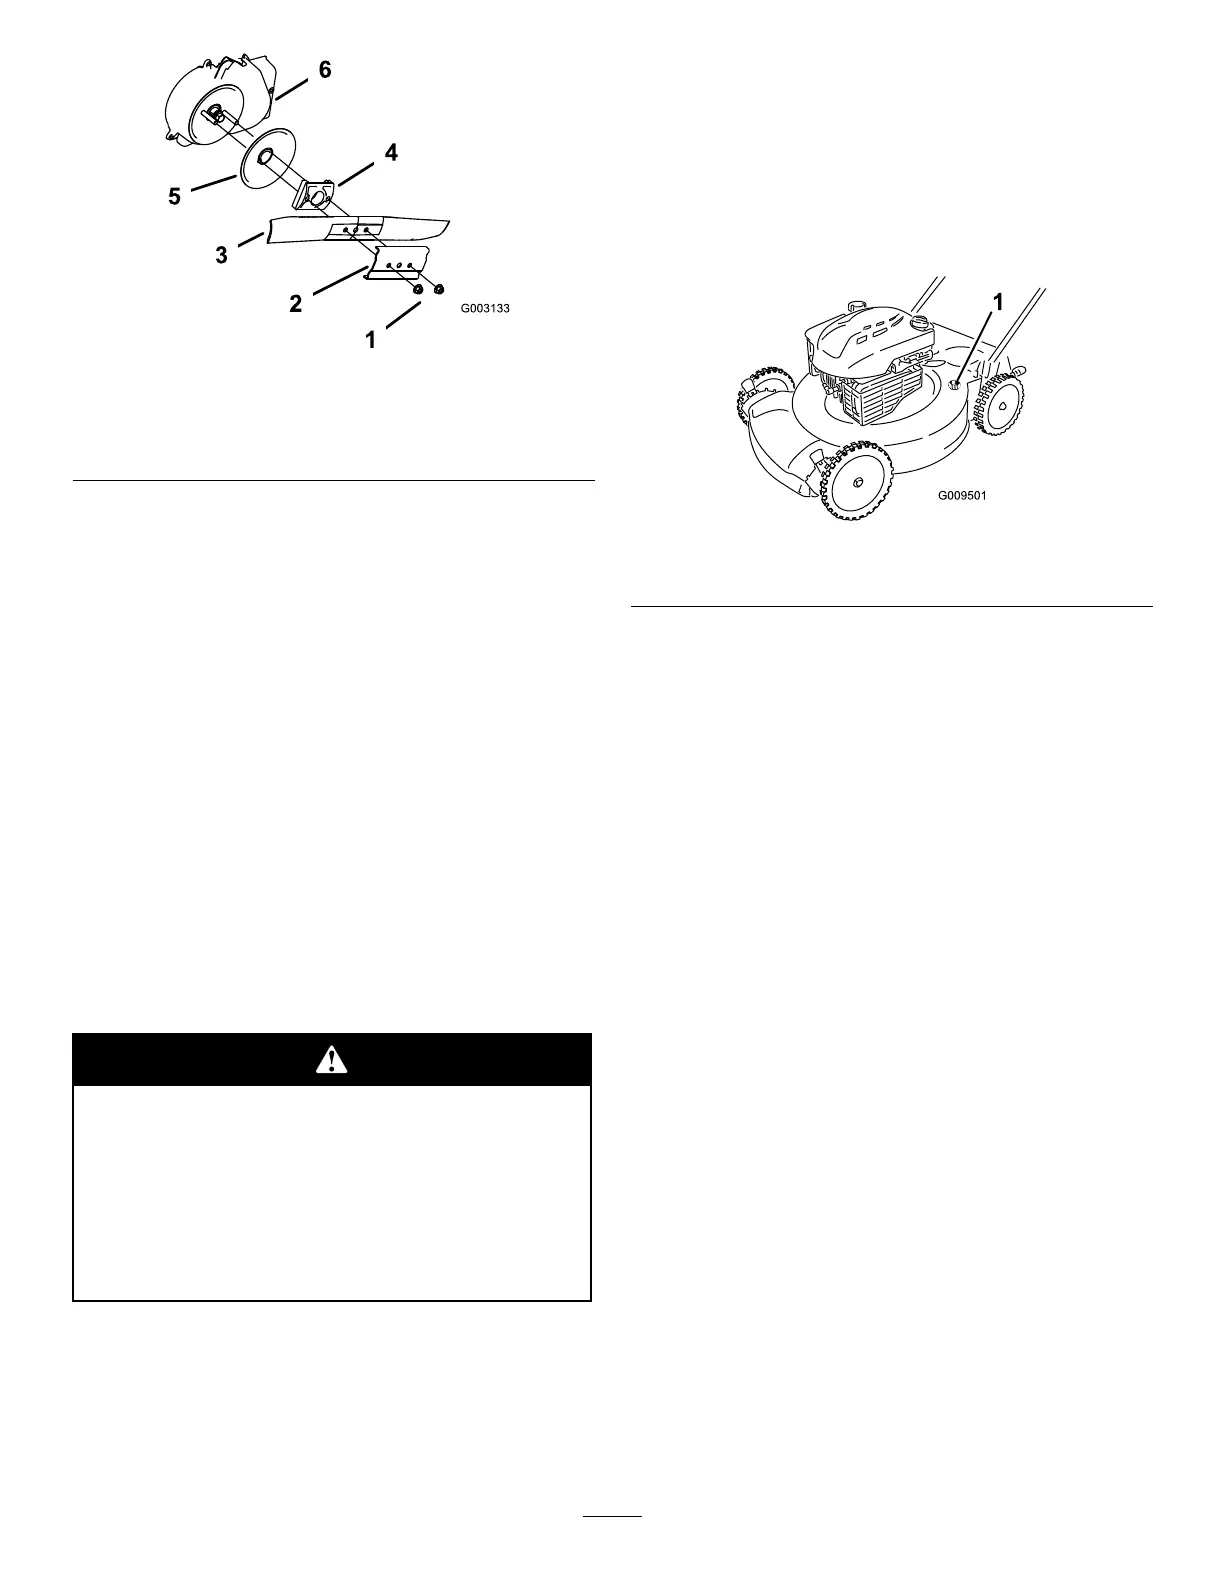
4.Attachagardenhosethatisconnectedtoawater
supplytothewashoutportonthemowerhousing
(Figure32).
Figure32
1.Washoutport
5.Turnthewateron.
6.Starttheengineandrunituntiltherearenomore
clippingsthatcomeoutfromunderthemower
housing.
7.Stoptheengine.
8.Shutoffthewateranddisconnectthegardenhose
fromthemower.
9.Starttheengineandrunitforafewminutestodry
thehousingtopreventitfromrusting.
10.Allowtheenginetocoolbeforestoringthemower
inanenclosedarea.
16

 Loading...