4.Routethecontrolcablesbetweenthedeckandthe
handletoprotectthecablesfrombeingdamaged
(Figure4).
Figure4
1.Cableguard3.Cable(s)
2.Handle
5.Standintheoperatingpositiontodeterminethehandle
heightthatismostcomfortableforyou(Figure5).
Figure5
1.Handle4.Mediumhandleheight
2.Handlebracket(2)
5.Lowesthandleheight
3.Highesthandleheight
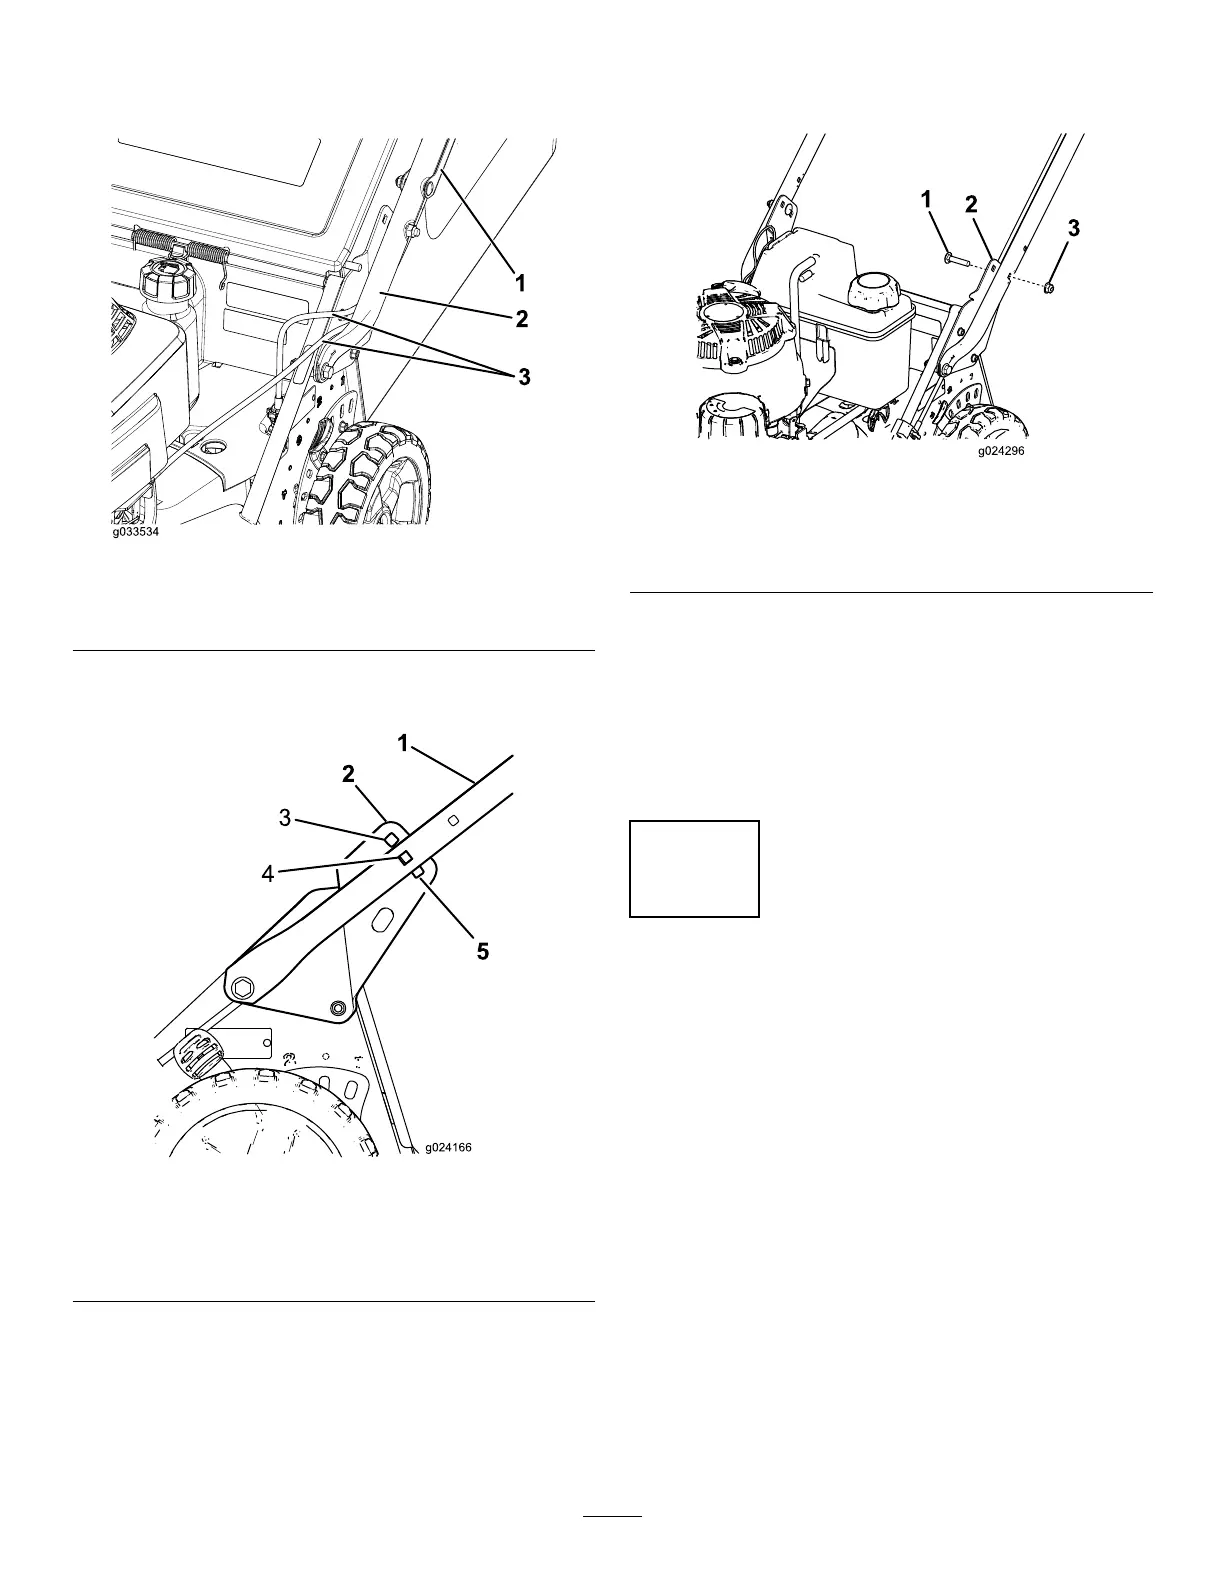
6.Securethehandleontothehandlebracketsatyour
desiredhandleheightwith2carriagebolts(5/16x
1-1/2inches)and2angenuts(5/16inch)asshown
inFigure6.
Important:Ensurethattheboltheadsareon
theinsideofthehandleandthenutsareonthe
outsideofthehandle.
Figure6
1.Carriagebolt—5/16x
1-1/2inches(2)
3.Flangenut—5/16inch(2)
2.Handlebracket(2)
7.Positionthecableguardontothehandlewiththe
cable(s)insidetheguard,andsecuretheguardtothe
handlewiththe2carriageboltsandthe2locknutsthat
youpreviouslyremoved(Figure3).
Important:Ensurethatyoudonotpinchthe
cable(s)tothehandlewhenyouinstallthecable
guardsontothehandle.
2
FillingtheCrankcasewithOil
NoPartsRequired
Procedure
Theenginecrankcaseisshippedwithoutoil.Before
startingtheengine,llthecrankcasewithoil.Theengine
crankcase(withoillter)canhold0.85L(29oz)ofoil.Use
onlyhigh-qualitySAE10W-30weightdetergentoilthathas
theAmericanPetroleumInstitute(API)serviceclassication
SH,SJ,orequivalent.
Beforeeachuse,ensurethattheoillevelisbetweentheAdd
andtheFullmarksonthedipstick(Figure7).
8
 Loading...