AdjustingtheControlCable
1.Slideupthespringcoverandunhookthespringfrom
theadjusterlink(Figure9).
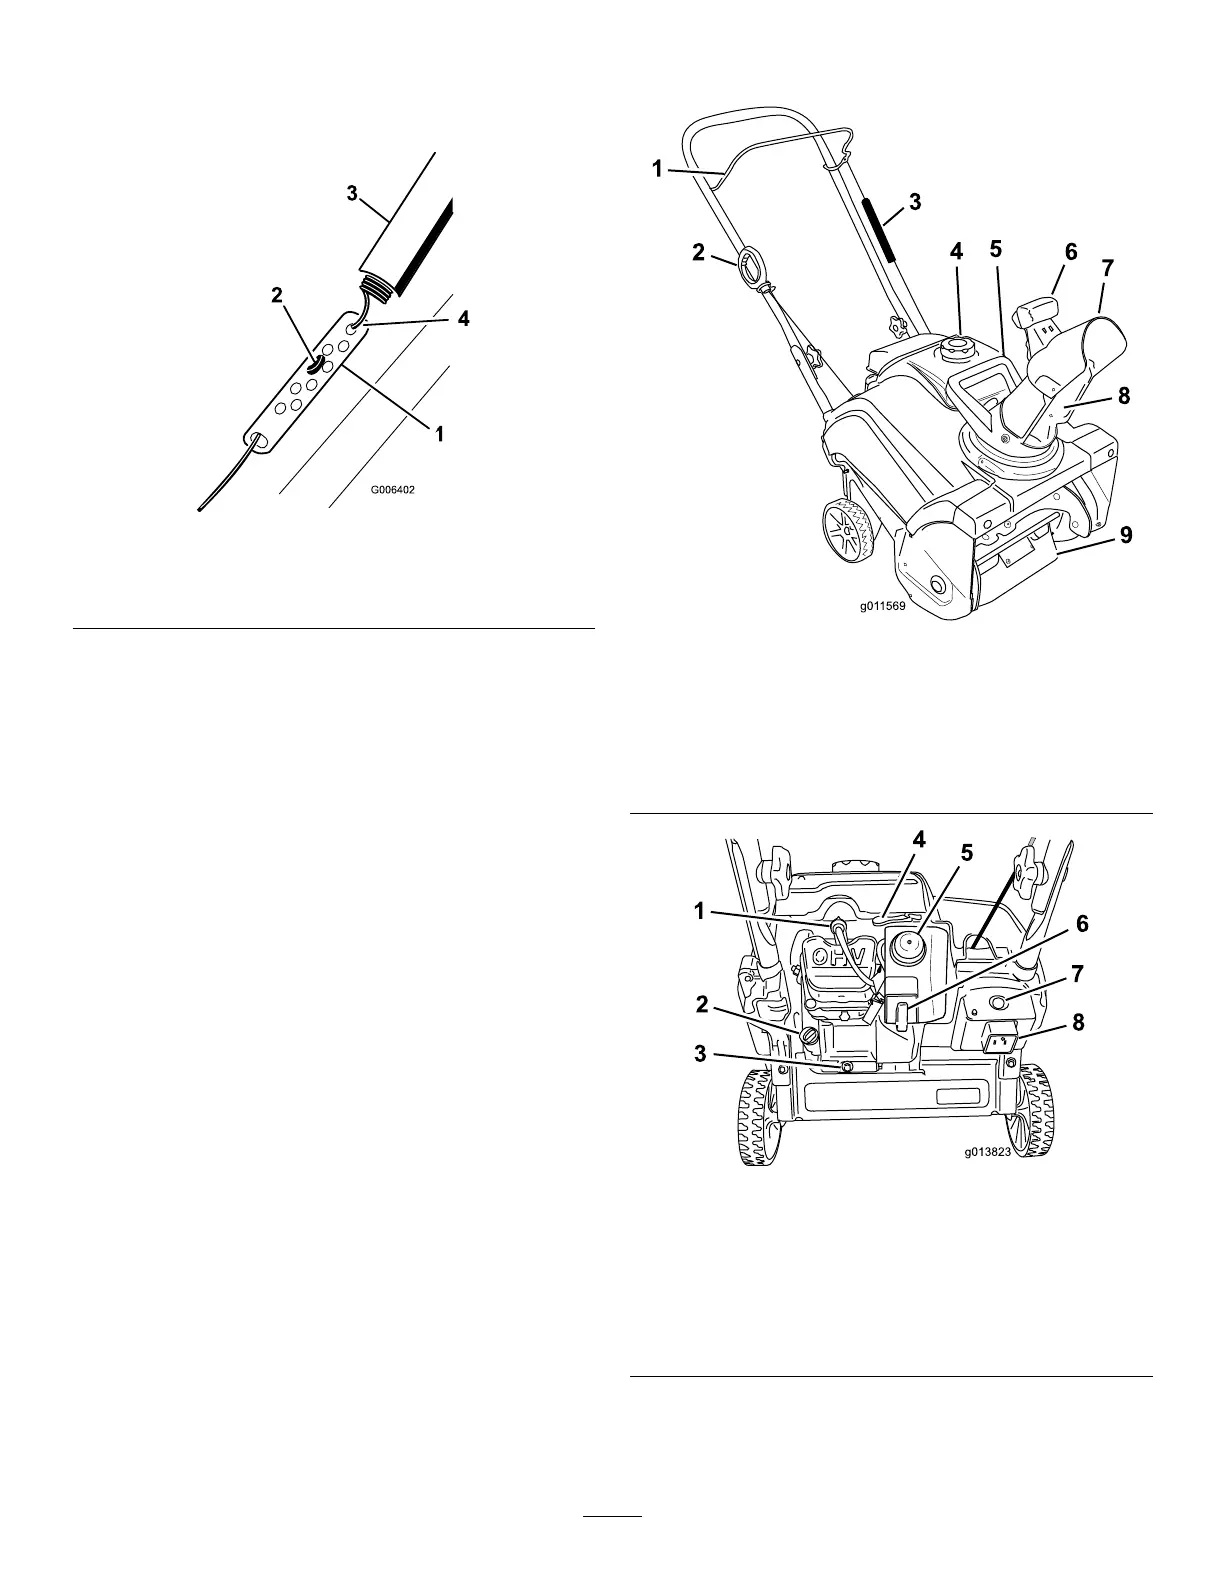
Figure9
1.Adjusterlink
3.Springcover
2.Z-tting
4.Unhookthespringhere.
Note:Youcanpulluptheadjusterlinkandcableto
makeunhookingthespringeasier.
2.MovetheZ-ttingtoahigherorlowerholeonthe
adjusterlinkasneededtoobtainthe2to3mm(1/16
to1/8inch)gapbetweenthecontrolbarandthe
handle(Figure9).
Note:MovingtheZ-ttinghigherdecreasesthegap
betweenthecontrolbarandthehandle;movingit
lowerincreasesthegap.
3.Hookthespringtotheadjusterlinkandslidethespring
coverovertheadjusterlink.
4.Checktheadjustment;refertoCheckingtheControl
Cable(page6).
Note:Thebeltmayslip(squeal)inwetconditions;
todryoutthedrivesystem,starttherotorandrunit
withoutaloadfor30seconds.
ProductOverview
Figure10
1.Controlbar6.Chute-deectortrigger
2.Recoil-starthandle
7.Chutedeector
3.Springcover
8.Dischargechute
4.Fuel-tankcap9.Rotorblades
5.Chutehandle
Figure11
1.Sparkplug
5.Primer
2.Oilllcap
6.Ignitionkey
3.Oildrainplug
7.Electric-startbutton
(Model38473only)
4.Chokelever8.Plug-inforelectricstart
(Model38473only)
7
 Loading...