10
Models 38537 and 38538
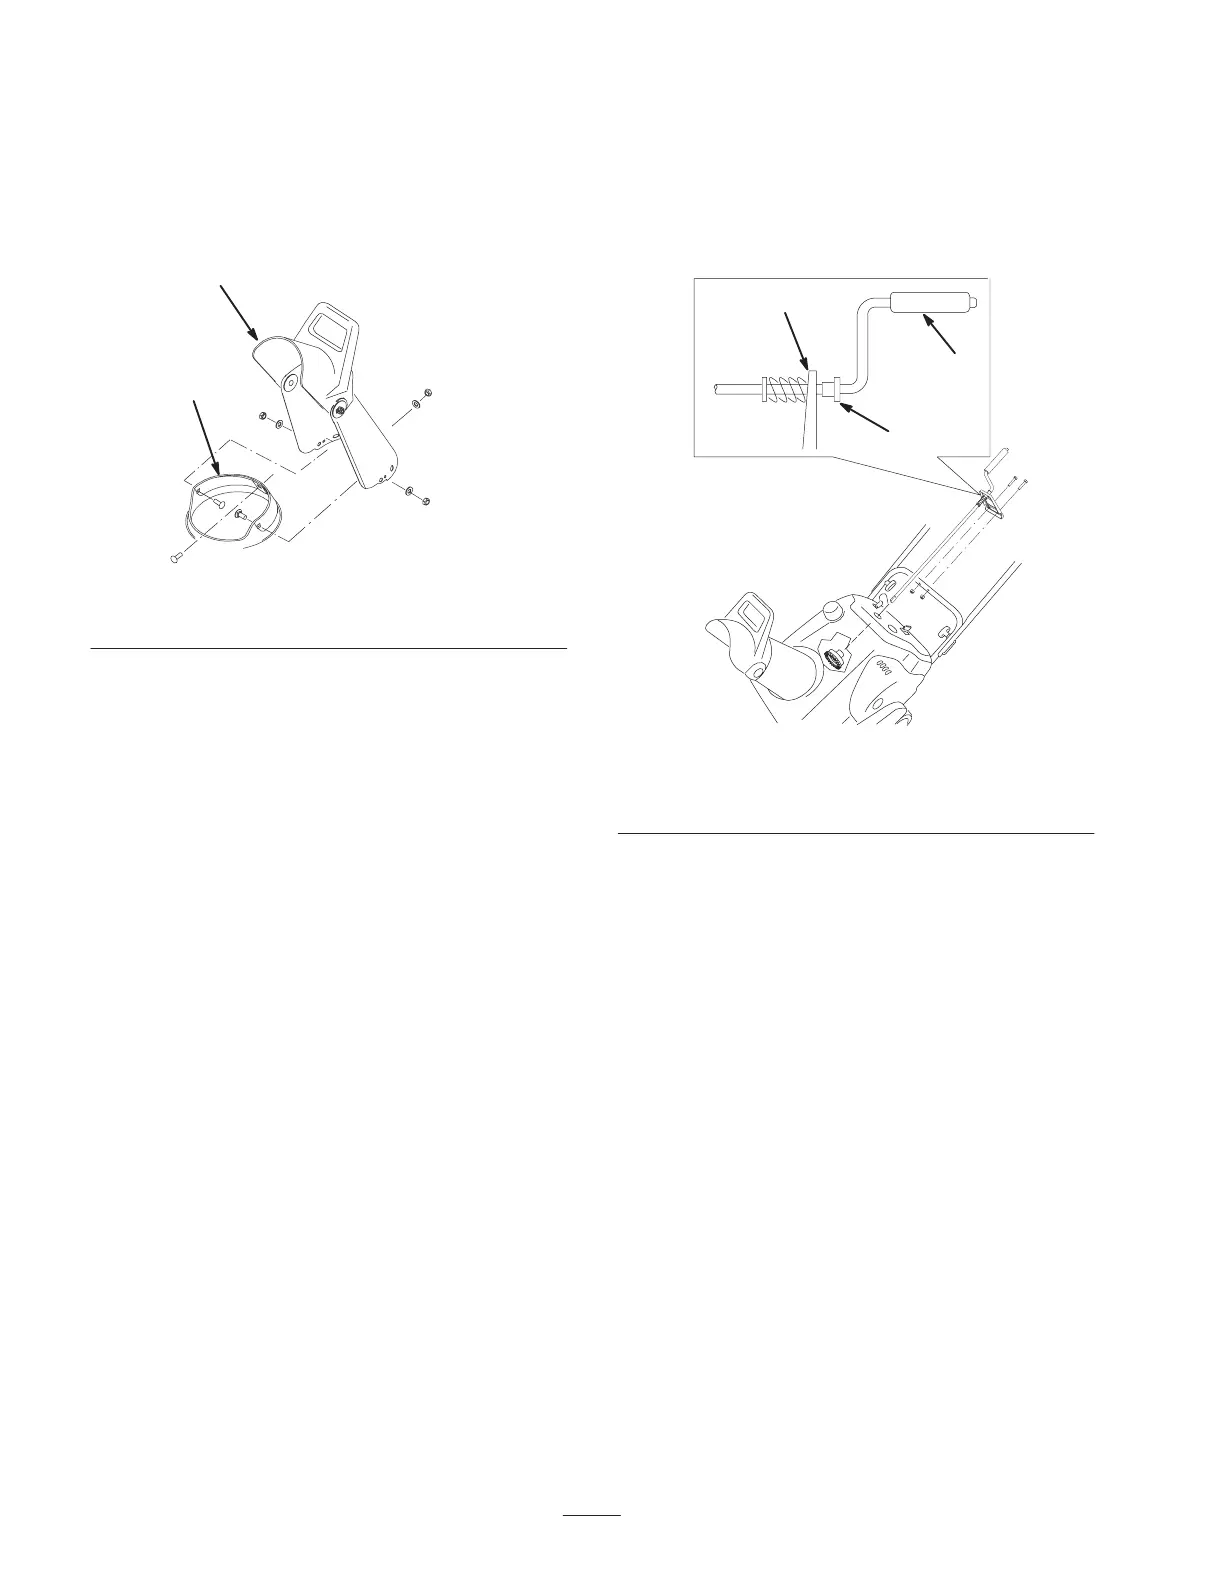
1. Place the discharge chute over the chute ring, and align
the hole in the back of the discharge chute with the
center hole in the chute ring (Fig. 10).
1
2
m5520
Figure 10
1. Chute ring 2. Discharge chute
2. Insert a screw through the center hole of the chute ring
from the inside and through the hole in the discharge
chute (Fig. 10).
3. Install a washer and a locknut on the screw, and tighten
the locknut until it is finger tight.
4. Align the remaining holes of the discharge chute and
the chute ring, and insert the 2 remaining screws
through the holes from the inside of the chute ring.
5. Install the washers and the locknuts on the screws, and
tighten the locknuts until they are finger tight.
6. Tighten all locknuts securely.
Installing the Chute Crank
Models 38537 and 38538
1. Insert the flattened end of the chute crank through the
hole in the shroud while aligning the mounting bracket
with the holes in the lower handle (Fig. 11).
2
1
3
m5545
Figure 11
1. Chute crank
2. Plastic bushing
3. Mounting bracket
2. Slowly rotate the crank until the flattened end fits into
the hidden gear opening and the chute ring turns with
the crank (Fig. 11).
3. Ensure that the plastic bushing is fully inserted into the
hole in the mounting bracket. If not, slide it along the
crank and into the hole (Fig. 11).
4. Secure the mounting bracket to the handle with 2 bolts
and locknuts (Fig. 11).
 Loading...