Setup Instructions Page 19
How to Install the Cross Conveyor
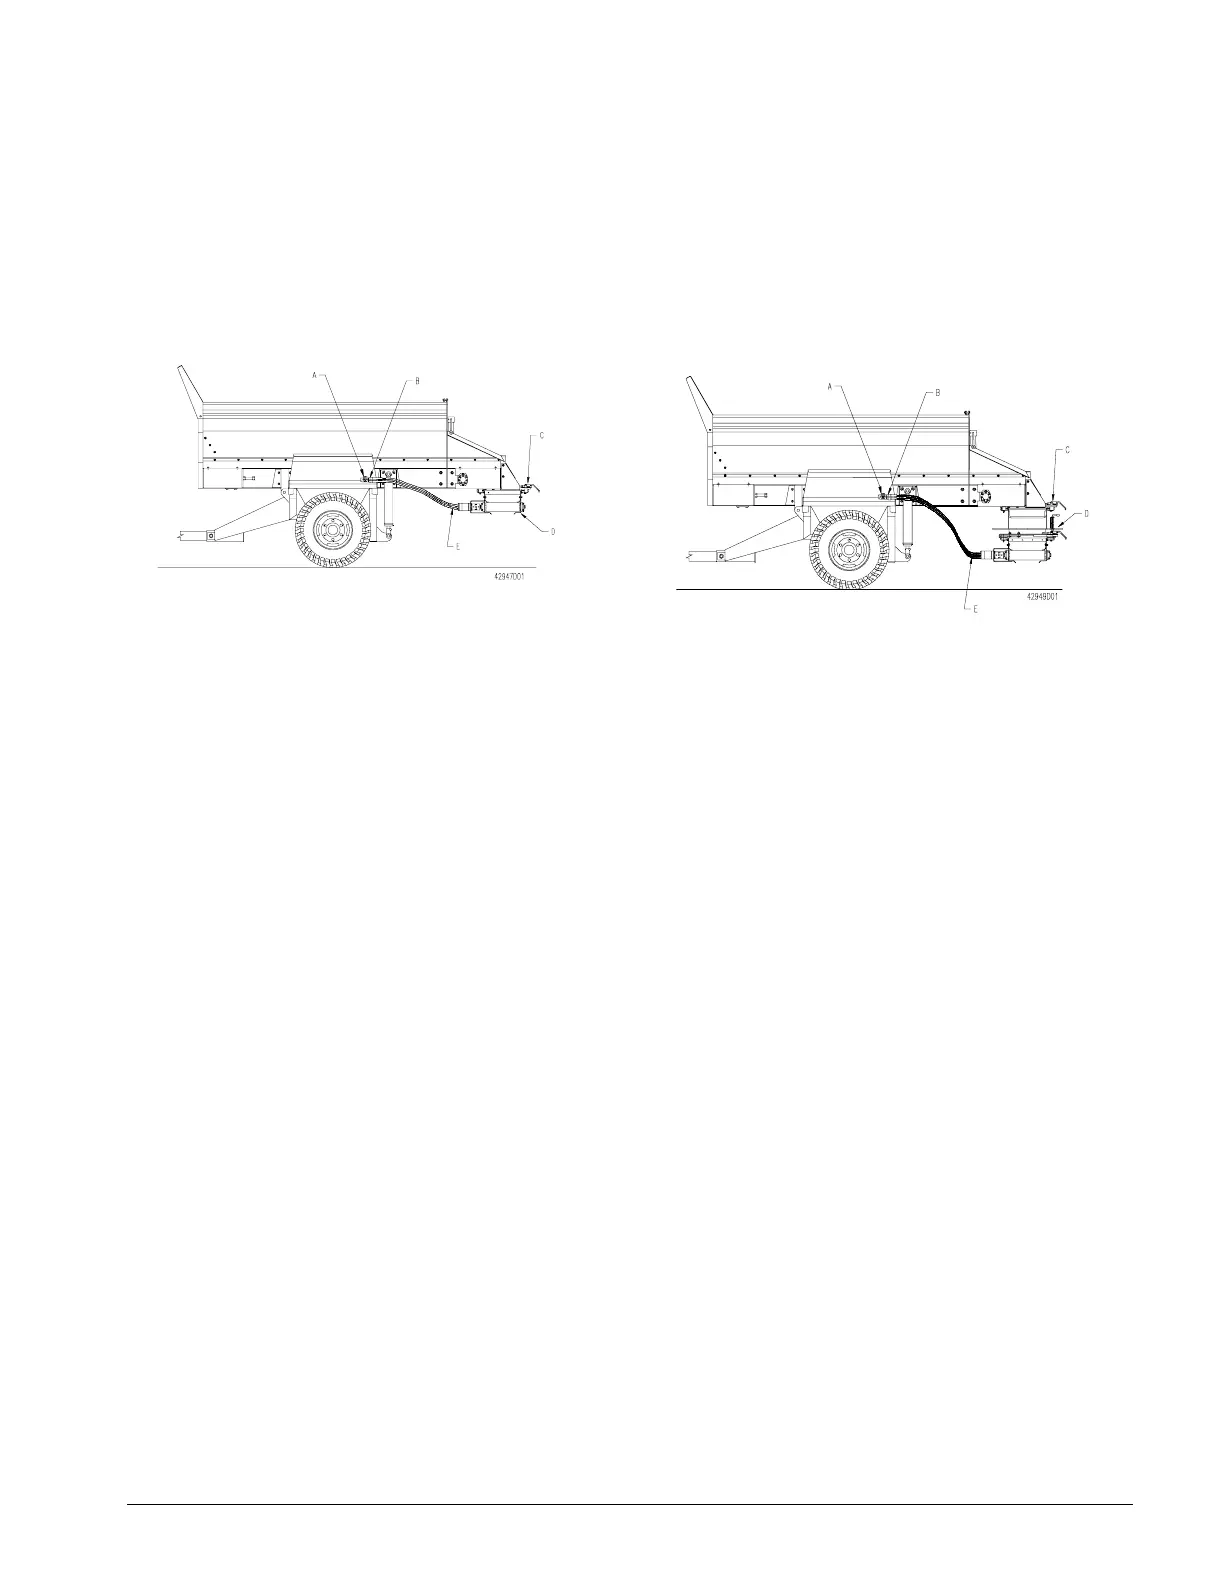
The cross conveyor spreads material to either side of the
MH-400 (Figure 8).
Figure 8: Cross conveyor, side view
A. Option control valve reference
B. Hose connections
C. Quick-attach brackets
D. Cross conveyor
E. Hydraulic hoses
Note – If you are also installing the swivel kit using the
option caddy, it is easier to insert it into the quick-attach
brackets on the cross conveyor first, then mount the
combined unit on the MH-400.
1. Install the cross conveyor into the quick-attach
brackets at the rear of the MH-400 (see How to
Mount the Options on page 17).
2. Ensure that the cross conveyor is centered between
the mounting brackets, and that the motor extends
out the same side as the control handles on the
MH-400.
3. Connect the hydraulic hoses to the option control
valve on the rear MH-400 fender (see How to
Connect the Option’s Hydraulics on page 18).
Ensure that the hydraulic hoses run horizontally.
4. With the tow vehicle hydraulics operating ensure that
the cross conveyor is operating properly. (see
Operating Instruction on page 22)
How to Install the Swivel Kit
The swivel kit allows the cross conveyor to swivel freely
in a 270 degree arc, or to be locked into one of five fixed
positions, 45 degrees apart (Figure 9).
Figure 9: Swivel kit, side view
A. Option control valve
B. Hose connections
C. Quick-attach brackets
D. Swivel kit
E. Hydraulic hoses
1. If possible, install the swivel kit into the quick-attach
brackets on the cross conveyor before installing the
cross conveyor on the MH 400.
2. Position the swivel kit so that its two mounting
brackets face toward the rear (away from the
MH-400).
3. Install the swivel kit into the quick-attach brackets at
the rear of the MH-400 (see How to Mount the
Options on page 17).
4. If the cross conveyor has already been installed,
remove the cross conveyor from the MH-400 and
follow steps 1-3.
5. Connect the cross conveyor’s hydraulic hoses (see
How to Connect the Option’s Hydraulics on page
18).

 Loading...