6.Liftuponthespeedcontrolrodandinsertthe
trunnionintotheholeinthespeedselectorlever
(Figure6).
Note:Ifthetrunniondoesnottintothehole
whenyouliftuponthespeedcontrolrod,rotatethe
trunnionupwardordownwardonthespeedcontrol
roduntilitts.
7.Securethetrunnionandupperendofthespeed
controlrodwiththeouterwasherandhairpincotter
thatyoupreviouslyremoved.
Note:Foreasierinstallation,lookdownthrough
theopeninginthespeedselector(Figure8).
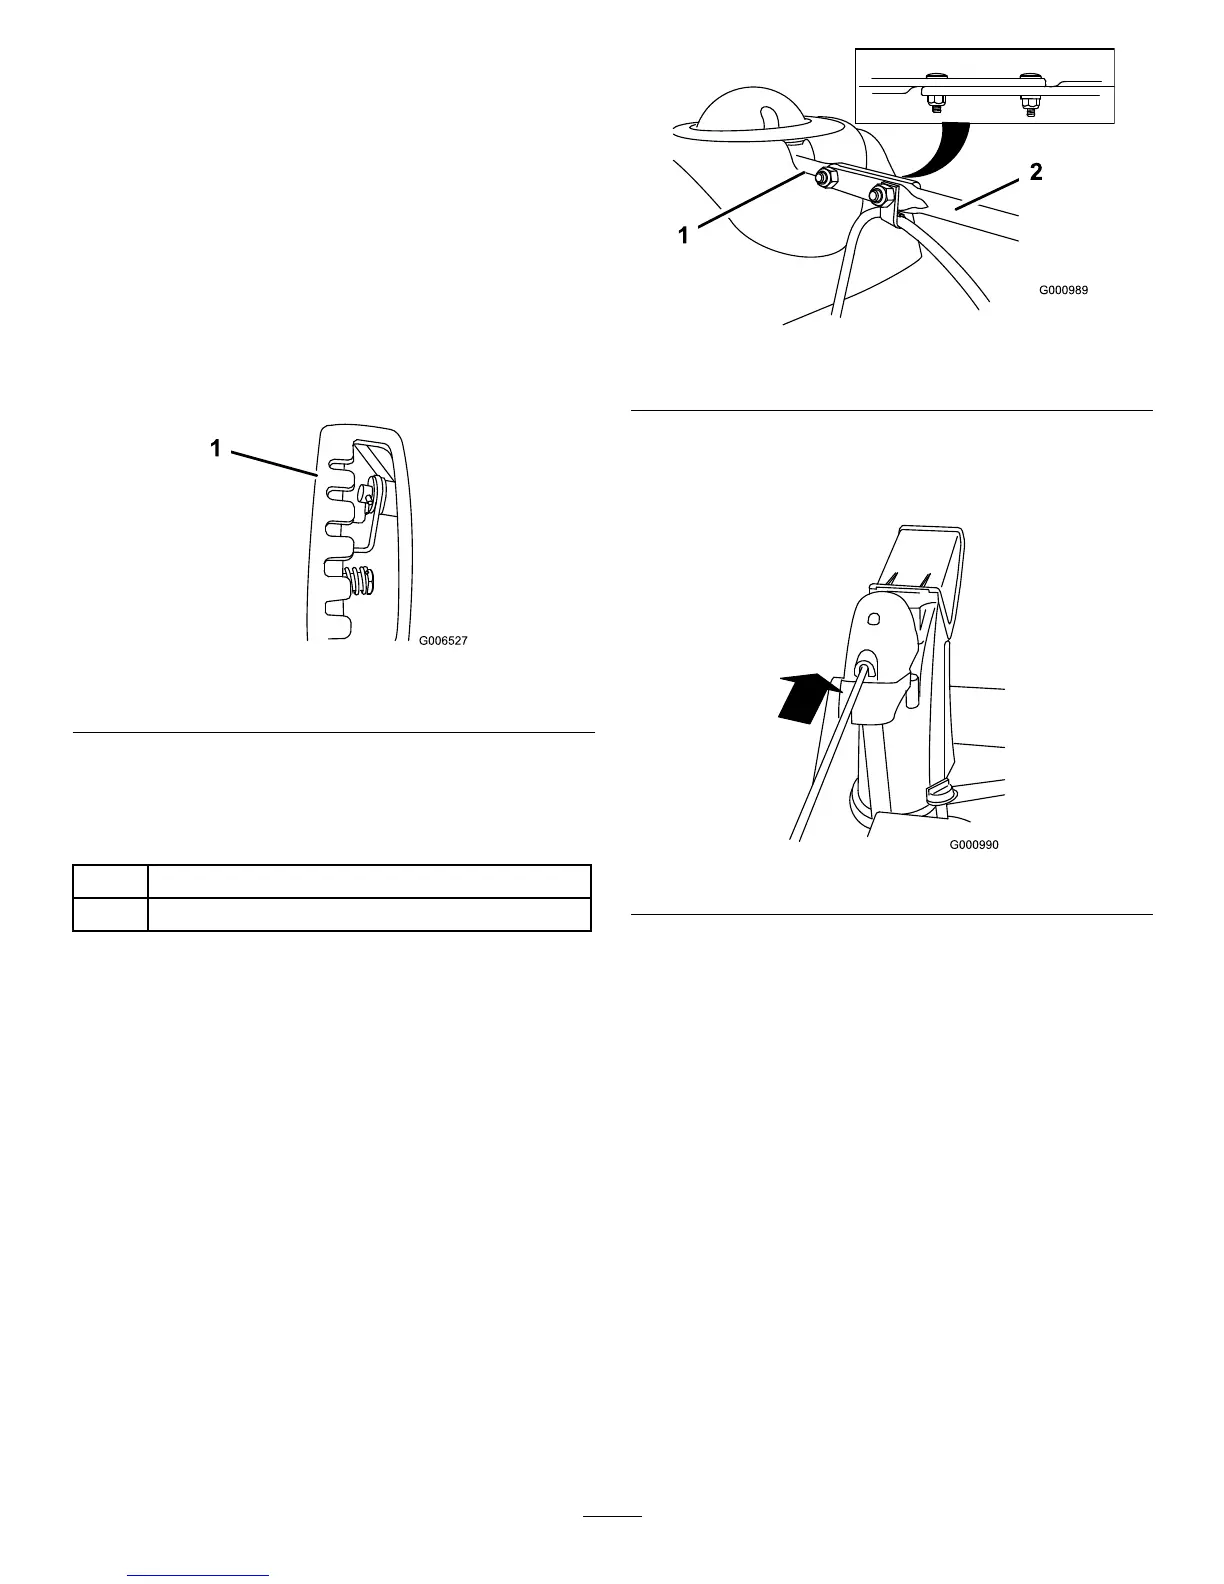
Figure8
1.Speedselector
3.InstallingtheChuteControl
Rod
2
Carriagebolts
2Locknuts
Procedure
1.UnwraptheQuickStickandrotateitsothatitis
uprightandinthecenter.
2.Holdthebluetriggercapdownandpullthelever
fullyrearward.
Note:Thedischargechuteanddeectorshould
faceforward.Iftheydonot,holdthebluetrigger
capdown(butdonotmovetheQuickStick)and
rotatethedischargechuteuntiltheydo.
3.Aligntheattenedbackendofthelongchute
controlrodwiththeattenedfrontendoftheshort
rodthatextendsfromthecontrolpanelsothatthey
nesttogether(Figure9).
Figure9
1.Shortrod
2.Longchutecontrolrod
4.Insertthefrontendoftherodintotheopeningin
thebackofthechutegearcoveruntilitslidesinto
thechutegear(Figure10).
Figure10
5.Aligntheholesinthenestedendsoftherodsand
insert2carriagebolts(intheloosepartsbag)through
theshortrodfromtheleftsideofthesnowthrower
(fromtheoperatingposition).
6.Insertthecableclipthatsupportsthedeector
cableontotheforwardcarriagebolt,andsecurethe
carriageboltswithlocknutsfromtheloosepartsbag
(Figure11).
9
 Loading...