ReplacingtheGrass
Deector
ServiceInterval:Beforeeachuseordaily—Inspect
thegrassdeectorfordamage
WARNING
Anuncovereddischargeopeningcould
allowthelawnmowertothrowobjectsinthe
operator’sorbystander’sdirectionandresult
inseriousinjury.Also,contactwiththeblade
couldoccur.
Neveroperatethelawnmowerunlessyou
installamulchplate,dischargedeector,or
grasscollectionsystem.
Inspectthegrassdeectorfordamagebeforeeach
use.Replaceanydamagedpartsbeforeuse.
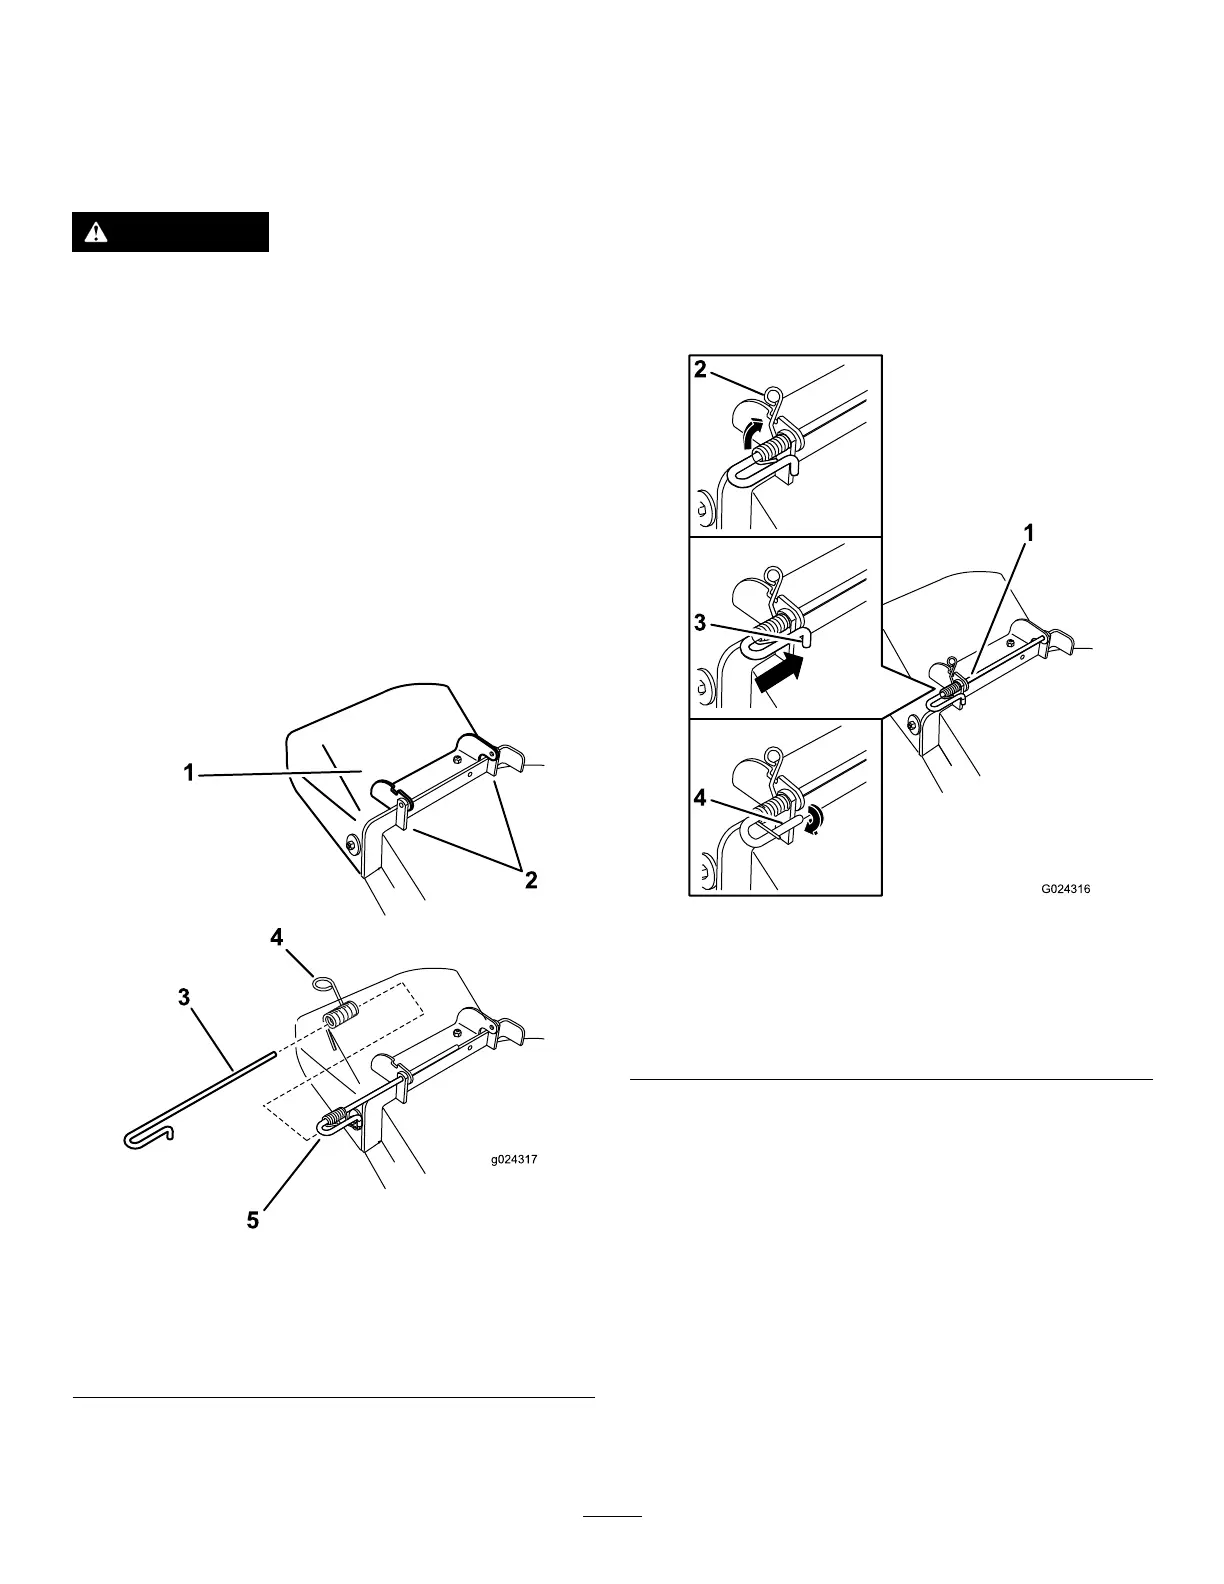
1.Disengagethespringfromthenotchinthe
deectorbracketandslidetherodoutofthe
weldeddeckbrackets,spring,anddischarge
deector(Figure70).
g024317
Figure70
1.Deectorassembly4.Spring
2.Deckbrackets
5.Springinstalledoverthe
rod
3.Rod
2.Removethedamagedorworndischarge
deector.
3.Positionthenewdischargedeectorassembly
withthebracketendsbetweenthewelded
bracketsonthedeckasshowninFigure70.
4.Installthespringontothestraightendofthe
rod.Positionthespringontherodasshownin
Figure70sotheshorterspringendiscoming
fromundertherodbeforethebendandgoing
overtherodasitreturnsfromthebend.
5.Lifttheloopendofthespringandplaceitinto
thenotchonthedeectorassemblybracket
(Figure71).
g024316
Figure71
1.Rodandspringassembly
partiallyinstalled
3.Rod,shortend,moved
behindmowerbracket
2.Loopendofthespring
installedintothenotchin
thedeectorbracket
4.Shortend,retainedby
mowerbracket.
6.Securetherodandspringassemblybytwistingit
sotheshortendoftherodcanbeplacedbehind
thefrontbracketweldedtothedeck(Figure71).
Important:Thegrassdeectormustbe
springloadedinthedownposition.Liftthe
deectoruptotestthatitsnapstothefull
downposition.
51
 Loading...