MaintainingtheHeadlights
ReplacingtheHeadlight
Specication:SeeyourPartsCatalog.
1.Disconnectthebattery;refertoDisconnecting
theBattery(page45).
2.Openthehood.
3.Disconnecttheelectricalconnectorforthe
harnessfromtheconnectorofthelamp
assembly(Figure53).
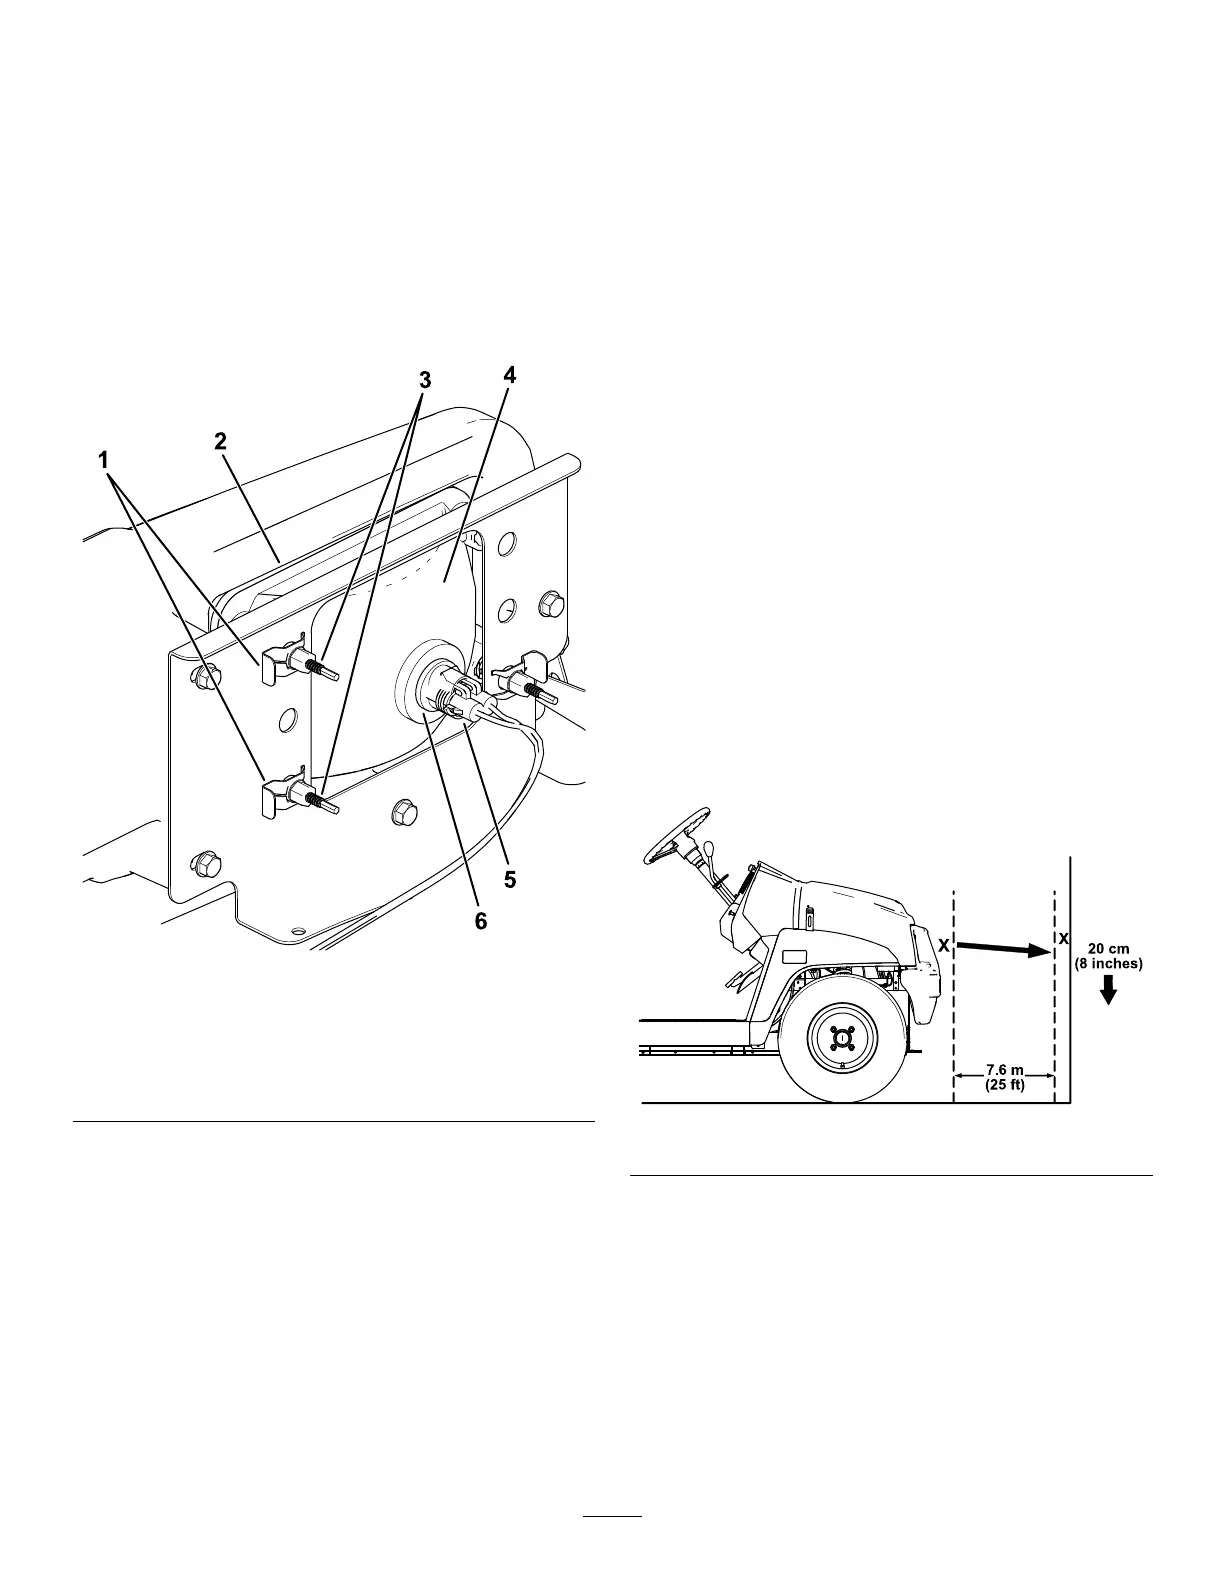
g277621
Figure53
1.Speedclip
4.Headlight
2.Openinginthebumper
5.Harness-electrical
connector
3.Adjustmentscrew6.Lampassembly
4.Removethespeedclipsthatsecurethe
headlighttotheheadlightbracket(Figure53).
Note:Retainallpartsforinstallationofthenew
headlight.
5.Removetheheadlightassemblybymovingit
forwardthroughtheopeninginthefrontbumper
(Figure53).
6.Installthenewheadlightthroughtheopeningin
thebumper(Figure53).
Note:Ensuretheadjustmentpostsarelinedup
withtheholesinthemountingbracketbehind
thebumper.
7.Securetheheadlightassemblywiththespeed
clipsthatyouremovedinstep4.
8.Connecttheelectricalconnectorfortheharness
totheconnectorofthelampassembly(Figure
53).
9.Adjusttheheadlightstodirectthebeamsto
thedesiredposition,refertoAdjustingthe
Headlights(page48).
AdjustingtheHeadlights
Usethefollowingproceduretoadjusttheheadlight
beampositionwheneveraheadlightassemblyis
replacedorremoved.
1.Parkthemachineonalevelsurfacewiththe
headlightsapproximately7.6m(25ft)froma
wall(Figure54).
2.Measurethedistancefromtheoortothecenter
oftheheadlightandmakeamarkonthewallat
thesameheight.
3.TurnthekeyswitchtotheONposition,andturn
ontheheadlights.
4.T akenoteofwheretheheadlightsaimonthe
wall.
Thebrightestpartoftheheadlightbeamshould
be20cm(8inches)belowthemarkplacedon
thewall(Figure54).
g298100
Figure54
5.Atthebackoftheheadlightassembly,rotate
adjustmentscrews(Figure53)topivotthe
headlightassemblyandalignthepositionofthe
castbeam.
6.Connectthebatteryandclosethehood;referto
ConnectingtheBattery(page46).
48

 Loading...