EasyManua.ls Logo

Toshiba D-R400 User Manual

Toshiba D-R400
103 pages
To Next Page IconTo Next Page
To Previous Page IconTo Previous Page
Page #61 background imageLoading...
Page #61 background image
61EN 61EN
Disc
Management
Recording
Playback
Introduction Connections Basic Setup
Editing Function Setup
Others
SEARCH
Using [SKIP j ] / [SKIP i ]
1) During playback, press [SKIP i ] to skip the
current title or chapter and move to the next.
The title or chapter will move forward by one at a time.
If there is no chapter in one title, the current title will
be skipped.
To go back to the beginning of the current title or
chapter, press [SKIP j ].
Press it twice in quick successions to go to the previous
title or chapter. The title or chapter will move
backward one title at a time.
Using [DISPLAY]
1) During playback, press [DISPLAY].
2) Use [{ / B] to select
, then press [ENTER].
e.g.) DVD-video
1/ 5 1/ 5
DVD
0:01:00 / 1:23:45
Video
The number next to will be highlighted.
3) Title:
Use [K / L] or [the Number buttons] to enter a
desired title number to search, then press [ENTER].
Title search will start.
Chapter:
Press [B] to move to the number next to
for
chapter.
Use [K / L] or [the Number buttons] to enter a
desired chapter number to search, then press
[ENTER].
After the search, playback will start automatically.
Title/Chapter Search
Note
In search mode display, total numbers of each search
contents (title/chapter/time) are shown as a
denominator.
1/ 5 1/ 5 0:01:00 / 1:23:45
DVD
Video
total number
of titles
total number
of chapters
total time
of the disc
Using [SKIP j ] / [SKIP i ]
1) During playback, press [SKIP i] to skip the
current track/file and move to the next.
The track/file will move forward one at a time.
To go back to the beginning of the current track/file,
press [SKIP j ].
Press it twice in quick successions to go to the previous
track/file. The track/file will move backward one at a
time.
Track Search
Note
During CD playback, you can enter a track number
directly using [the Number buttons] for track search
without displaying the menu.
Using [DISPLAY]
• For audio CD, skip to step 2.
1) During playback, press [DISPLAY].
2) Use [{ / B] to select
, then press [ENTER].
e.g.) audio CD
1/ 5
CD
0:00:15 / 0:05:00
e.g.) MP3 files
1/ 5 0:00:15
MP3
The number next to will be highlighted.
3) Use [K / L] or [the Number buttons] to enter a
desired track/file number to search, then press
[ENTER].
After the search, playback will start automatically.
E7E7AUDEN.indb61E7E7AUDEN.indb61 2007/01/2919:04:142007/01/2919:04:14

Table of Contents

Other manuals for Toshiba D-R400

Question and Answer IconNeed help?

Do you have a question about the Toshiba D-R400 and is the answer not in the manual?
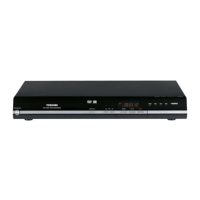
Toshiba D-R400 Specifications

General IconGeneral
BrandToshiba
ModelD-R400
CategoryDVD Recorder
LanguageEnglish

Summary

PRECAUTIONS

IMPORTANT SAFETY INSTRUCTIONS

Essential guidelines for safe operation and installation of the appliance.

Laser Safety

Precautions related to the laser system to prevent eye injury.

Avoid the Hazards of Electrical Shock and Fire

Instructions to prevent electrical hazards and fire risks.

FEATURES

FUNCTIONAL OVERVIEW

SETTINGS FOR THE VIDEO INPUT

INITIAL SETTING

FORMATTING A DISC

Choosing the Recording Format

Guide to selecting the format for a new DVD-RW disc.

Reformatting a Disc Manually

Steps for manually formatting a used DVD-RW or DVD+RW disc.

PREPARING A DISC

PLAYING THE DISCS IN OTHER DVD PLAYERS

Auto Finalizing Discs

Function to automatically finalize discs after recording or disc full.

Finalizing a Disc

Procedure for finalizing a disc for playback on other players.

INFORMATION ON DVD RECORDING

Recording Mode Options

Explanation of available recording modes and their times/quality.

Restrictions on Recording

Limitations on recording copy-protected or specific disc types.

BASIC RECORDING & ONE-TOUCH TIMER RECORDING

TIMER RECORDING

Checking, Canceling, or Correcting Timer Programs

Managing programmed timer recordings, including error handling.

SETTINGS FOR AN EXTERNAL DEVICE

Recording from an External Device

Steps for connecting and recording from external devices like camcorders.

SATELLITE LINK

Preparing for Satellite Link Timer Recording

How to set up the unit and tuner for automatic recording.

DV DUBBING

BASIC PLAYBACK

SPECIAL PLAYBACK

SEARCH

SELECTING THE FORMAT OF AUDIO AND VIDEO

INFORMATION ON DISC EDITING

EDITING DISCS

LIST OF THE DEFAULT SETTINGS

GENERAL SETTING

Parental Lock Settings

How to set parental control levels and passwords for playback.

Audio Output Settings

Configuration options for audio output format and signal.

Reset All Settings

Procedure to restore all settings to factory defaults.

TROUBLESHOOTING

Power Issues

Solutions for problems related to the unit not turning on.

Picture Issues

Solutions for problems with no picture or distorted picture.

Sound Issues

Solutions for problems related to no sound or noisy sound.

Remote Control Issues

Solutions for problems where the remote control does not function.

Playback Issues

Solutions for problems encountered during disc playback.

Recording/Timer Recording/Editing Issues

Solutions for problems during recording, timer programming, or editing.

Disc Errors

Explanation of various disc-related error messages and their causes.

Recording Errors

Explanation of various recording error messages and their causes.

Frequently Asked Questions

Answers to common user questions about the unit's operation.

Related product manuals