79
8
MISFEED REMOVAL
When a misfeed occurs, the error indicator blinks, "CLEAR PAPER JAM" appears in
the display, and the machine stops operating. If a misfeed occurs when using the
ADF/RADF, "RETURN X ORIGINAL(S) START TO RESUME" will appear in the
display. ("X" indicates the number of pages to be returned.). This indicates the
number of the originals that must be returned to the document feeder tray after a
misfeed. Return the required number of originals. This number will be cleared when
copying is resumed or the [CLEAR] key ( ) is pressed. If an original misfeed
occurs in the ADF/RADF, the machine will stop and the error indicator will blink. To
remove a misfeed from the ADF/RADF, see "D: Misfeed in the ADF/RADF" (p.82).
1
Open the bypass tray and side cover, in that order.
To open the bypass tray, see "Loading paper in the bypass tray" (p.18). To
open the side cover, see "TONER CARTRIDGE REPLACEMENT" (p.84).
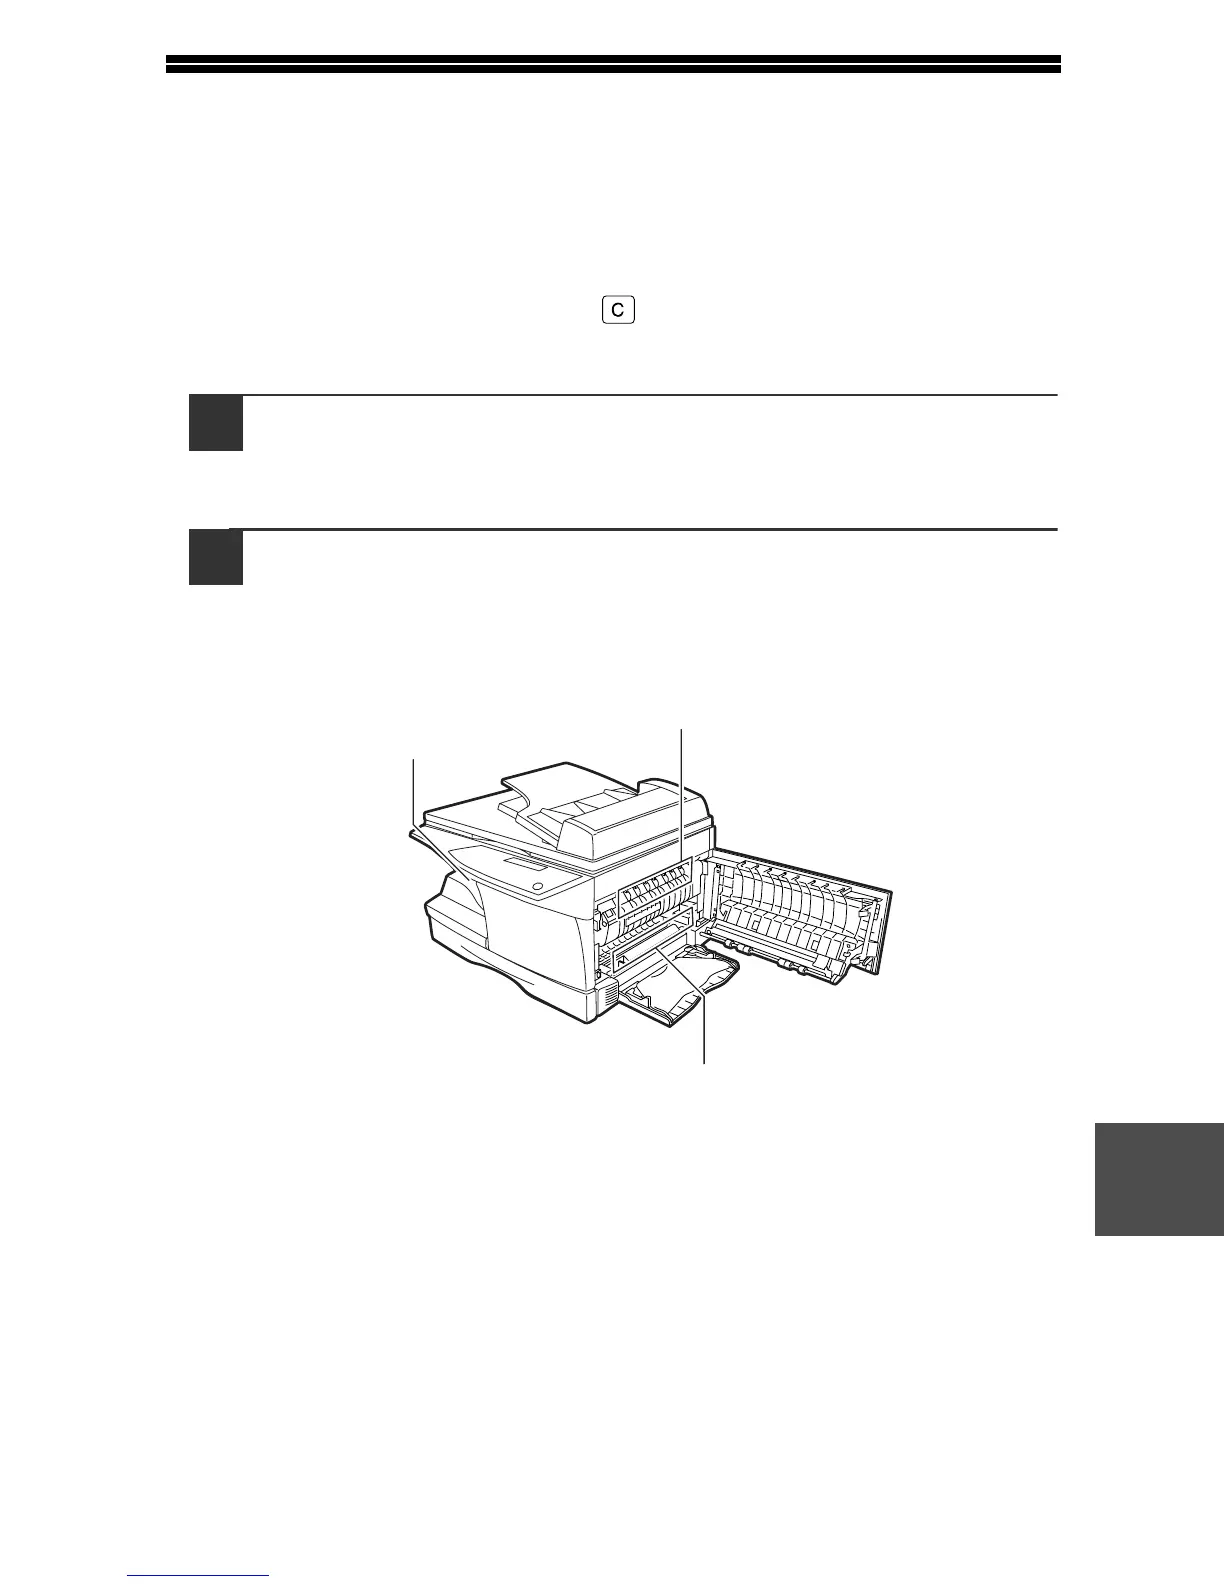
2
Check the misfeed location. Remove the misfed paper
following the instructions for each location in the illustration
below. If the error indicator blinks, proceed to "A: Misfeed in
the paper feed area" (p.80).
If paper is misfed here, proceed to "A:
Misfeed in the paper feed area" (p.80).
If paper is misfed here, proceed to "B:
Misfeed in the fusing area" (p.80).
If the misfed paper is seen from
this side, proceed to "C: Misfeed
in the transport area" (p.81).

 Loading...