F.
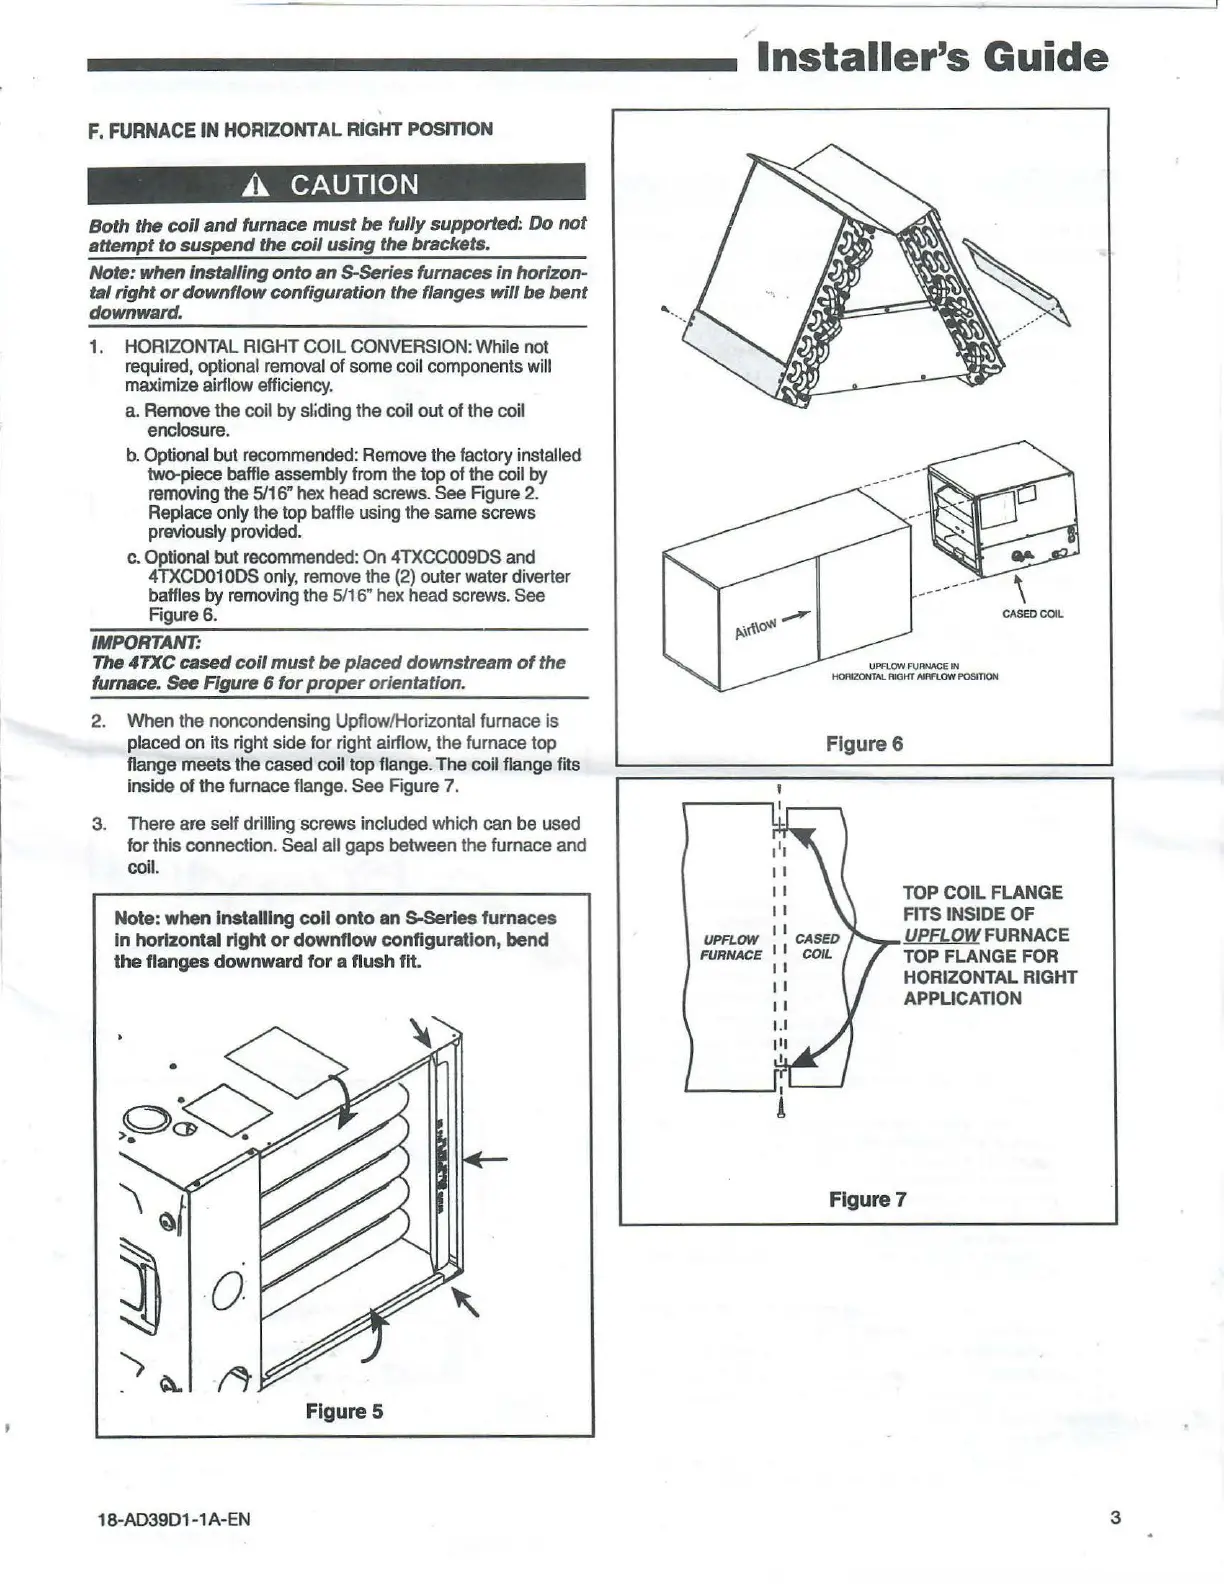
FURNACE IN HORIZONTAL RIGHT POSITION
A CAUTION
Both the
coil
and
furnace
must
be
fully supported:
Do
not
attempt
to
suspend the
coil
using the brackets.
Note: when
Installing
onto
an
$-Series furnaces in horizon-
tal
right
or
downflow configuration the flanges
will
be
bent
downward.
'
1.
HORIZONTAL
RIGHT COIL
CONVERSION:
While
not
required,
optional
removal
of
some
coil
components
will
maximize
airflow
efficiency.
a.
Remove
the coil
by
sliding the coil out of the
coil
enclosure.
b.
Optional
but
recommended:
Remove
the
factory
installed
two-piece
baffle
assembly
from
the top
of
the
coil
by
removing
the
5116"
hex
head
screws.
See
Rgure 2.
Replace
only
the top
baffle
using
the
same
screws
previously
provided.
c.
Optional
but
recommended:
On
4TXCC009DS
and
4TXCD010DS
only,
remove
the
(2)
outer
water
diverter
baffles
by
removing
the
5/16"
hex
head
screws.
See
Rgure6.
IMPORTANT:
The 4TXC cased
coil
must
be
placed downstream
of
the
furnace.
See
Figure 6
for
proper
orientation.
2.
When
the noncondensing Upflow/Horizontal furnace is
placed
on
its right side for right
airflow,
the
furnace top
flange meets the cased coil
top
flange.
The coil flange fits
inside of the furnace flange.
See Figure 7.
3.
There are self drilling
screws
included which
can
be
used
for this connection.
Seal
all gaps between the furnace
and
coil.
Note: when
Installing
coli
onto an 5-Serles furnaces
In horizontal right
or
downflow configuration, bend
the
flanges downward
for
a flush fit.
FigureS
18-AD39D1-1
A-EN
Installer's
Guide
UP
FLOW
FURNACE
II
Figure 6
TOP
COIL FLANGE
FITS INSIDE
OF
UPFLOW
FURNACE
TOP
FLANGE
FOR
HORIZONTAL
RIGHT
APPLICATION
Flgure7
3
 Loading...