18-CD29D1-11 33
Installer’s Guide
NOTE:
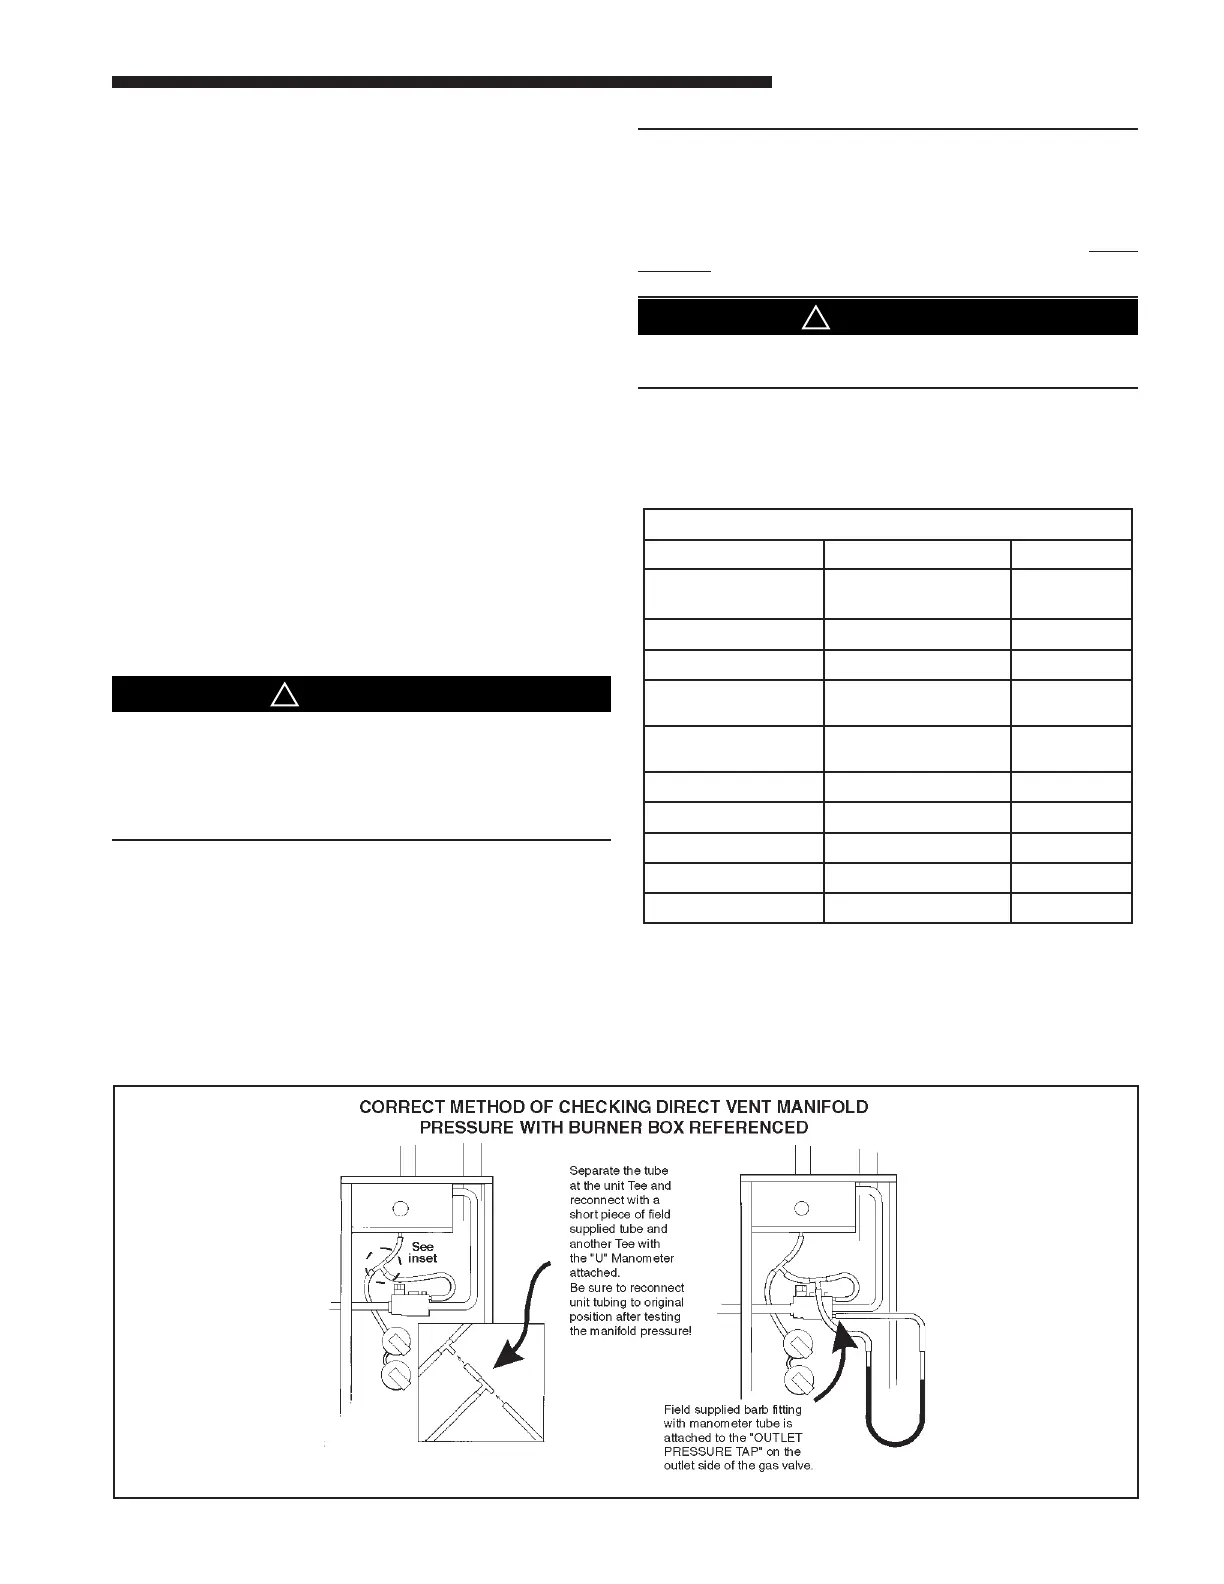
The manifold pressure must be referenced to the burner
box. The burner box pressure tap equalizes the gas valve
pressure regulator. Manifold pressure is checked by in-
stalling a tee (field supplied) in the tubing, between the tee
coming from the burner box tube and the gas valve, in ad-
dition to the regular gas valve pressure tap on the outlet
side of the gas valve. See Figure 55.
Replace manifold pressure tap threaded plug and leak
check after checking/ adjusting manifold gas pressure.
Table 19 lists the main burner orifices used with the fur-
nace. If a change of orifices is required to correct the fur-
nace input rating. Refer to Table 20.
TABLE 17
FINAL MANIFOLD PRESSURE SETTINGS
MODEL FUEL PRESSURE
NATURAL GAS LP GAS
*UH1B040A9241A 3.5" W.C. 11.0" W.C.
*UH1B060A9361A 3.5" W.C. 11.0" W.C.
*UH1B080A9421B
*UH1C080A9601A
3.5" W.C. 11.0" W.C.
*UH1C100A9481A
*UH1D100A9601A
3.5" W.C. 11.0" W.C.
*UH1D120A9601A 3.3" W.C. 11.0" W.C.
*DH1B040A9241A 3.5" W.C. 11.0" W.C.
*DH1B065A9421A 3.0" W.C. 9.5" W.C.
*DH1C085A9481A 3.5" W.C. 11.0" W.C.
*DH1D110A9601A 4.5" W.C. 11.0" W.C.
5. Adjust gas heat by removing the adjustment regulator
cover screw.
a. To increase outlet pressure, turn the regulator ad-
just screw clockwise.
b. To decrease outlet pressure, turn the regulator ad-
just screw counterclockwise.
c. Adjust regulator until pressure shown on mano-
meter matches the pressure specified in Table 17.
1. The input of no more than nameplate rating and
no less than 93% of the nameplate rating, unless the
unit is derated for high altitude.
d. Replace and tighten the regulator cover screw se-
curely.
6. Cycle the valve several times to verify regulator set-
ting.
a. Repeat steps 5-6 if needed.
7. Turn off all electrical power to the system.
8. Remove the manometer and flexible tubing and tighten
the pressure tap screw.
9. Using a leak detection solution or soap suds, check for
leaks at the pressure outlet boss and pressure tap test
screw.
10. Turn on system power and check operation of the
unit.
SAFETY HAZARD
Replace and/ or tighten all plugs removed or loosened
when adjusting gas pressure. Leak check the fittings be-
fore placing the furnace into regular service.
Failure to follow this warning could result in fire, explo-
sion, or property damage.
T
 Loading...