20
Mini / Multi-Split Programmable Controller
3.11.4 Two Week Schedule
Using the TWO WEEK schedule, daily schedules may be programmed for up to two
weeks. Within each day up to eight individual time segments can be set. The unit will
execute corresponding timer settings over the course of the two week period.
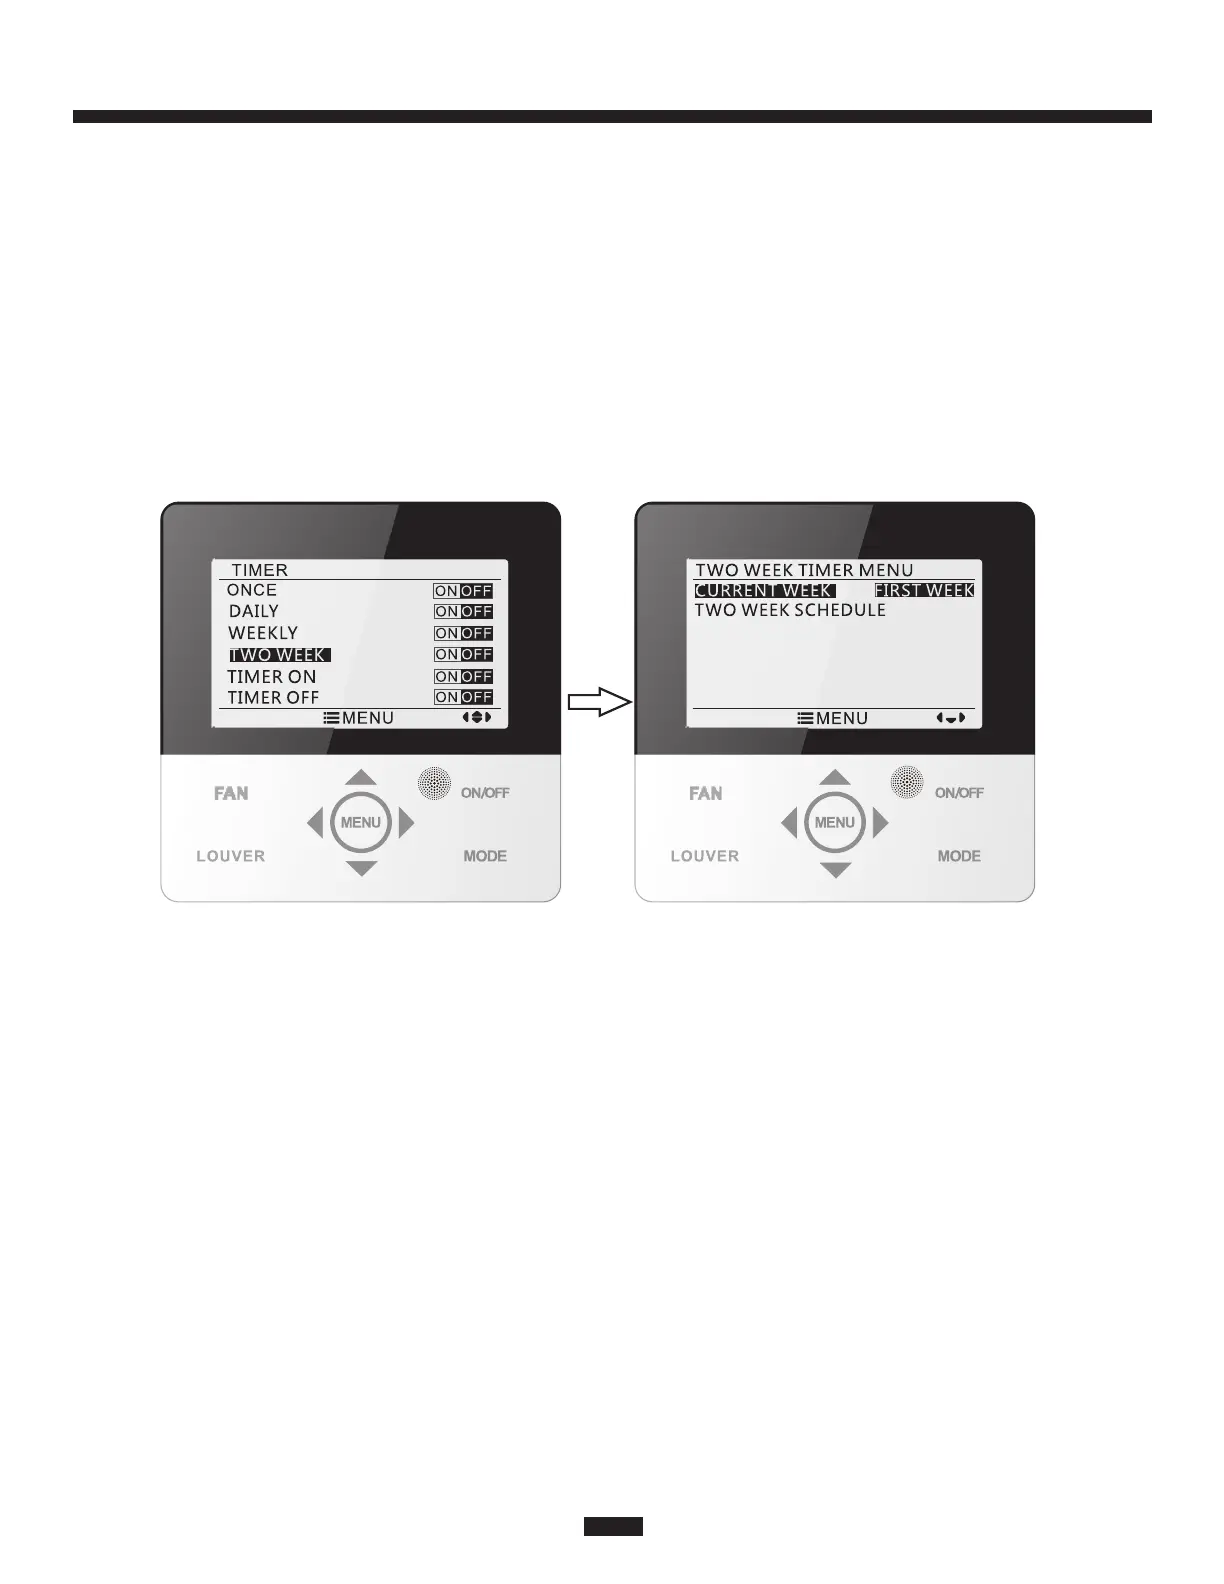
On the timer function setting screen, press the“▲” or “▼” button to select the two
week timer setting. Press the MENU button to enter the two week timer menu screen.
Press the“▲” or “▼” button to select the current week option. Press the“◀” or “▶”
button to set the current week as first week or second week. Press the MENU button to
save current week setting. Please refer to Fig. 15.
After entering the TWO WEEK timer menu screen, press the “▲” or “▼” button to
select the TWO WEEK schedule option. press the MENU (enter) button to enter the
TWO WEEK timer schedule. After entering the TWO WEEK timer setting screen, press
the“◀” or “▶” button to select the day to be set. Press the MENU button to enter timer
programming of that day. Press the “◀” or “▶” button to select the item to be set.
Press the “▲” or “▼” button to adjust the content. Press the MENU button to save the
setting. Press the BACK button to exit this screen. To view the setting symbols please
refer to the weekly timer setting section.
3.11.5 Timer On and Timer Off
TIMER ON and TIMER OFF are one-time countdown timers. When the system is
on, TIMER OFF can be set or both TIMER OFF and TIMER On can be set concurrent-
ly. When the system is off, TIMER ON can be set, or both TIMER ON and TIMER OFF
can be set concurrently. For example, if TIMER OFF is set for two hours and TIMER
ON is set for four hours simultaneously while the unit is on, the unit will turn off in two
Fig. 15 Setting the current week
 Loading...