SS-SVX11K-EN
63
Wiring Requirements
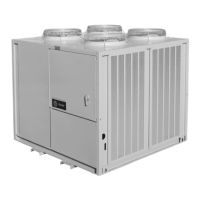
Main Electrical Power Requirements
WWAARRNNIINNGG
PPrrooppeerr FFiieelldd WWiirriinngg aanndd GGrroouunnddiinngg
RReeqquuiirreedd!!
FFaaiilluurree ttoo ffoollllooww ccooddee ccoouulldd rreessuulltt iinn ddeeaatthh oorr
sseerriioouuss iinnjjuurryy..
AAllll ffiieelldd wwiirriinngg MMUUSSTT bbee ppeerrffoorrmmeedd bbyy qquuaalliiffiieedd
ppeerrssoonnnneell.. IImmpprrooppeerrllyy iinnssttaalllleedd aanndd ggrroouunnddeedd
ffiieelldd wwiirriinngg ppoosseess FFIIRREE aanndd EELLEECCTTRROOCCUUTTIIOONN
hhaazzaarrddss.. TToo aavvooiidd tthheessee hhaazzaarrddss,, yyoouu MMUUSSTT ffoollllooww
rreeqquuiirreemmeennttss ffoorr ffiieelldd wwiirriinngg iinnssttaallllaattiioonn aanndd
ggrroouunnddiinngg aass ddeessccrriibbeedd iinn NNEECC aanndd yyoouurr llooccaall//
ssttaattee//nnaattiioonnaall eelleeccttrriiccaall ccooddeess..
• Verify the power supply meets the required power
requirements of the system.
• Install power wiring in accordance with all
applicable codes.
• Install and connect properly sized power supply
wiring, with over current protection, to the main
power terminal block (1TB1) or to an optional
factory mounted non-fused disconnect switch (1S1)
in the control panel.
• Install and connect properly sized power supply
wiring, with over current protection, to the proper
termination point in the air handling unit (If
applicable).
• Install proper grounding wires to an earth ground.
• For EVP units only, install and connect properly
sized power supply wiring, with overcurrent
protection, to the proper termination point for the
chilled solution pump.
Field Installed Control Wiring
Requirements
WWAARRNNIINNGG
HHaazzaarrddoouuss VVoollttaaggee!!
FFaaiilluurree ttoo ddiissccoonnnneecctt ppoowweerr bbeeffoorree sseerrvviicciinngg ccoouulldd
rreessuulltt iinn ddeeaatthh oorr sseerriioouuss iinnjjuurryy..
DDiissccoonnnneecctt aallll eelleeccttrriicc ppoowweerr,, iinncclluuddiinngg rreemmoottee
ddiissccoonnnneeccttss bbeeffoorree sseerrvviicciinngg.. FFoollllooww pprrooppeerr
lloocckkoouutt//ttaaggoouutt pprroocceedduurreess ttoo eennssuurree tthhee ppoowweerr
ccaann nnoott bbee iinnaaddvveerrtteennttllyy eenneerrggiizzeedd.. VVeerriiffyy tthhaatt nnoo
ppoowweerr iiss pprreesseenntt wwiitthh aa vvoollttmmeetteerr..
WWAARRNNIINNGG
PPrrooppeerr FFiieelldd WWiirriinngg aanndd GGrroouunnddiinngg
RReeqquuiirreedd!!
FFaaiilluurree ttoo ffoollllooww ccooddee ccoouulldd rreessuulltt iinn ddeeaatthh oorr
sseerriioouuss iinnjjuurryy..
AAllll ffiieelldd wwiirriinngg MMUUSSTT bbee ppeerrffoorrmmeedd bbyy qquuaalliiffiieedd
ppeerrssoonnnneell.. IImmpprrooppeerrllyy iinnssttaalllleedd aanndd ggrroouunnddeedd
ffiieelldd wwiirriinngg ppoosseess FFIIRREE aanndd EELLEECCTTRROOCCUUTTIIOONN
hhaazzaarrddss.. TToo aavvooiidd tthheessee hhaazzaarrddss,, yyoouu MMUUSSTT ffoollllooww
rreeqquuiirreemmeennttss ffoorr ffiieelldd wwiirriinngg iinnssttaallllaattiioonn aanndd
ggrroouunnddiinngg aass ddeessccrriibbeedd iinn NNEECC aanndd yyoouurr llooccaall//
ssttaattee//nnaattiioonnaall eelleeccttrriiccaall ccooddeess..
115 Volt Control Wiring (All Units)
• Verify that the Control transformer (1T1) is wired for
the proper operating voltage.
• Connect properly sized wiring to the liquid line
solenoid valve(s).
• The phase monitor (1U3) when powered with line
voltage properly phased and balanced has a green
LED energized.
• Connect properly sized wiring to the hot gas bypass
solenoid valve(s), if applicable, to operate with the
unit. Refer to the unit wiring diagram that shipped
with the unit.
• Install the interlock circuitry wiring for the air
handling unit to permit compressor operation after
the fan has started, i.e., proof of fan operation
device, fan starter auxiliary contacts or pump
starter station, pump starter auxiliary contacts,
proof of flow device, etc. Refer to the field
connection diagram that shipped with the unit for
interlocking information.
• Install properly sized power supply wiring, with
over current protection, to the proper termination
point for the field provided economizer actuator(s),
if applicable. Refer to the “Economizer Actuator
Circuit” illustrated in the “Field Installed Control
Wiring” section.
“No Controls” Units
• A field provided “step” controller must be installed
and properly wired. (Controller will have 2, 4 or 6
steps, depending on unit configuration.) Refer to
the field connection diagram for connection
information.
• Install proper grounding wires to an earth ground.
• Install an outside air thermostat in series with the
flow switch to stop or prevent the unit from
operating below the recommended ambient
temperatures.
EVP Chiller Units
• Install proper grounding wires to an earth ground.
IInnssttaallllaattiioonn EElleeccttrriiccaall
 Loading...