Vacuum and Refrigerant Leakage Detection
NOTICE
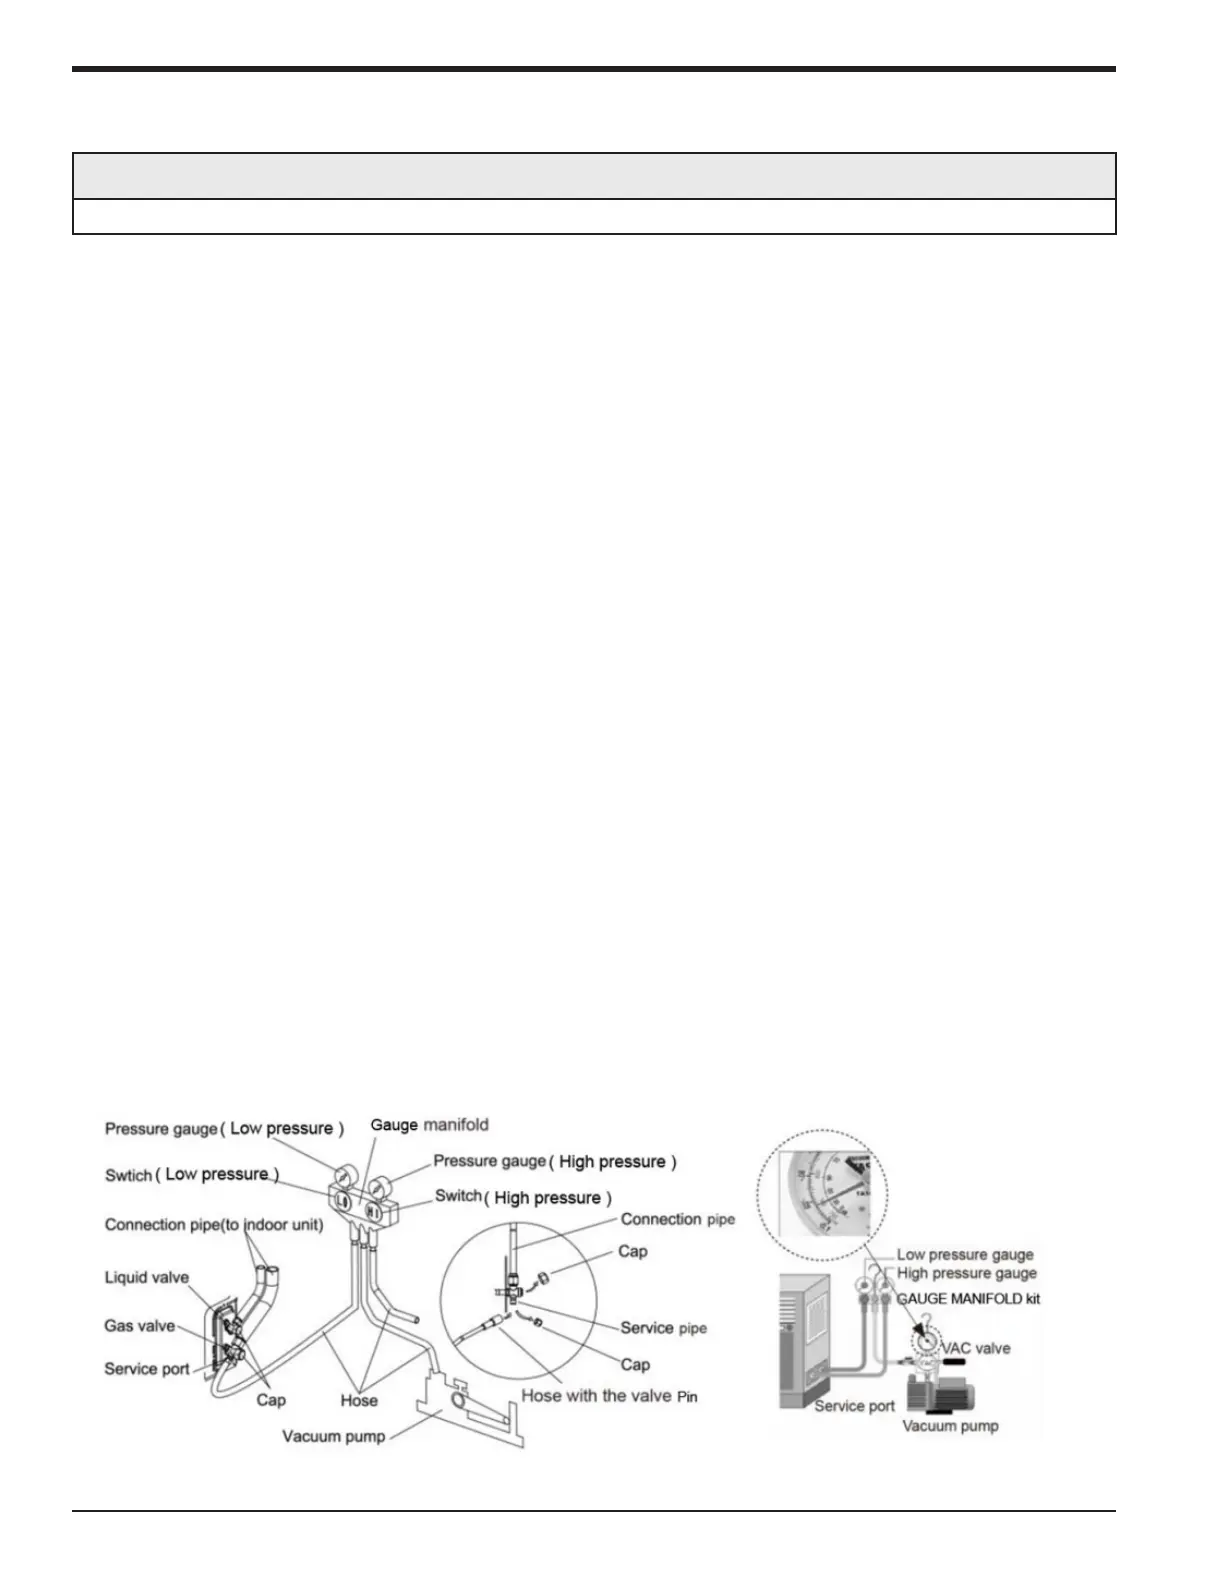
Do not purge the air with refrigerant. Use a vacuum pump to vacuum the installation!
1. When connecting refrigerant pipe to the unit or removing it from the unit, please use both a
back-up wrench and the torque wrench.
2. When connecting, place the equipment specified oil type on the backside of the copper
tube flare prior to tightening. Do not place oil on the flare face, as this will promote system
contamination, tighten it by hand and then tighten it with the spanner or adjustable wrench.
3. Refer to the torque reference table within this document before tightening to determine the
appropriate torque (over-tightening will damage the nut and lead to leakage).
4. Use dry Nitrogen to pressurize the piping circuit with 150 PSIG and allow it to hold while
performing other installation processes. It is recommended to apply a soap bubble solution and
observe the connection.
5. Evacuate each individual refrigeration circuit to 350 microns or below, and close off the valve
to the vacuum pump. If the pressure rises above 500 microns within one minute, but not above
1500 microns within 5 minutes, moisture is present. If the pressure continues to rise above
1500 microns, a leak exists in the circuit being tested.
a) If moisture is present, use triple evacuation process to eliminate the moisture.
b) If a leak is present, leak check all joints and piping.
Evacuation is not completed until the micron gauge does not rise above 500 microns within
one minute after achieving 350 micron pressure vacuum.
6. After evacuation is complete, additional charge is to be added.
a) If no additional charge is required, break the vacuum with refrigerant, then remove the
gauge connectors.
b) slightly open the liquid valve at the outdoor unit, allow system to equalize, then fully
open the liquid valve and then open the vapor service valve.
7. After leak checking is complete, apply thermal insulation around the flare connections and all
exposed refrigeration pipes.
a) Seal the insulation.
b) Inspect the insulation to ensure no breakages are present.
24 88-M4MHW17-1A-EN
Installer's Guide
 Loading...