 Loading...
Do you have a question about the Trane XL824 and is the answer not in the manual?
| Connectivity | Wi-Fi |
|---|---|
| Programmable | 7-day programmable |
| Power Source | 24V AC |
| Humidification Control | Yes |
| Dehumidification Control | Yes |
| Air Circulation | Yes |
| Remote Access | Yes, via Trane Home app |
| Indoor Air Quality Integration | Yes |
| Geofencing | Yes |
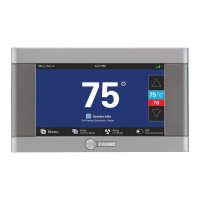
| Display | Color touchscreen |
| Compatibility | Trane and American Standard HVAC systems |
| Smart Home Integration | Amazon Alexa |
| Energy Management | Energy usage reports |
| Voice Control | Yes, via Amazon Alexa |
Adjust display brightness, backlight, screensaver, and color themes.
Choose up to two widgets to display on the Home screen.
Enable/disable scheduling or use 1-Touch Presets.
Create schedules based on answering questions.
Configure Home, Away, Sleep temperature settings.
Select wireless network and enter password.
Connect to Trane Home for remote access.
Input Zip Code for weather information.
Default view with customizable widgets and key controls.
Select Simple View from Home View Options.
Select Classic View from Home View Options.
Identifies Date/Time, Menu, System Mode, Fan Mode, etc.
Select set points and use arrows to adjust temperatures.
Override schedules temporarily or permanently.
View and edit the current heating/cooling schedule.
Optionally display up to two widgets on the home screen.
Maintain a set temperature indefinitely until changed.
Select up to two apps to display on the Home screen.
Edit schedules or 1-Touch Presets, enable/disable scheduling.
View local weather, 5-day forecast, radar, and alerts.
View alerts, demand response, notifications, and about info.
Access and manage Smart Optimization settings.
Access Z-Wave bridge functions.
Humidity, Ventilate, Service, Dealer contact.
Modify screen brightness, backlight, screensaver, color theme.
Access the setup wizard for initial configuration.
Manually set the device's date, time, and time zone.
Connect to Wi-Fi, access advanced setup, diagnostics.
Manually upgrade software and restart the thermostat.
Change start and stop times for daily schedule periods.
Add or delete periods from the schedule.
Apply same schedule settings to multiple days.
Automatically create schedules based on questions.
Choose specific days to apply common schedule settings.
Save changes and reflect grouped settings across selected days.
Change the start and end times for specific schedule periods.
Adjust cooling and heating set points for periods.
Assign custom or predefined names to schedule periods.
Select a time slot to insert a new schedule period.
Name the period and set temperature targets.
Select the trash can icon to mark a period for removal.
Save changes to remove the selected periods.
Override schedule until a specific date and time.
Override schedule indefinitely until cancelled.
Stop "Hold Until" or "Hold Permanently" modes.
Provide predetermined heating/cooling set points for time periods.
Configure cooling/heating for the "Away" preset.
Configure cooling/heating for "Home" and "Sleep" presets.
Adjust cooling and heating targets for each preset mode.
Save configured presets and return to the Home screen.
None, Low, Medium, High impact screen lock and menu access.
Press and hold Menu for 5 seconds to temporarily disable.
Central hub for home automation devices from various manufacturers.
Control climate, view weather, receive alerts remotely.
Examples include cameras, sensors, locks, appliances, and receptacles.
Connect to the network using the WPS button on the router.
Select network from list and enter password.
Connect to a network by manually entering its SSID and security type.
Connect directly to a router using a CAT5 cable.
Go to www.tranehome.com or use the mobile app.
Select Menu > Connect New Device on the app.
Choose the specific Trane or American Standard thermostat model.
Mobile app generates a Pin Code to enter on the thermostat.
Read and accept or decline the third-party license information.
Add devices via the Smart Home menu and follow manufacturer instructions.
Remove devices using the Smart Home menu.
Unregister bridge or factory reset the bridge.
Update the network of your Z-Wave bridge.
Start the mobile app and select Connect New Device.
Prepare device and put into add mode within four minutes.
Copies network to bridge from another controller.
Removes the bridge from Trane Home, disabling remote control.
Resets all Z-Wave info and removes devices from the bridge.
Guidelines for resetting secondary/inclusion controllers.
Customizes the XL824 for unique environments and system performance.
Software updates occur automatically when connected to Trane Home.
Adjust energy savings to High, Medium, Low, or Off.
FCC ID, rules, and user information regarding interference.
IC ID and Industry Canada standards for license-exempt devices.