Step 1
Step 2
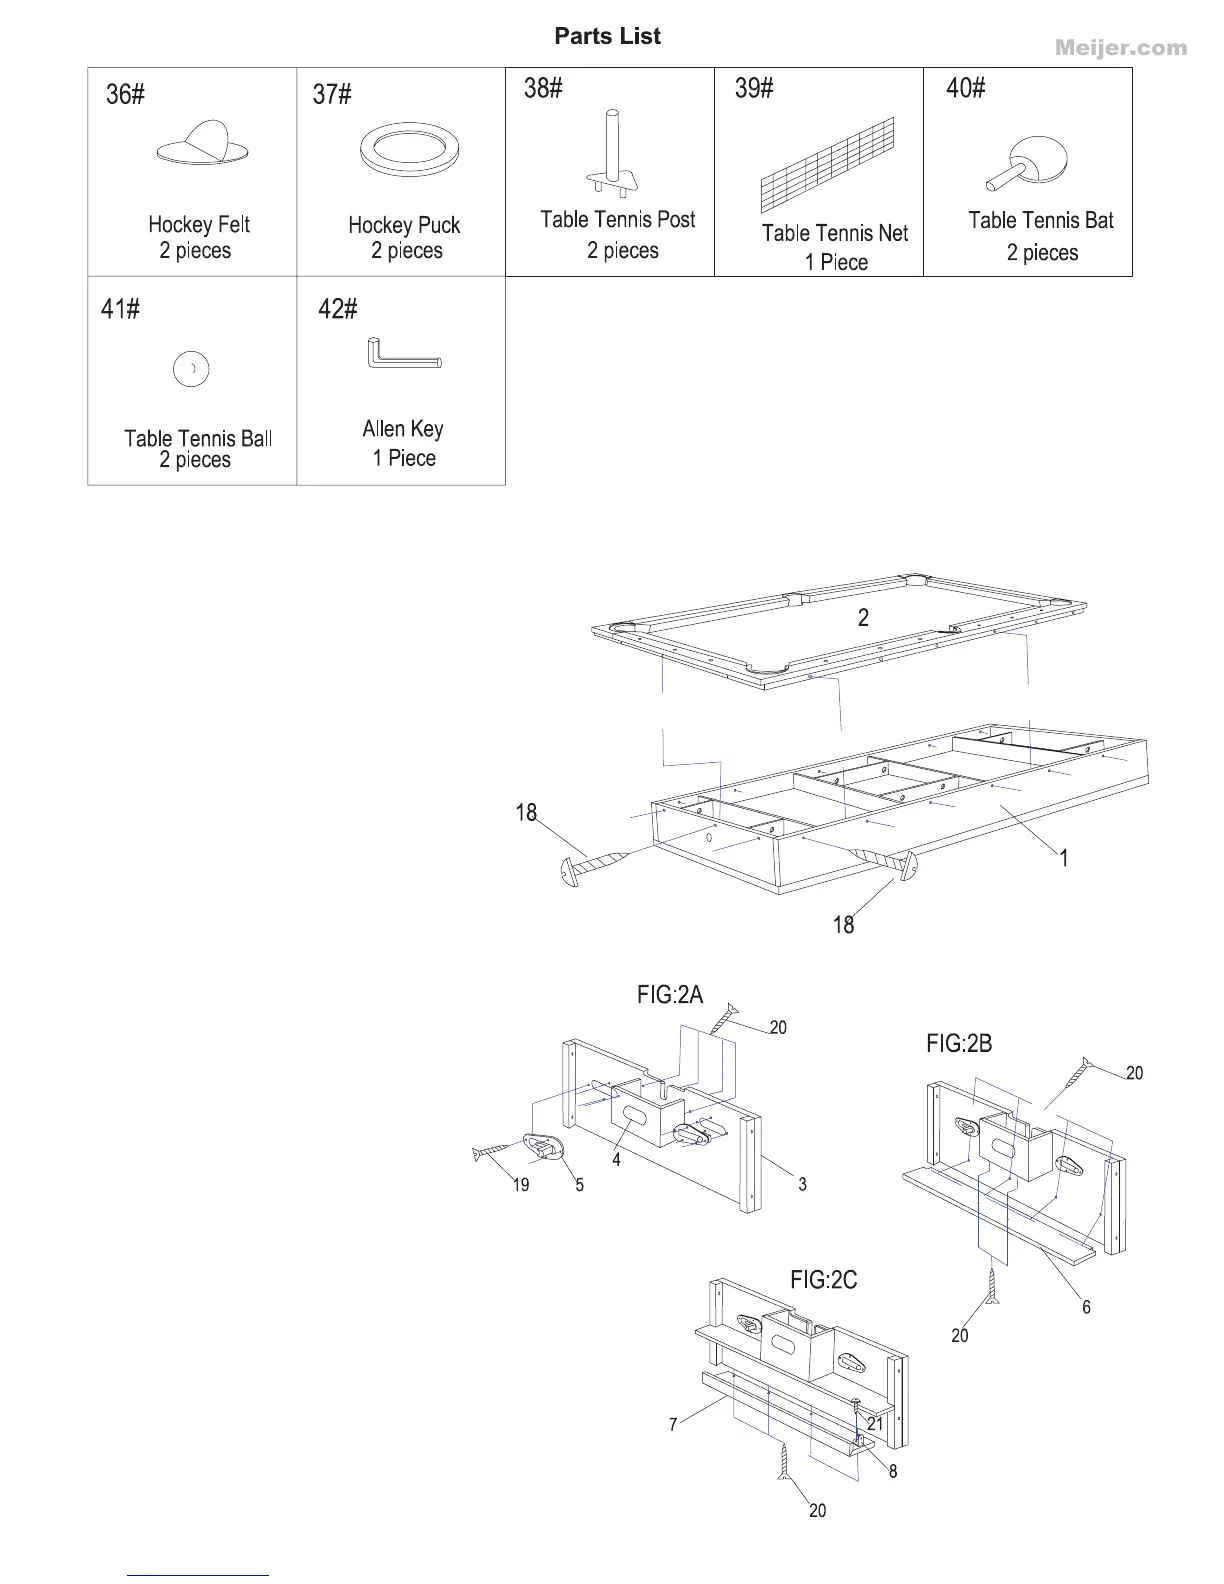
Remove all components from the carton.
NOTE: Parts are packed inside the table top.
Remove the pool table surface (#2), inside the
table top you will find all the parts needed to
assemble your table. When all the parts are
out of the table top, replace the pool table
surface. Attach the pool table surface by
using the screws (#18).
FIG: 2A
Screw 2 lock pins (#5) into leg
pedestal (#3) predrilled holes with
screws (#19). Attach the catcher
box (#4) with screws (#20) into
predrilled holes.
FIG: 2B
Screw the ball below board-A (#6)
to the leg pedestal (#3) using
screws (#20) into predrilled holes.
FIG: 2C
Screw the steel bracket (#8) into the
ball below board-B (#7) using the
predrilled holes. Now attach the
ball below board-B (#7) to the leg
pedestal (#3) in the predrilled holes
using screw (#20). Repeat these
steps for the other end of the table.
 Loading...