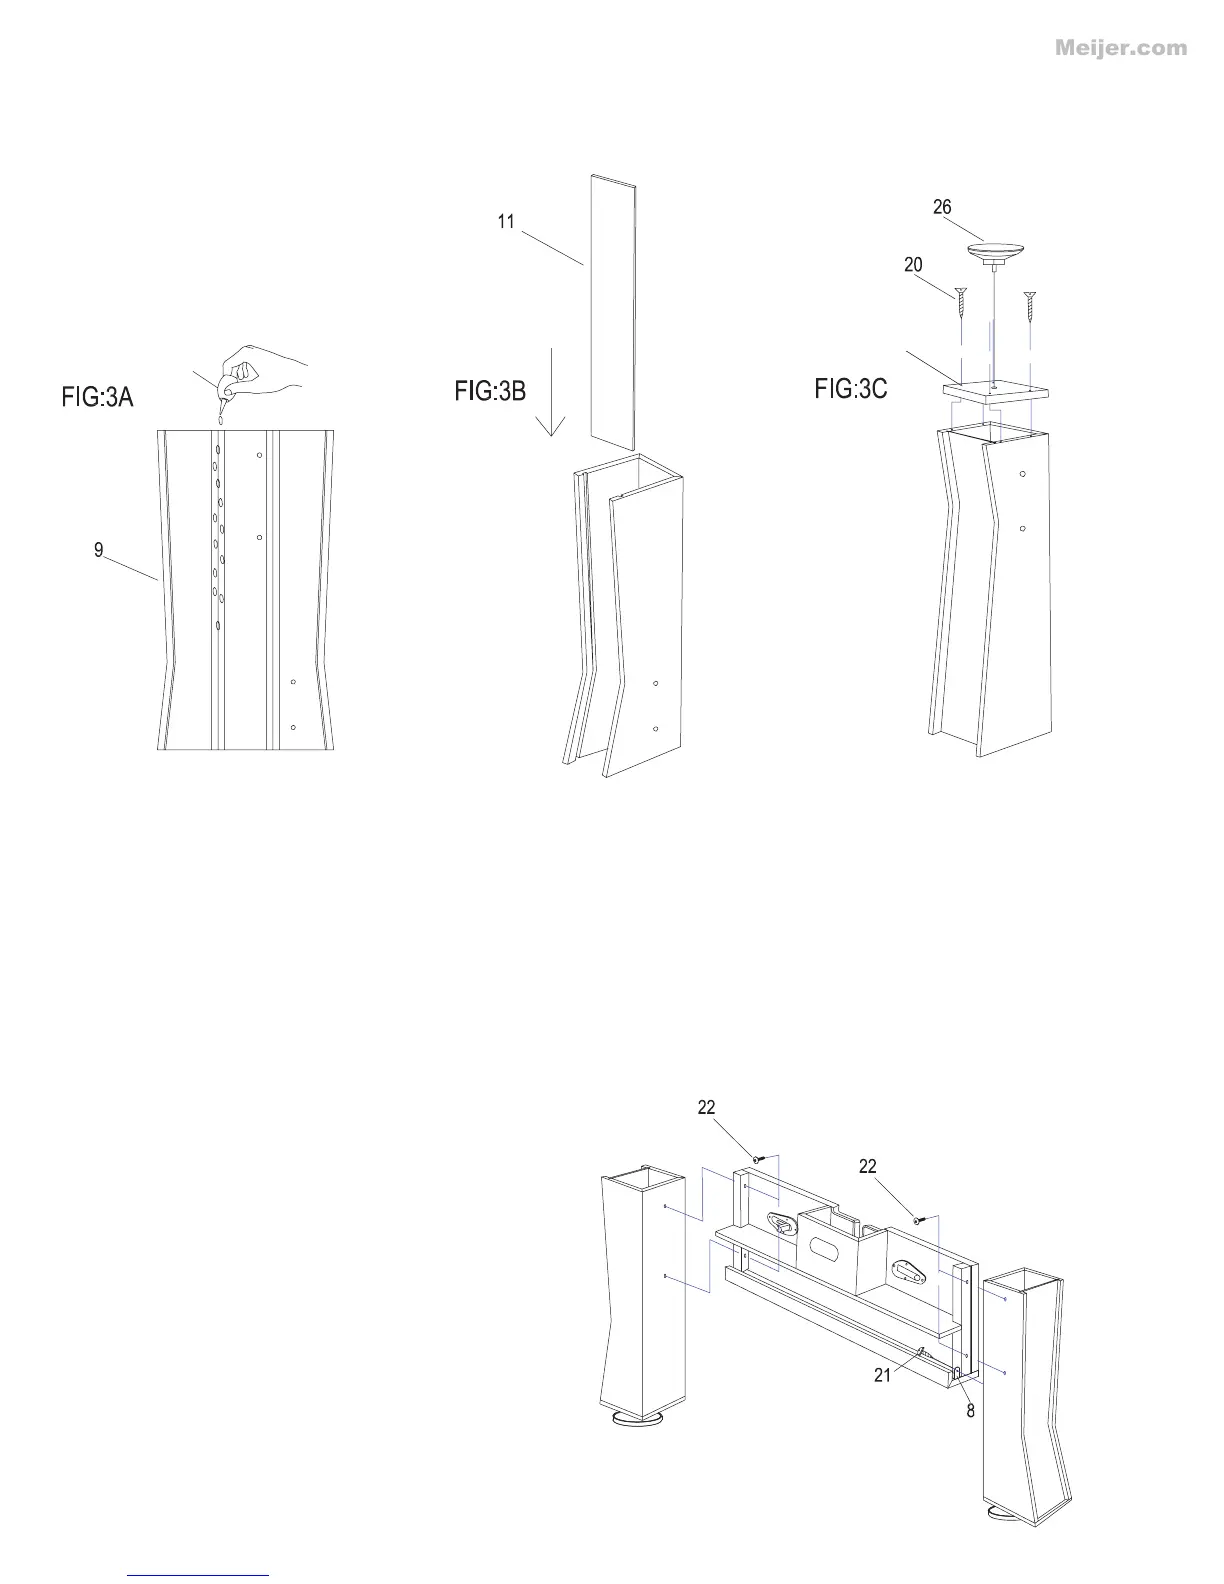
Identify part (#12), leg base to FIG: 3C, add glue drops to both sides of image.
Attach the leg pedestal (#3) to the
legs (#9) & (#10). Align the screw
holes on each side of the leg pedes-
tal (#3) to each leg (#9 & #10) using
screw (#22). Now screw the steel
bracket (#8) to the predrilled hole
in the leg using screw (#21).
FIG: 3A
Assemble the legs (#9). Run a bead of glue (#27) in the groves on the inside edges of the leg (#9).
FIG: 3B
Slide leg brace (#11) into glued groves on leg (#9).
FIG: 3C
Screw leg base (#12) to bottom end of leg using screws (#20). Screw leg leveler (#26) into leg base
(#12).
Repeat this step for all 4 legs, 2 of (#9) & 2 of (#10).
Step 3
Step 4
27
12