n
Disconnect the RJ45 network cable that connects
WKH RYHQV VHH FKDSWHU
Connecting appliance
with RJ45 cable
at page
40
,I WKLV LV WKH ILUVW
installation, the ovens are already independent.
o
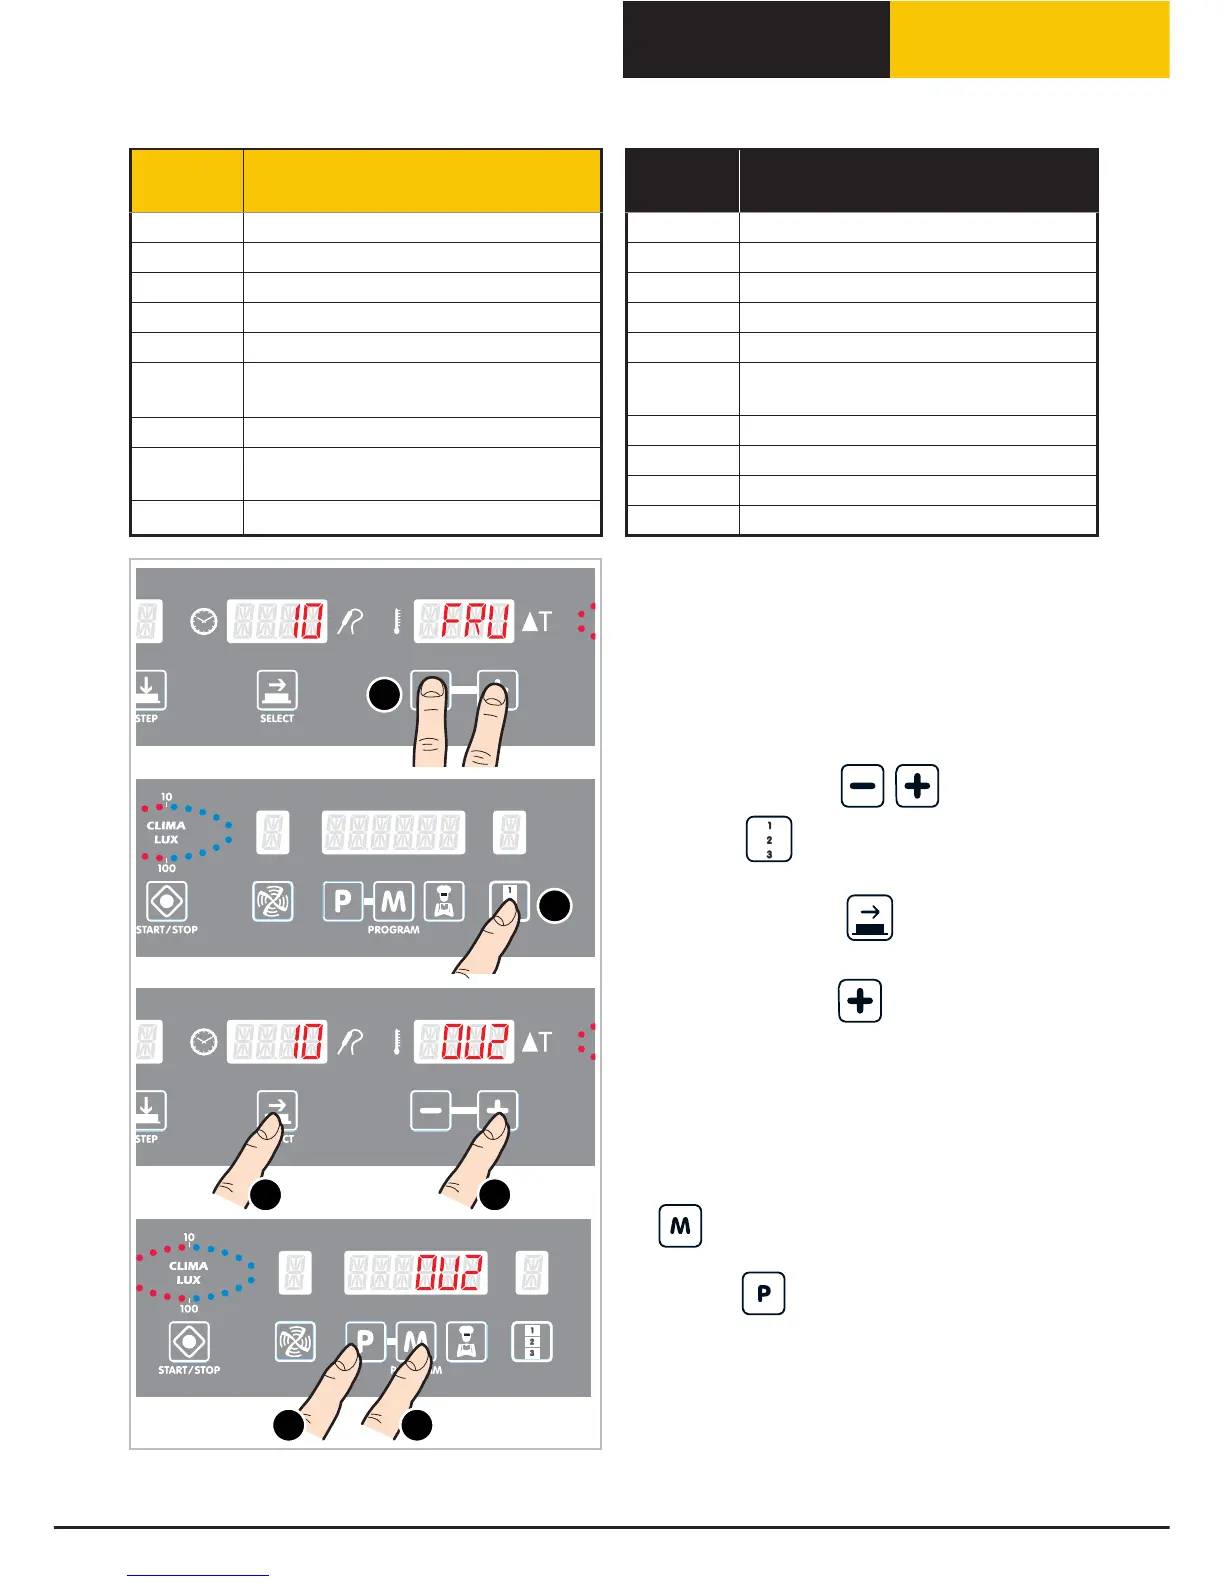
6ZLWFK 21 WKH RYHQ WKDW ZLOO EH VHW DV ´&21-
752//('µ '2 127 LQLWLDWH DQ\ FRRNLQJ F\FOH
VXFKDVFRRNLQJXVHWKHFRQWUROSDQHOWRHQWHUWKH
hidden menu by simultaneously pressing and hold-
ing for 5 seconds the
buttons.
pPress the button once -> the number 10 is
highlighted on the time screen.
qRepeatedly press the button until calling the
"OU" parameter onto the screen.
r
Repeatedly press the button until the program
screen displays the number you wish to assign to the
"CONTROLLED" oven from which the settings are
PDGHVHH
“
Table E”
If connecting only 2 ovens, assign the setting OU2
to the "CONTROLLED" oven.
sTo save the assigned setting hold and press the
button for 5 seconds until hearing the save
confirmation signal.
t
Press the button to exit the hidden menu.
u'LVFRQQHFWWKHSRZHUFDEOHIURPWKH´0$67(5µ
DQG´&21752//('µRYHQV
v Connect the ovens with the RJ45 cable.
wSimultaneously connect the oven plugs.
2
5 sec.
x1
3
4
5
67
No.
appliances
BakerTop
™ Range
Devices
1 BakerTop™ Oven - MASTER
2
BakerTop™ Oven - CONTROLLED 1
3
BakerTop™ Oven - CONTROLLED 2
4
BakerTop™ Oven - CONTROLLED 3
6 Prover
7 Reverse osmosis system
8 Static oven - Deck oven
9 Hood
10 Ovex.NET
No.
appliances
ChefTop
™
Range
Devices
1 ChefTop™ Oven - MASTER
2
ChefTop™ Oven - CONTROLLED 1
3
ChefTop™ Oven - CONTROLLED 2
4
ChefTop™ Oven - CONTROLLED 3
5 Blast-chiller
6
Temperature maintainer
Slow cooking oven
7 Reverse osmosis system
8 Static oven
9 Hood
10 Ovex.NET
Table E
BakerTop
™
ChefTop
™
English
41
 Loading...